USMC – Hobby Progress

Martin back with an update on how I am getting on in my Tale of Three Gamers challenge. My first article in this series looked at the US Marines Rifle Company starter box, which I followed up with an article looking at how you might set up the Marines Rifle Platoons for fighting the Japanese. Today I’m looking at how progress is going on actually getting some models on the table top.
First up I’ll confess prior to starting the project I knew relatively little about the role of the US Marine Corpse (other than in the movies) its actions, composition and the equipment it used or how it evolved during the Second World War. Thanks to some assistance from the Shoot and Scoot Discord patreons sharing some great resource books, I was able to look through the Marines Museum History of the USMC in WW2 and now have a bit more of an idea. Importantly for this project I got a lot of ideas about how to model and paint my Marine force.
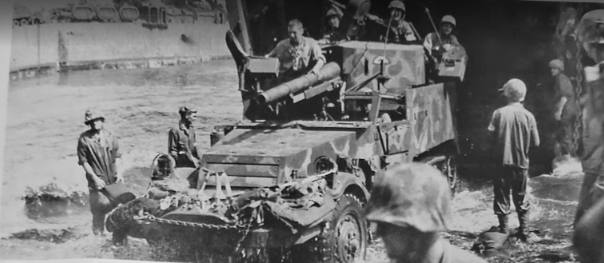
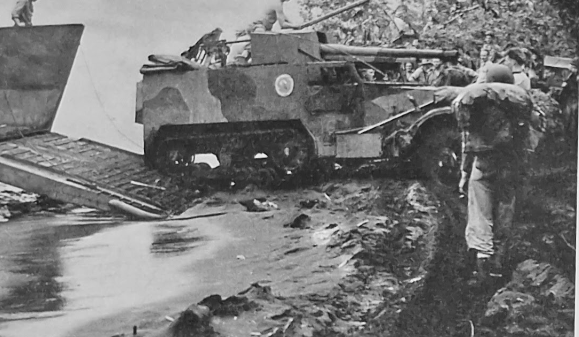
To start with I looked at a lot of photos of different operations in the Pacific and one thing I quickly realised and on reading more about it in the histories the marines altered things slightly for each individual part of the Pacific campaign to suit the expected terrain and quite a bit was left up to individual units to decide on as the photos below illustrate.
Infantry
Battlefront provide a good and easy to follow basic painting guide in Pacific. Generally I use these as the basis of all my painting. As the Marine Rifle platoons are big at up to 16 teams, to avoid the painting fatigue I wanted to take a slightly differing approach to them. Rather than all being the same I am doing about 20% of my figures still wearing some or all of the early period Frog Skin camo uniforms. So I needed to work out a repeatable process to get a look for these I liked. To create maximal contrast I went with the lighter Beach pattern, this will influence my final basing as well, but more on that another day. The other benefit of having some variety isit allows me to make my platoons easier to identify on the table top. I am only going to add camo painted models to just one of the two Rifle platoons I need to paint.
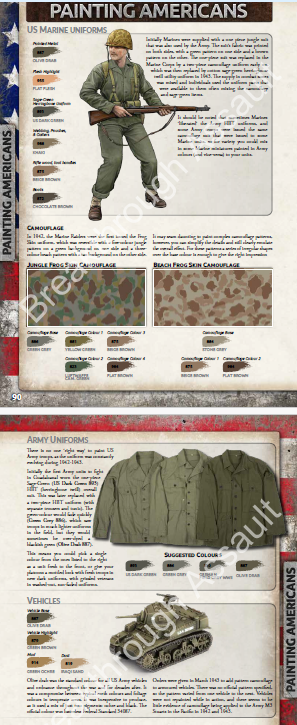
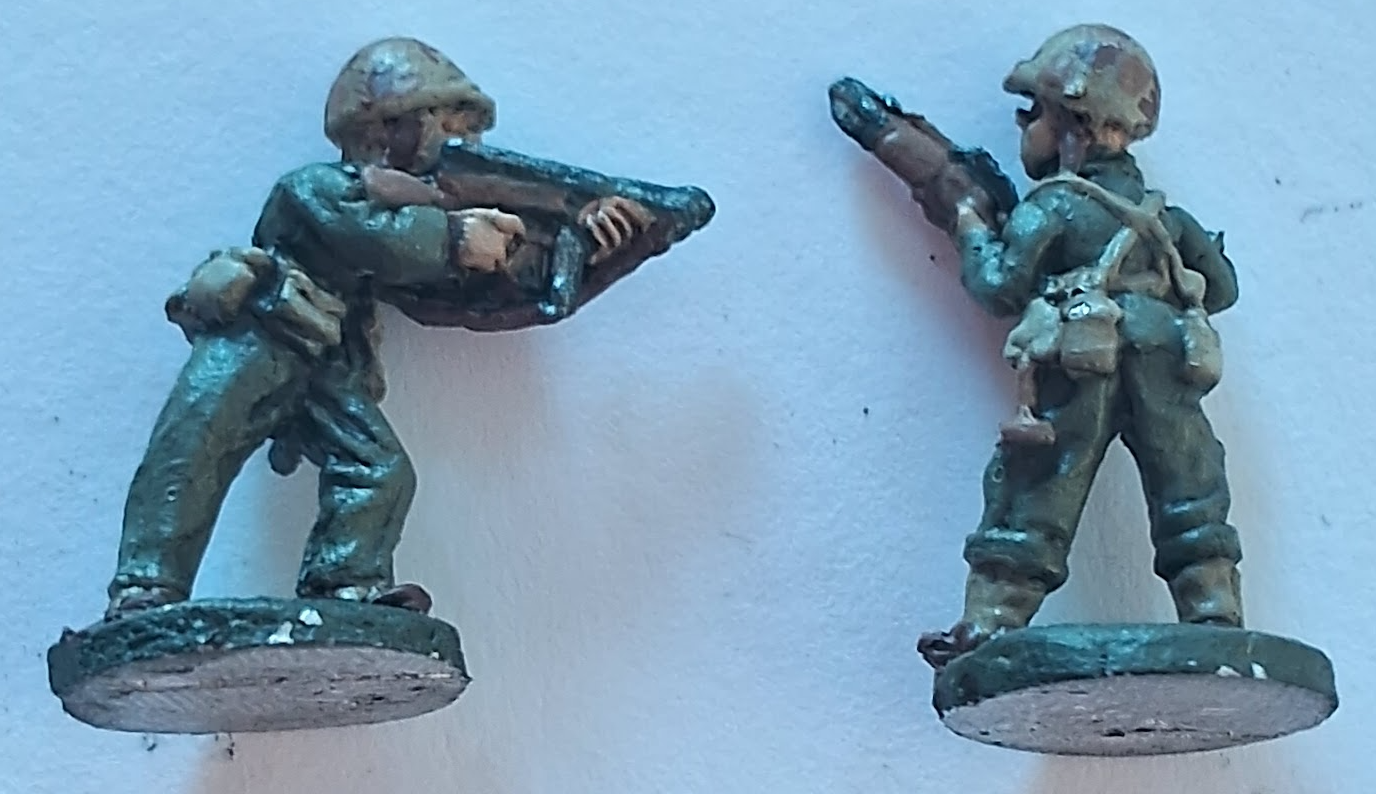
The method I found was to use a khaki base colour, in my case I used GW Zandari Dust (I have previously used this on my Soviets which are a similar base fabric colour to the USMC Beach Frog Skin Camo material, Zandari Dusk is not dissimilar to VMC 880 – Khaki just a touch darker, this actually created a bit more contrast than I usually get with my highlight colour which is VMC 821 German Camo Beige. Using coloured primers saves quite a bit of time which is not to be dismissed. I also found painting on the camo after I had applied the wash to create shadow gave the best overall look, making the camo pattern stand out quite a bit more.
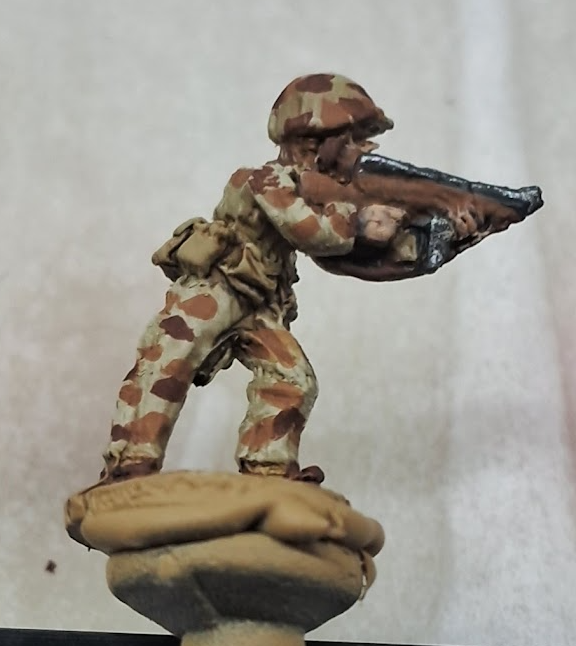
Once the primer was dry I basically block painted on all the base colours everywhere except for the Khaki items (webbing, gaiters, water bottles, etc). My colour pallette for these is very small at just VMC; 884 Stone Grey (helmet, jacket and trouser), 875 Beige Brown (wood and skin), 984 Flat Brown (leather), 995 German Grey (metal) and then apply a wash thinned 2:1 with clean water (I still have a supply of the old Colours of War Bradley Shade, but Agrax Eathshade or VJ Smoke would be similar). I let this stage dry over night to ensure it stays fixed. I then go back with the base colour and add any highlights. Aster the wash stage I additionally used VMC; 863 Gunmetal, 880 Khaki, 821 German Camo Beige, and GW Kislev Flesh.
Armour
For mechanised units the sporadic delivery of equipment and the freedom of action resulted in the differing platoons in the same formations visually appearing different i.e some had camo some not and the camo patterns varied even within individual platoons as there was no prescribed way to apply a pattern or even exactly what the colour should be so it was often down to how an individual crew did it and what was available in the middle of the Pacific! My go to source book for this sort of thing helpfully had some great photos (U.S. Armor Camouflage and Markings World War II by Jim Mekso).
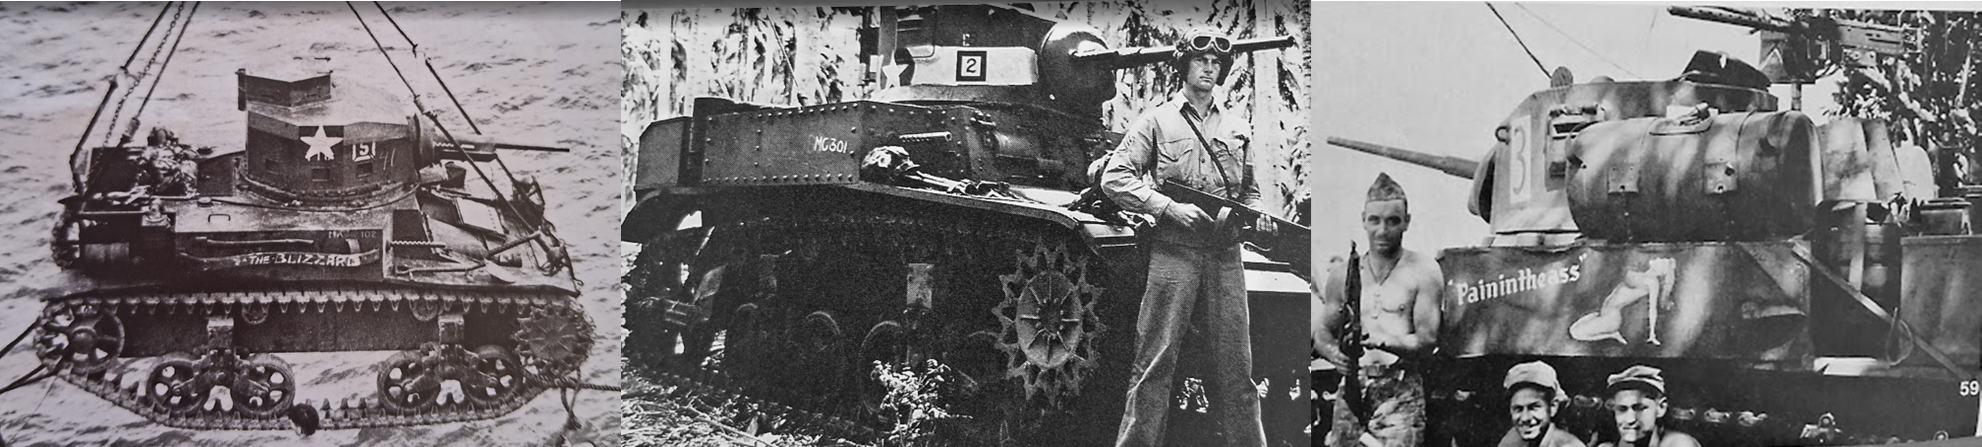
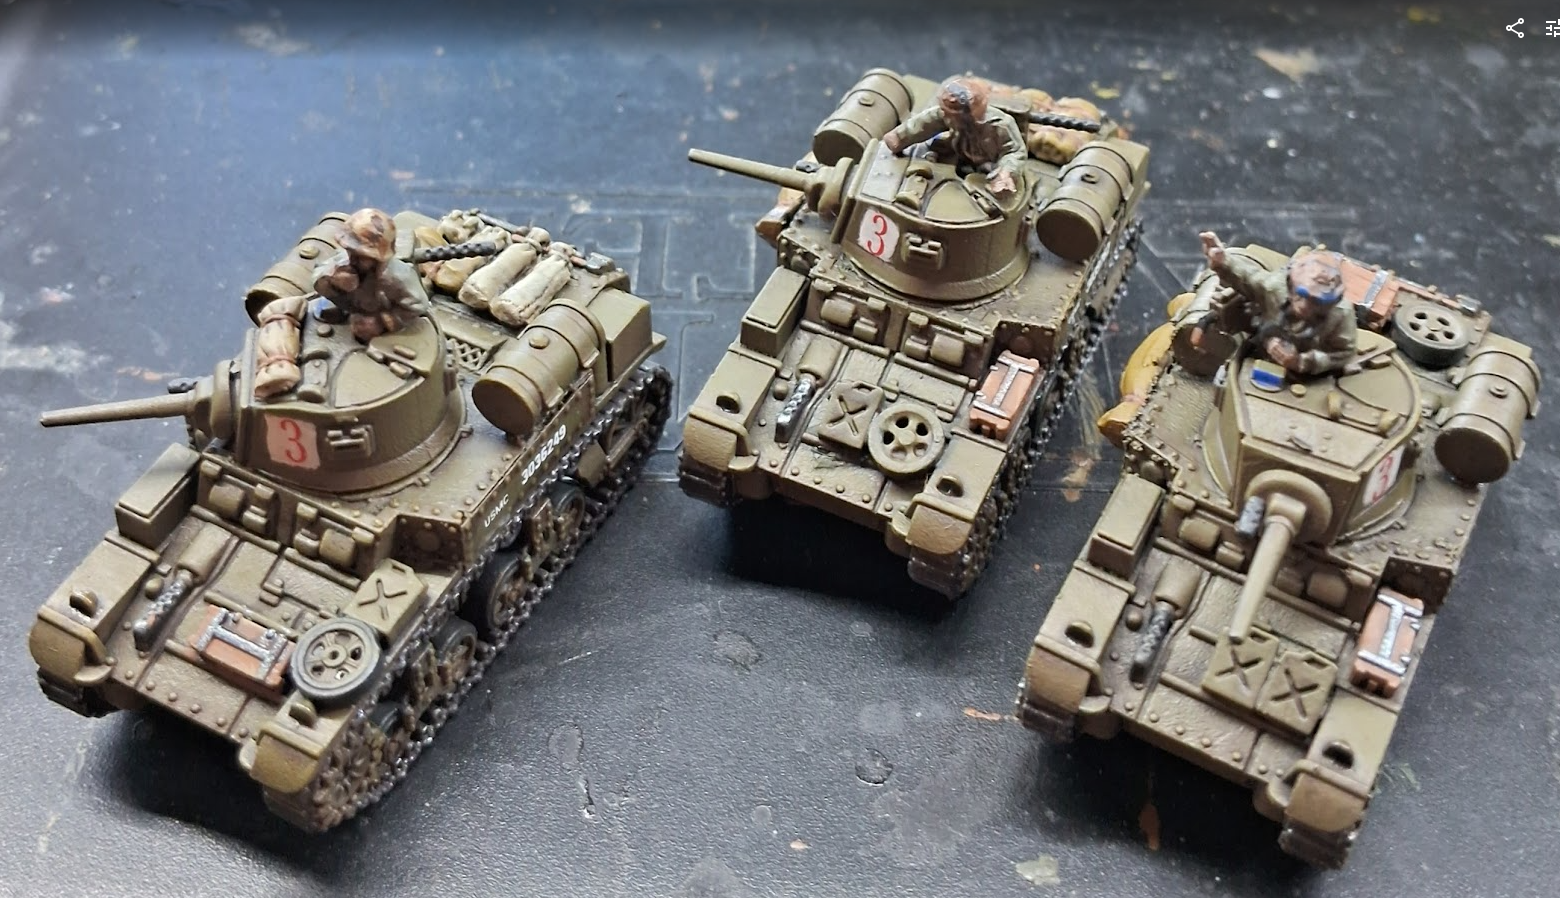
Notably Marine tanks typically didn’t have proper or even any Allied Star markings applied or they were overpainted in some way. Sometimes the vehicle registration numbers where completly painted out or partially changed unsurprisingly any reference to the US Army would be obscured in some way. Sometimes they carried distinct USMC registration markings with oversized numbering – for which I could find no quick explanation. I discovered the reasons for this variation was mainly because a lot of the Marines tank supplies came from army depots and it was only when they received dedicated equipment supplies were USMC specific registration markings applied. Armed with this insight created a lot of opportunity for me as a hobbyist to customise the paintwork of my Tank platoons without too much effort. I will say it is important to remember you still want a unified look to your Force otherwise it can just look like a random collection of models which to my eye never looks good on the table top. I decided to approach this colour scheme variation on a platoon by platoon basis, the advantage of this is it makes it quite a bit easier to spot individual platoons on the table, for both players and is very handy if you are looking to inter mix your vehicles on the table top as I like to do.
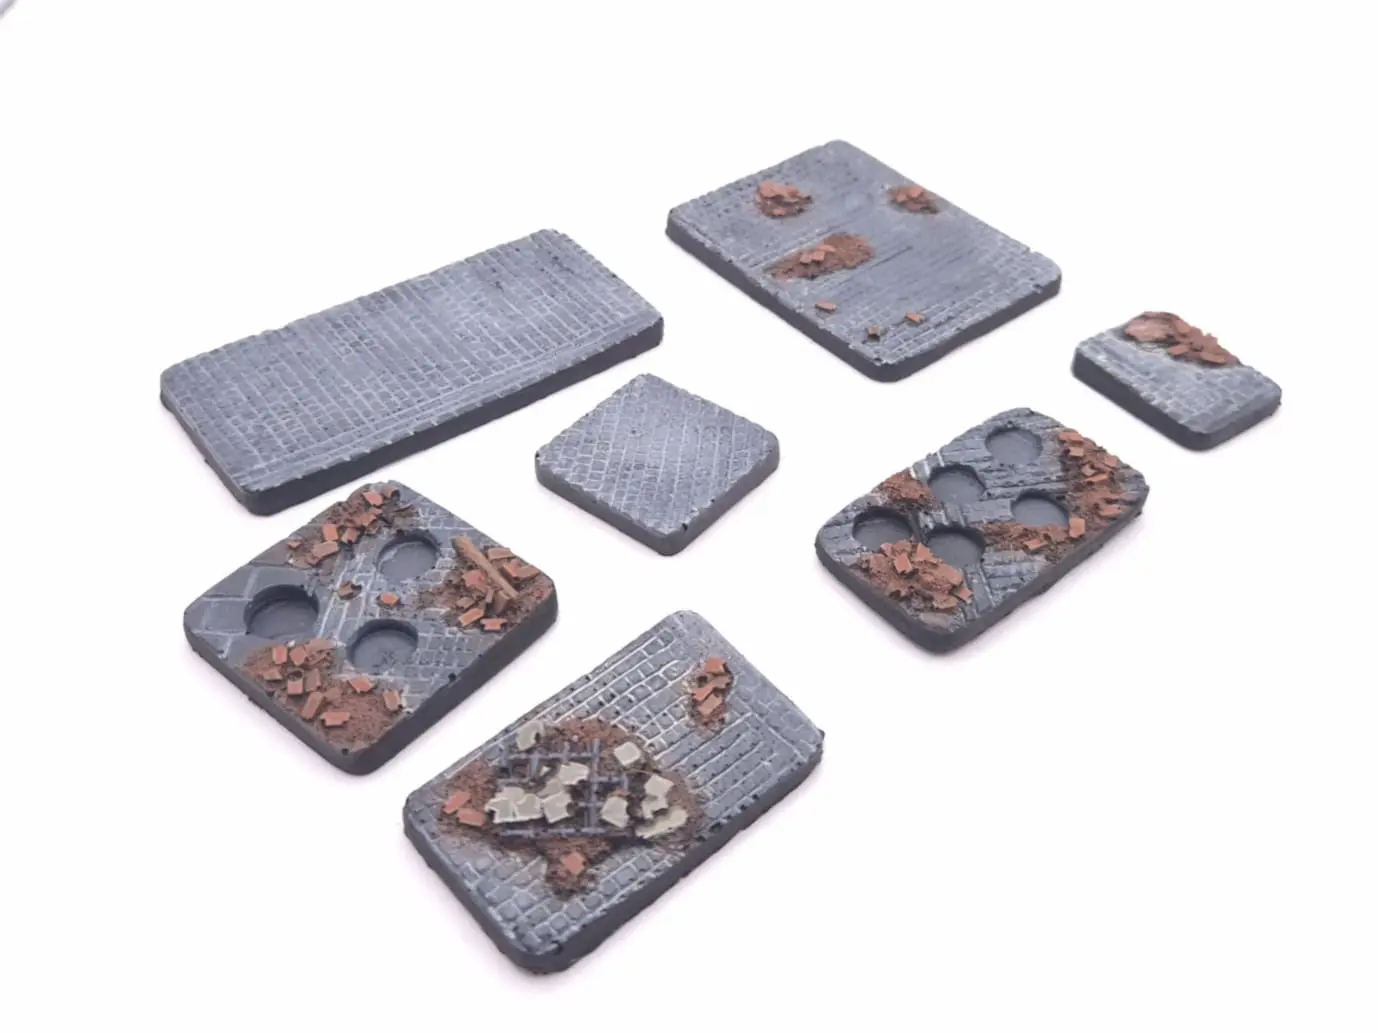
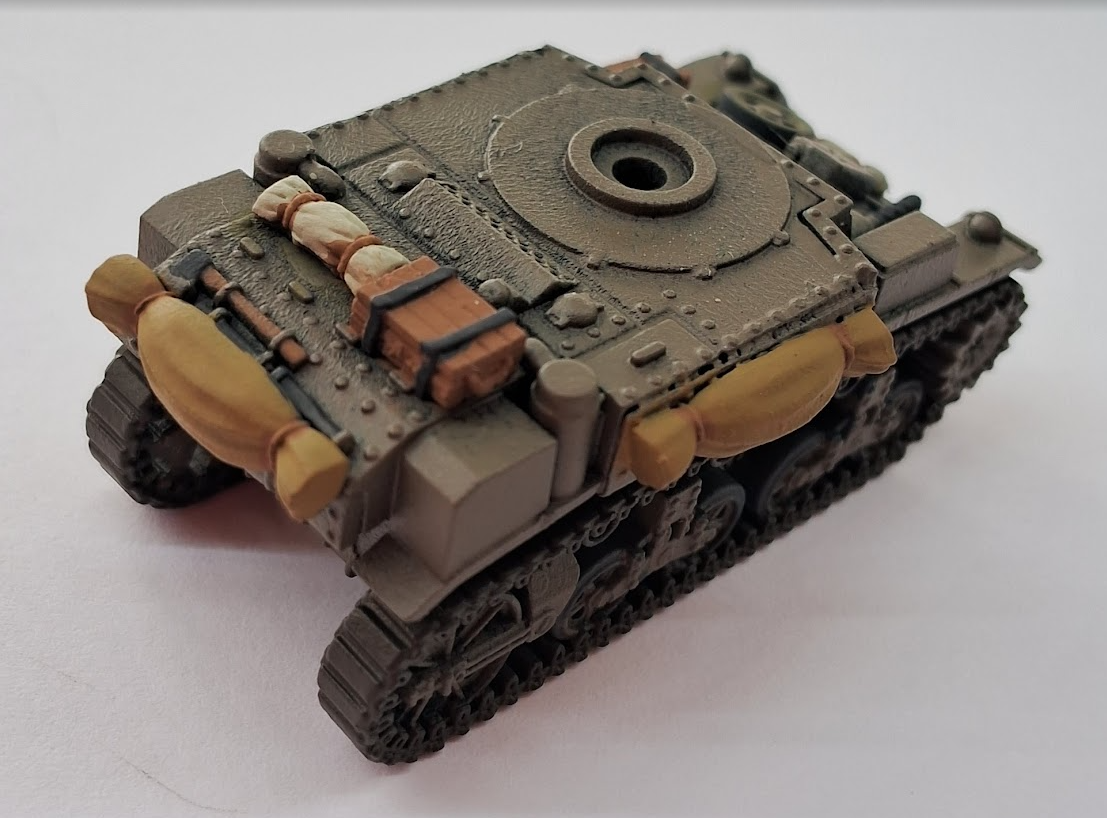
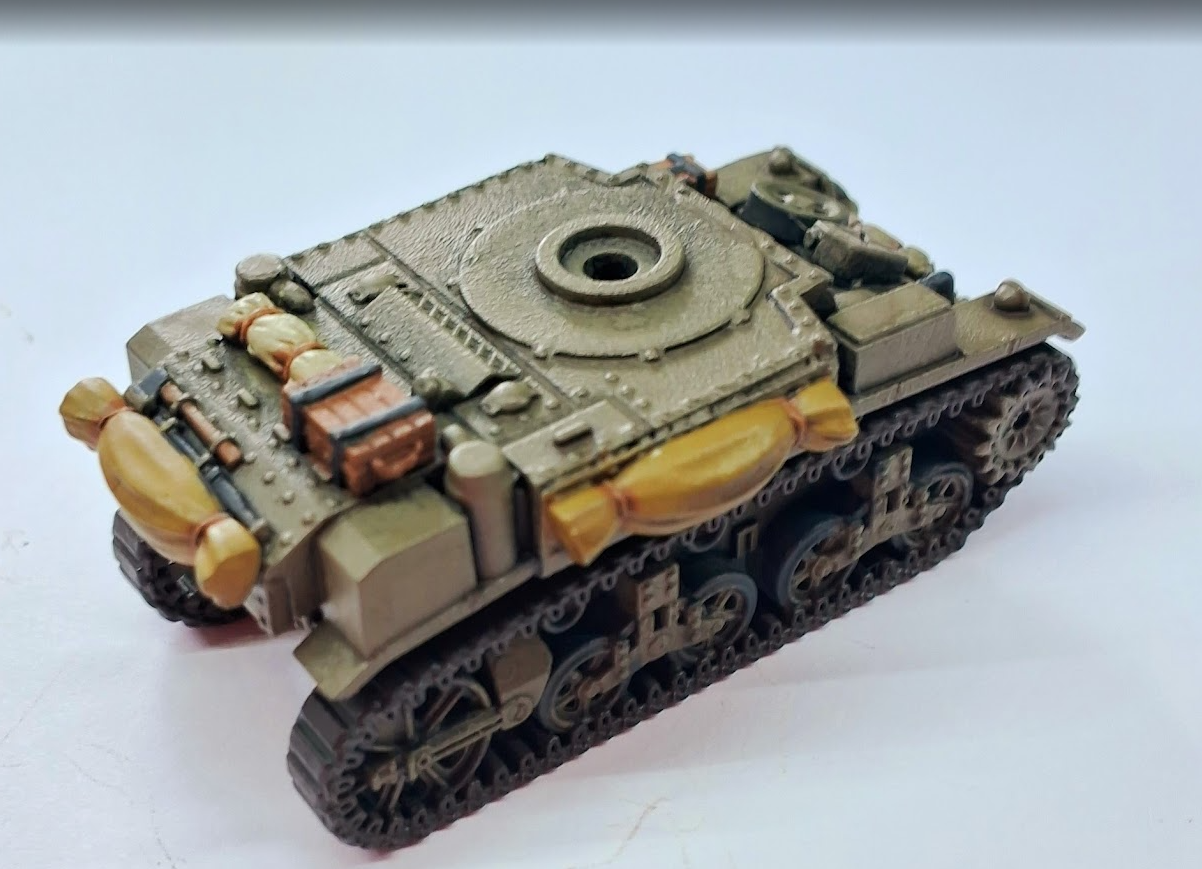
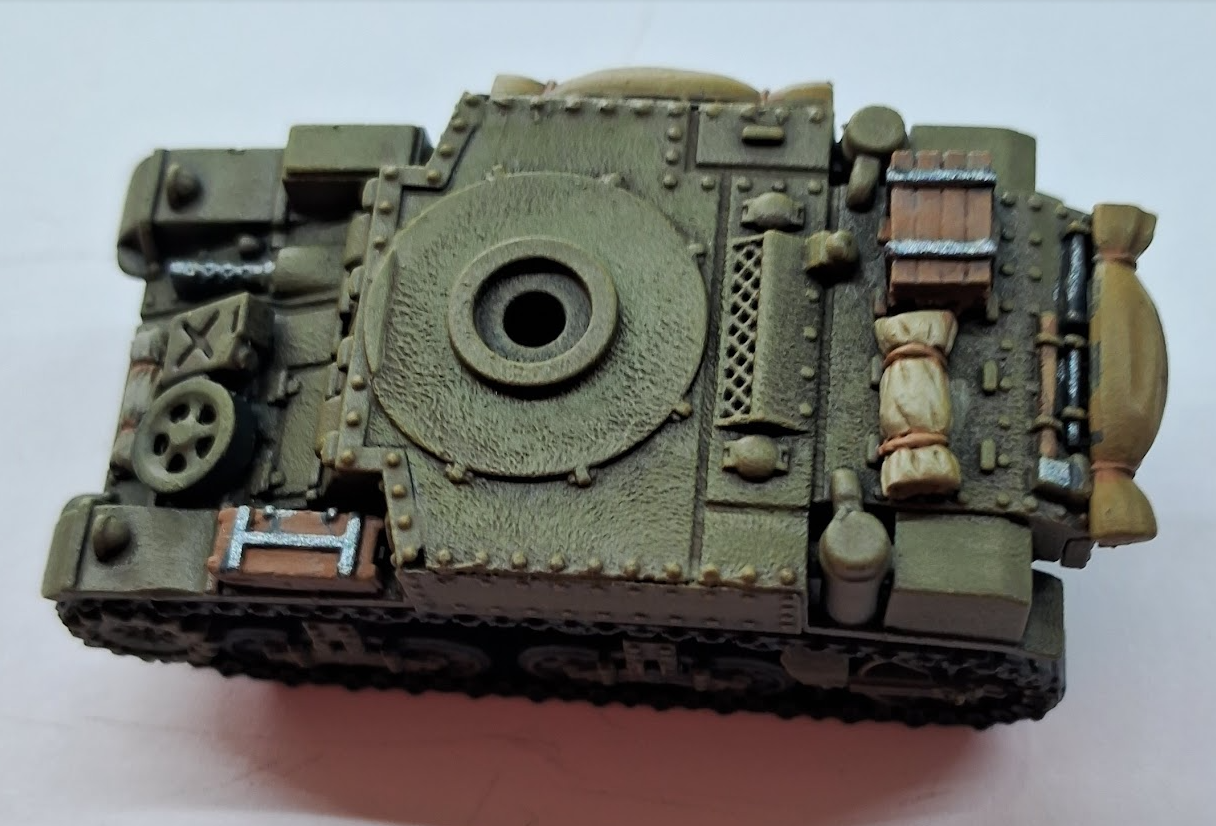
Building and Painting Stuarts
I noted in my research that particularly amongst the Stuart equipped tank units there was quite a noticable visual variation in the models of tanks that they were equipped at any given time. The models used include the M2A4, the M3 and M3A1. Armed with this I set about building my models. You can’t really build an M2A4 easily due to different running gear so I ignored those for now (maybe a 3D print option for the future) but something that approximates the various M3 and M3A1’s used by the USMC are achievable from the Battlefront sprue. The main visual difference being the different turrets so I built a couple of my Stuarts using the earlier turret parts with the raised turret hatch to represent these earlier tanks, I also removed the grenade launcher from the side of the turret as they didn’t seem to have those. This was easily done with a sharpe craft knife and a little care, the hulls seemed to be pretty much the same in the photos so I used the standard Battledfront build for all my tanks.
Next up is stowage here you can really make things stand out Battlefront provide a few parts on the sprue but if you have any other kits you can use stowage parts from them and there are some excellent third party stowage parts out there. I used a mix of the sprue parts, left overs from my bits box from previous kit builds and some third party metal parts from Debris of War.
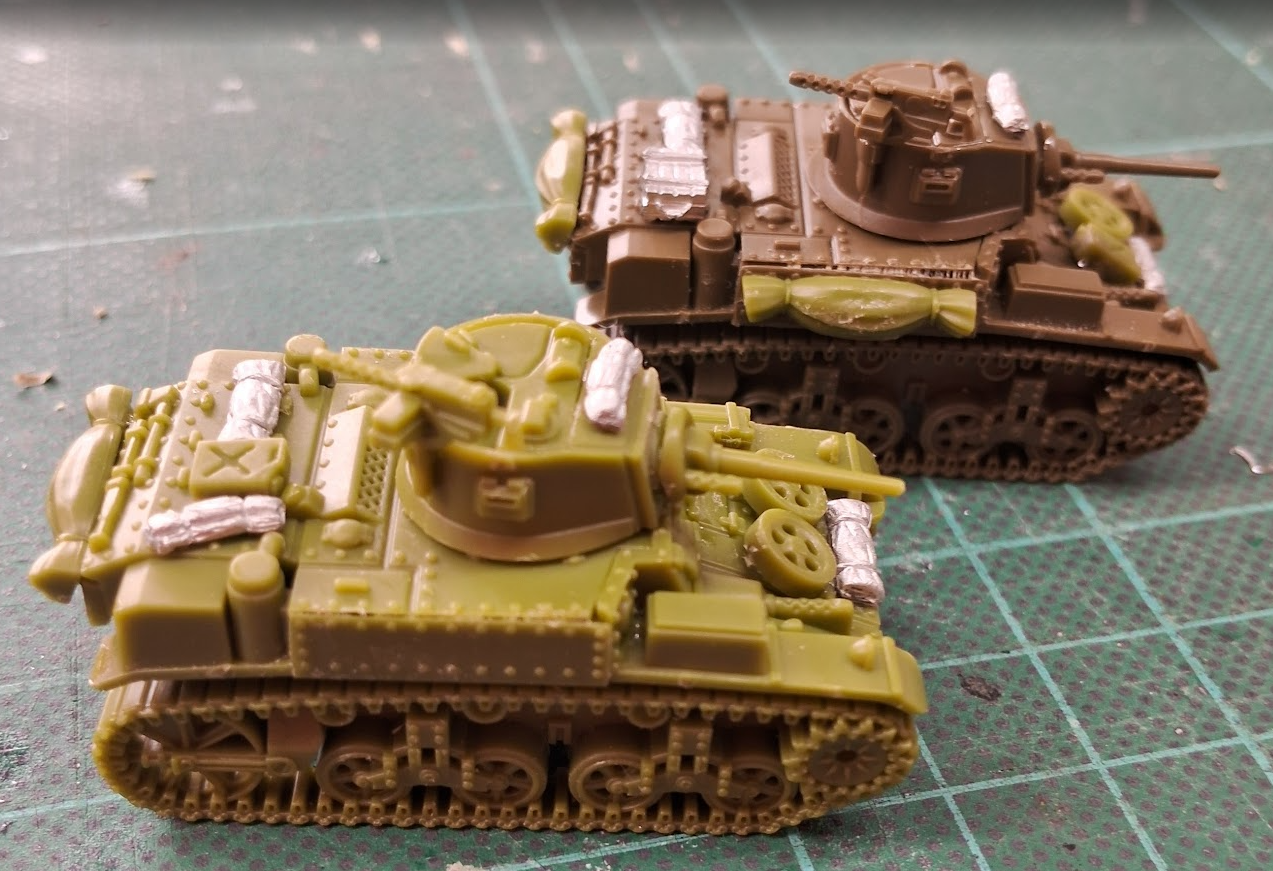
My last comment on the building is that the Stuart moulds are starting to show some age now and they are a bit prone to having small gaps in the side joint so a bit of plastic putty or other gap filler may be needed.
To paint my models I developed a pretty simple process, based on the ETO guide in colours of war. Once assembled I mount them on nails with a hot glue gun, this makes it easier to handle them when painting. First step is to prime them, I use an airbrush for this as it allows me to use a suitable coloured primer in this case Vallejo Surface Primer US Olive Drab (70.606), I then oversprayed this with my base colour Olive Drab (VMA 71.043) this provides me a nice solid green base to work from.
Step 2 is to use VMC 996 German Grey to pick out all my metal and rubber parts, I also paint all my stowage and any glass parts this colour as well, this helps create shadows when I add colour without altering the colour itself unlike if I paint pale colours over the olive drab.
Step 3 is to paint the tracks in a base colour for this I use “Humbrol Acrylic Gen2 173 Matt – Track” it does what it says on the label and is great for metal tracks.
Step 4 is to paint the stowage items here I used a mix of browns for wooden items, greens for tarpaulins and creams for other fabric items. I try to vary this across a platoon of models a bit so not all my crates are the same colour and there is some variation in the shades of tarpaulins. I paint these leaving the dark grey showing for metal parts such as hinges on boxes and at the edges where it joins the base model. Lasty I paint in any straps in a brown. I use a light colour for this to prevent it going too dark in step 5.
Step 5 my model is all covered in paint but it looks very flat and not particularly appealing. Now there are a number of ways to addesss this, as I am essentially following the colours of War method I now apply a mid brown wash over my entire model, I use a slightly thinned 1:3 parts water/paint mix, with Vallejo Smoke. Be a little careful doing this so as not to flood the model with wash, that will create unwanted pooling on flat surfaces. This creates all the shadows but will darken the overall model hence why I use slightly lighter colours than you might expect for my stowage straps and wooden crates.
Step 6 restore the base I now went back over the hull, turret and gun with my base colour, no I don’t return to the running gear, this helps viusally to make the detail on the upper surfaces stand out to the eye (Zenithal priming would achieve a similar effect). I carefully block back in any flat parts using thinned paint and a dampend straight brush its like dry brushing but here I am looking to cover the flat areas within panels but not the edges, this helps add depth and I’ll get all those edges with my highlight colour. I don’t personally bother with edge or panel highlighting, I prefer my colour transitions to look smooth and blended together like you see on a larger scale models.
Step 7 drybrush highlights I used 2 drybrush highlight colours for these, Green Ochre (VMC 879) for the tanks and tarpaulins and Oily Steel for the metal parts. I applied the first highlight to anything green using a drybrush technique. I use very cheap round makup brush for this, they are super soft and miles cheaper than specialist brushes. I have several of the each size for differing colours so I don’t have to worry so much about cleaning them perfectly. This picks up all the sharp edges and rivets and I do this to the whole tank including the running gear – I don’t worry too much if I catch the tracks at this point as I’ll sort that out with the metal highlight. For the metal I am a bit more careful using a smaller flat makeup brush so I have more control of where I am applying paint and it allows me to choose to drybrush or actually paint normally differing areas with the same brush depending on whether I am using the width or depth of the brush. This is particularly helpful round the drive sprokets where simply dry brushing would end up with metal paint all over sprocket wheel which I want to keep green.
Step 8 I go back over the stowage with the base colour this cleans up any unwanted green ochre and add highlights to add more depth to the finish. My final finish colour is typically 1 shade lighter than whatever I used for the base. Wooden parts are finished in a US Tan or Brown-Beige. fabric items are done with Khaki and Stone Grey. Straps get highlighted in US Tan Earth. The tarpaulins I picked out the edges with the green-ochre highlight used on the tank body but painted on rather than dry brushed.
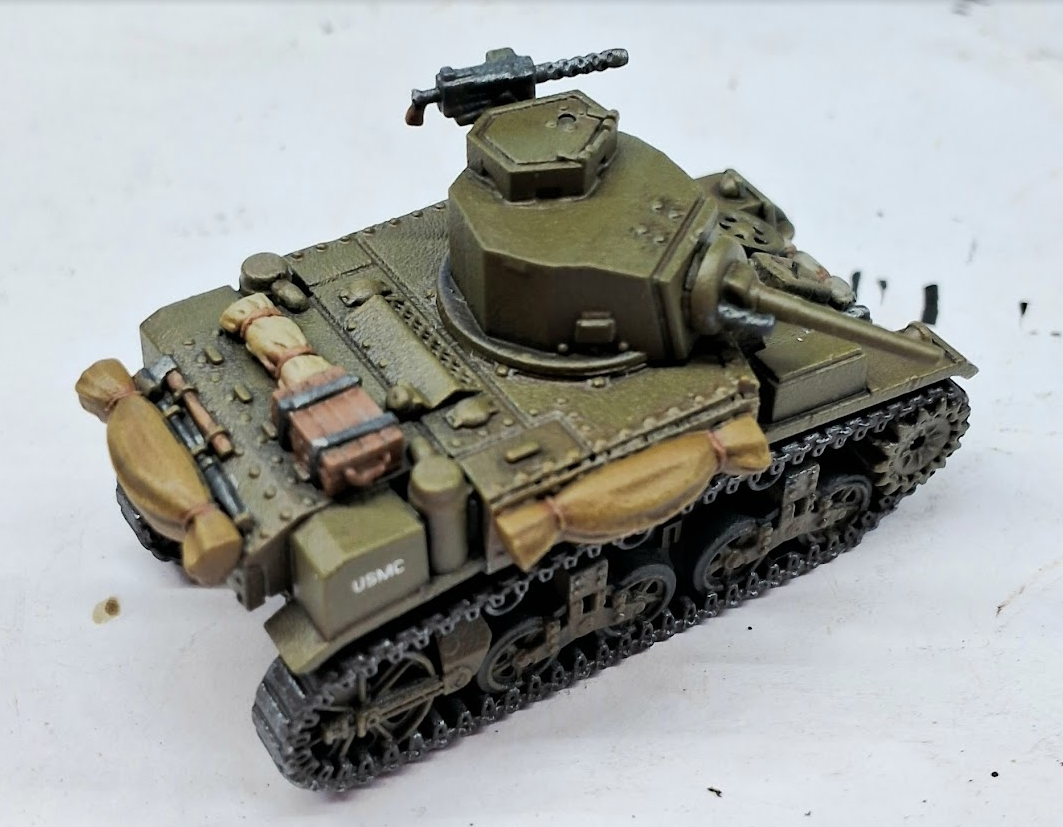
Step 9 add any decals, I used a mix of tank numbers and USMC decals (from I-94) nd add in tank commanders in open hatches. Those were painted like my marines.
Step 10 varnish I use Army Painter Matt Antishine rattlecans for an over all finish but I do hand varnish anything metal by hand first, this helps prevent chipping and this completes the model. Altogether each tank took me about an hour to complete so I comfortably fitted in painting a platoon over the course of a couple of evenings.
.