Battle of Kiev 1943 – Part 1
Battlefront have published a series of article by one of our fellow gamers Lucas Helene-Watson on the Battle of Kiev in 1943 over the past few weeks and being very interested the war in the east I had to try these out. My regular gaming partner would play the Germans. Before embarking on any gaming we sat down and had a thorough discussion on how we were going to do this so it linked together.
Phase one The Czechoslovak Assault
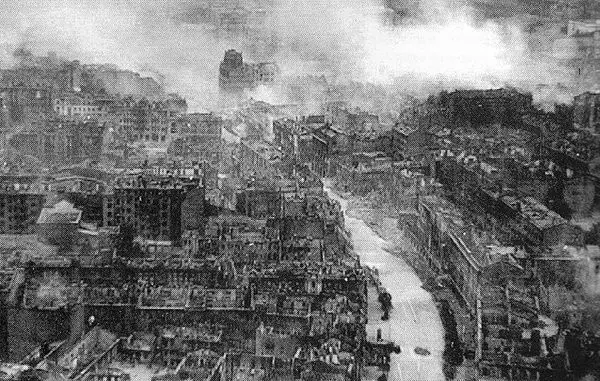
Game 1 in this series represents the initial assaults into the city outskirts by 1st Czechoslovak Independent Brigade on 5th November, the game was to be set in an urban environment and would use the City Fight rules. After doing a bit more reading around the battle and looking at what units we had we decided we we would fight this game as the assault into the factory area and would utilise the boulevard scenario from Iron Cross. The table was based on a tanks gaming mat to which we added some eastern european style buildings and craters to represent the initial bombardment, the mat is 3′ x 3′ which is a bit bigger than the size needed for the scenario so we utilised the extra depth as a place to put off table artillery units making use of the Across the Volga rule.

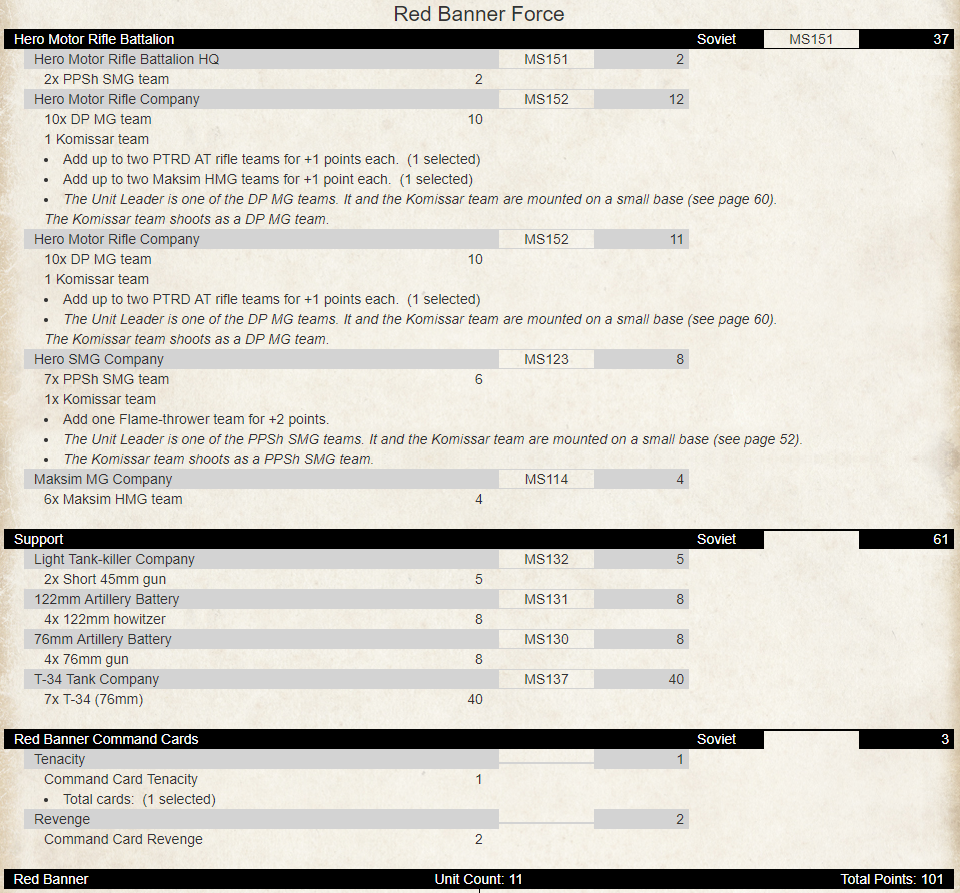
For the first scenario the suggestion was to take a Hero Motor Rifle battalion but not to include much in the way of integrated support elements. The scenario has a few special rules the Soviet HQ gain the Tenacity command card improving their counter assault chances and the infantry units all get a boost to follow me orders, whilst useful this I felt was of limited value in a City Fight game as you start so close together. With this in mind I chose to base my assault force around 3 core infantry units to go with my HQ were 2 Hero Motor Rifle Battalions with a single HMG and PTRD team plus a Hero SMG platoon with flamethrower, I also added a unit 6 Maxim HMG’s. My support was in the form of 7 T-34 tanks, 2 short 45mm AT guns (keeping with the lack of AT available in the real battle) and a battery each of Zis-3 and 122mm artillery which would be deployed off.
The Germans keeping with the few men many weapons ethos and a limited armoured support comprised of a Grenadier Formation of three platoons with 2.8cm AT rifle and integrated HMG teams giving them lots of fire power, these were accompanied by a pair of 7.5cm infantry guns and a unit of PaK 36 unit making for a really strong formation, they were upgraded to a Jaeger Company increasing their movement capability. In the scenario Germans support units are a little less reliable losing their For the Reich bonus making them more likely to fall back when casualties mount, my opponent took a small assault pioneer unit with a flamethrower, a unit of 4 Panzer IV (short) and a 10.5cm artillery battery. The Germans having prepared their positions well benefitted from the Fortify the Building command card (as a scenario bonus) so any teams in the building occupied by the HQ would would get 2+ saves. They also had the Pin Point Accuracy card meaning the Pz IV’s would range in on a Skill of 2+ if used as an off table artillery support option.

Initial skirmishing saw the Soviets capture the central building killing a Grenadier unit, whilst the assault pioneers covered by another grenadier unit sought to outflank the soviet position on the German right but were hampered by the presence of the T-34 battalion screening the objective. In a brutal exchange between the Pz IV’s and the Soviet AT guns 3 tanks were knocked out struggling to clear the rubble and craters with no soviet losses inflicted, weakening the german left flank and opening up a way forward for the Soviets.

After capturing the central building the Hero Motor Rifles move through the Hero SMG unit and flank the German position covered by the T-34’s upon who the German artillery wreaked havoc. I chose to sacrifice this unit to prevent the German’s moving their troops on the extreme right back towards the objective eventually 6 tanks are disabled but the lone remaining tanker held firm, its presence enough to keep the Germans at bay.


Using the T-34 battalion to keep all the German infantry pinned on place not wishing to risk an assault against my big tank unit, brought time for the artillery, SMG and Hero Motor Rifles to whittle down the defending platoons in the objective building eventually the weight of defensive fire was reduced to a level where I could risk the assault with some chance of actually getting it home, this took some time due to the 2+ save from Fortify the building. The assault went in, the dice were rolled but, the Germans only managed to score 4 hits and the battered Motor Rifles charged home. In combat with their 2+ to hit the Germans were cut down as they destroyed the Grenadier HQ, PaK36’s and the remnants of a Grenadier platoon, the remaining German survivors were forced to break off with just a single team escaping the onslaught.

Overall the scenario was great fun to play and I would recommend giving it a go. The 2+ save from Fortify the Building was a little too effective and in future I would suggest to only apply this to just the room occupied by the HQ. Tanks definitely weren’t much use offensively to either side, the presence of my large T-34 unit did make maneuvering very difficult for the Germans but they did little material damage whilst the Pz IV shorts would have been better employed in an artillery role where they would have survived a lot longer.
Summary
It had been a hard fought encounter and the factory zone was reclaimed and could now be quickly turned to supplying the depleted Red Army with much needed supplies to continue driving the fascists from the remainder of the city.
The next game represents the German counter attack and for this scenario we are going to use slightly larger forces of 120 points to enable the Germans to build a powerful panzer formation, for the soviets the T-34’s would be returning but in the guise of a Hero formation in a desperate clash of armoured forces. The final game will see the battered soviet infantry units represented by a Hero Rifles take on the marauding panzers.