Building a Better List: SAS Parachute Squadron

FOW Late War continues to grow with the release of six books and another three on the way for Battle of the Bulge as soon as things get back to normal at the factory post-Malaysia lockdown (spoiler they are worth the wait!). While at events you often see some fairly similar lists, I wanted to explore something a bit different; The SAS Parachute Squadron.
This formation is based around the SAS who were parachuted into Normandy and met up with the French Resistance. While the French Resistance operated fairly independently under occupation, post-D-Day they were formed into the French Forces of the Interior (FFI) peaking at over 200,000 fighters. These forces assisted the allied efforts to liberate France, guiding forces, sabotaging and attacking key areas. In places they helped hold defensive lines, allowing other troops to be rotated or freed up for other actions.
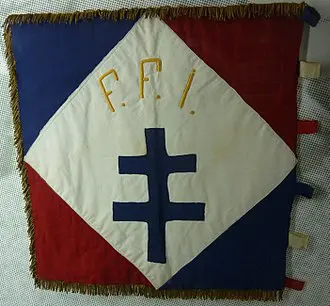
The Cross of Lorraine on the flag of the 2nd company, 1st battalion, FFI Finistere.
Over 1,100 SAS soldiers operated behind enemy lines in France, drawn from the 1st and 2nd SAS regiments. Between 4-5th June, many were inserted with the aim of disrupting the German’s ability to counter-attack the landings. They worked closely with local resistance units who provided excellent intelligence and support to their operations. In addition, the SAS formed three-man liaison units called ‘Jedburghs’ that acted as a link between allied and resistance forces.
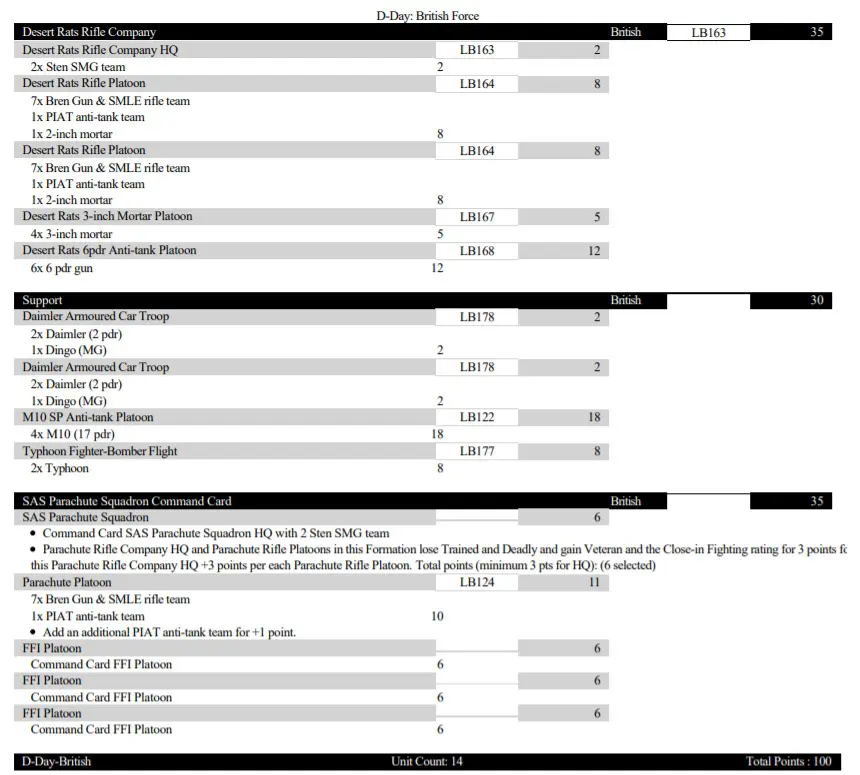
My 100pt SAS Force represents a SAS platoon supported by three FFI units backed up by British infantry arriving to secure the area.
The Formation
The SAS were and still are, the very elite of the British Forces. By modern standards, they are classed as Tier 1 operators and in WW2 they were groundbreaking, as they pioneered special forces tactics used across the world today. As such they have the best stats in the game; Fearless, Veteran and Careful. Just to add some spice in the assault they gain deadly for a 2+ assault. However, this comes as a pretty steep price of +3pts over a traditional Para platoon!
The formation is backed up by three FFI platoons

These are pretty much night and day to the SAS. They are fearless and will keep advancing but won’t hang around in a long assault and will likely run when reduced to two stands. They also are not great at hitting things in an assault. However, they are nine stands for 6 points and that’s nothing to sniff at, especially with a PIAT! Most importantly, they don’t count towards the points on the table meaning you have less in reserve. In a typical 100pt game this means, with three platoons, I only need to leave 22pts off the table. This is a really big deal in so many missions and can allow you to dominate scenarios like Dust Up early on.
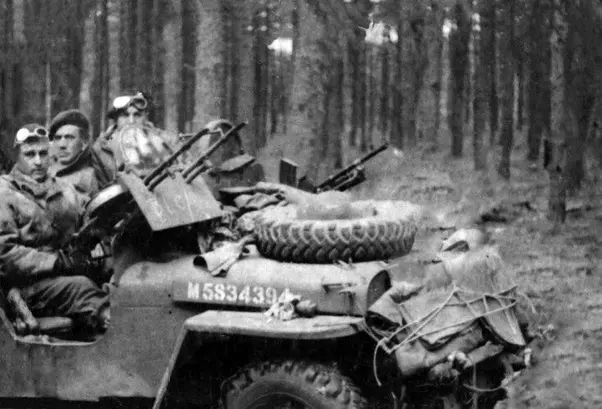
Member of the FFI in Châteaudun with a Bren gun.
While the force can take two mortars and a pair of 6pdrs, I elected not to. With 40 infantry stands and my plan for a second formation, this army isn’t going to break so I don’t need the platoons and I just can’t get along with two stand platoons. One casualty and they are going to be in poor spirits!
Supporting forces
Firstly, I should point out this list is not a meta tournie winner. If it was the support would be a load of AT14 and some Crocs.
However, I doubt all of that would have been supporting some resistance fighters. Instead, I have elected for a second formation.
In my head the FFI would have conducted spoiling attacks and diversions, drawing the enemy off allowing the Allies to launch the main attack, or worked with the infantry in defence lines. For that reason, I have included one of my favourite formations, the Desert Rat Infantry Company.
With a HQ, two rifle platoons, mortars, and six 6pdrs, they can certainly hold their own as a formation. Mortars give a solid bombardment and that important smoke screen, while six 6pdrs is an amazing unit and the perfect ambush. Twelve AT11 shots will ruin any tanks day and, with that many shots, even Tigers need to be careful! Even bailing a tank means they are very vulnerable to assault by the six(!) infantry platoons.
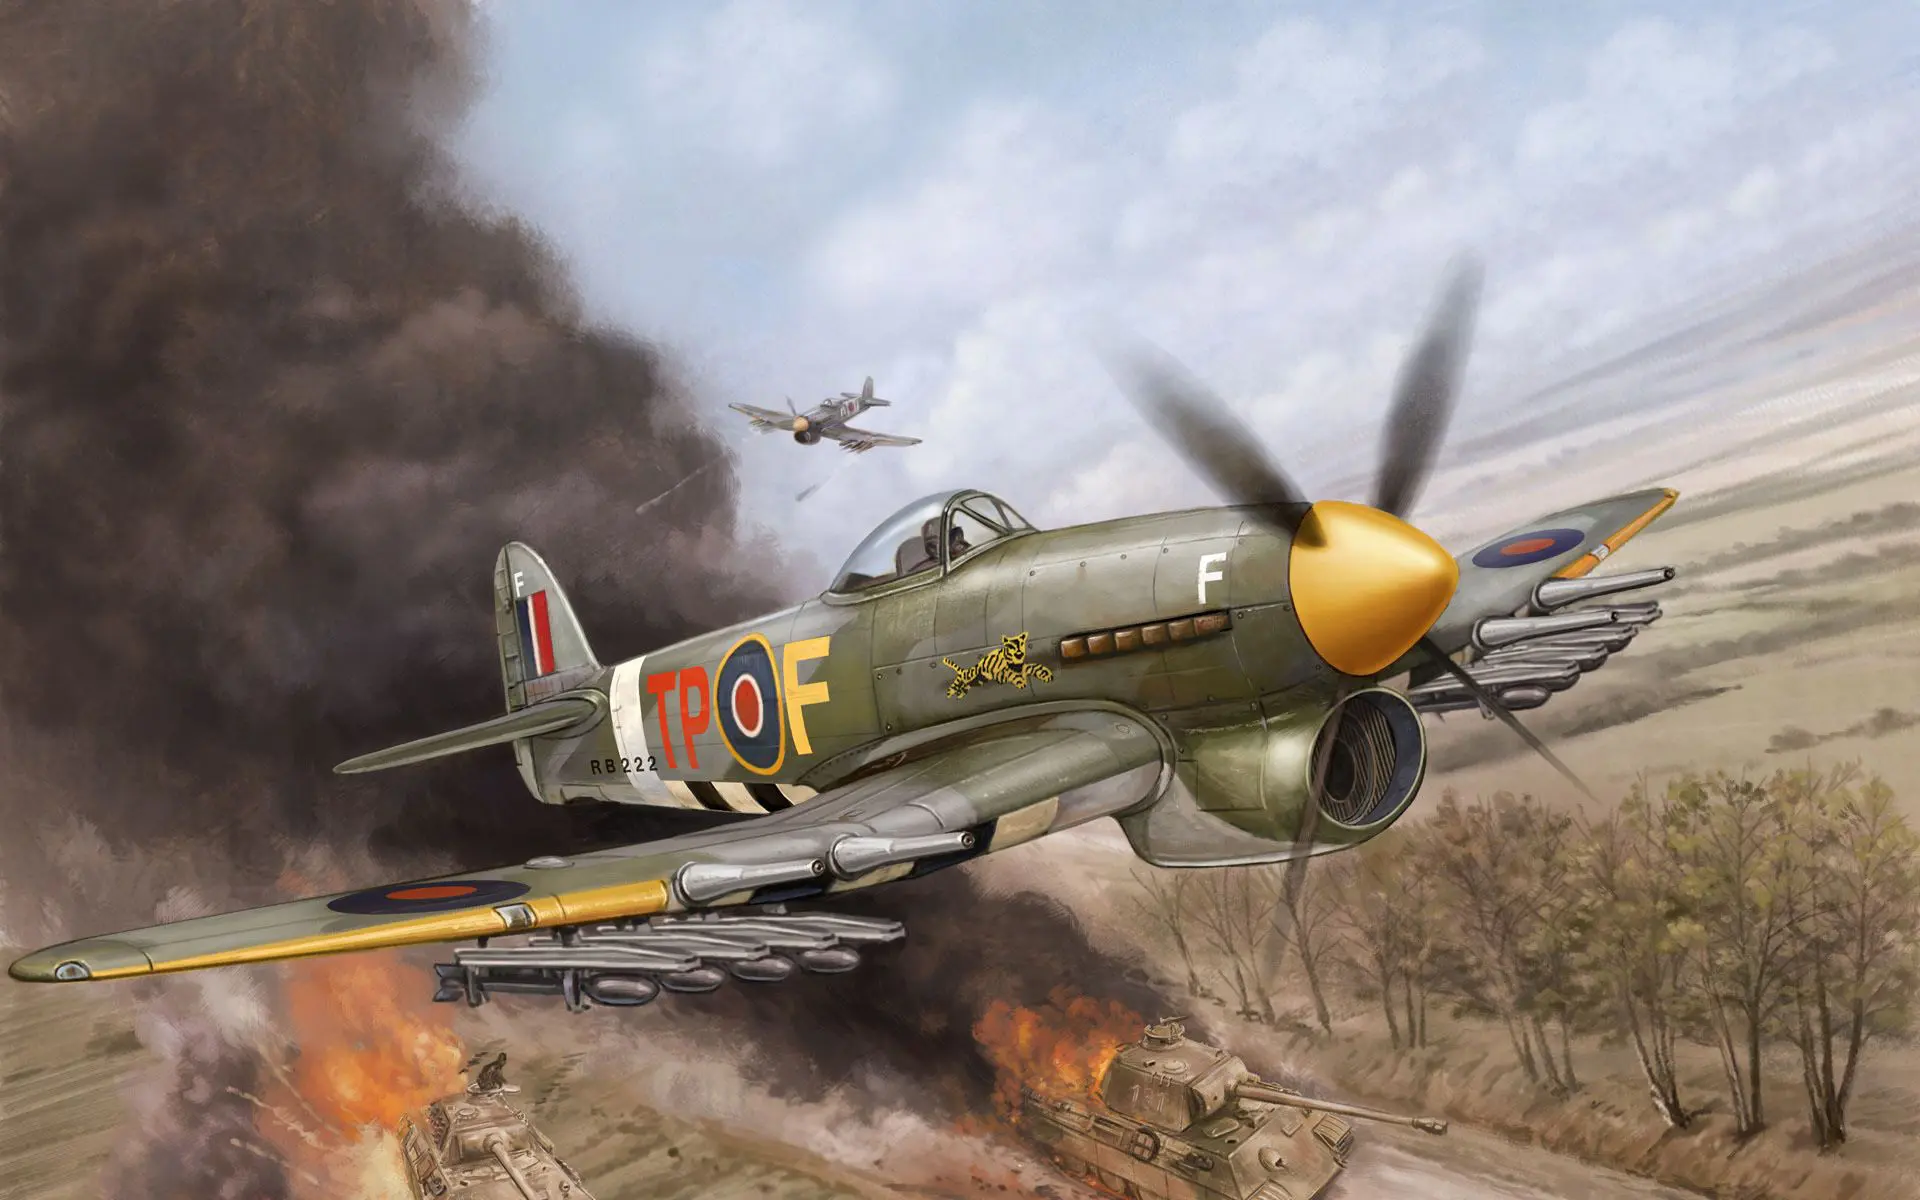
With the formations set I opted for Typhoons as support. They give me some reach and stop the enemy bunching up. They are perfect for clusters of TA0 recce and TA1 tanks, they also provide another tool vs Tigers and FA9 nastiness.
Four Achilles, this is later in the Normandy campaign rather than D-Day, are assigned to support the Desert Rats, providing some AT14; they will keep any armour honest and will be stalking towards the back of my force, using their good range to pick off-targets.
Finally, a pair of Daimler patrols form part of the recce sent to locate and link up with the SAS & FFI forces. Their spearhead will help guide these forces to the perfect attack point.
Tactics
At first glance, I think a lot of people might dismiss this force. They have no heavy armour (in fact no real armour at all) and they ‘only’ have four Achilles. However, they do have six nine-strong infantry platoons in two formations, six AT11 guns, a template, recce, AT14 and air support. That ticks most boxes that an army needs to round it out. Six platoons is a tough battle, most armies only have one or two templates especially Germans or Brits, where they are more expensive and it takes a long time to dig all that out.
With 22pts in reserve, I can skin it a number of ways; when defending a platoon of desert rats, mortars, air and a recce patrol will sort me out. That still leave five platoons of infantry, six guns, recce (never underestimate its usefulness when defending) and Achilles on the table. I will definitely be happy to play Fighting Withdrawal or No Retreat with this.
The key to any defence will be deploying ahead of the objective. The FFI make a great first line; even if pushed back you then have a line of SAS and Desert Rats waiting to pounce. The 6pdrs cover your main objective while the Achilles manoeuvre for those shots vs anything heavy. If facing Tigers an Achilles ambush is pretty scary. Let them assault, then hit them and assault, capturing any bailed ones.
Many opponents will be expecting this to defend and could be very surprised by an attack stance; at worst you will get something like Dust Up. Here your FFI helps to keep a lot of stuff on the table. Be aggressive, dominate the game while you are 18pts up on your opponent.
As the SAS say ‘Who Dares Wins’.
Conclusion
I plan to paint this up and give it a go. That’s a lot of painting, but I am getting pretty good with contrast paints which will make it more bearable.
I think the key to all these infantry stands will be diorama-like bases; with this much infantry, basing will really transform the look of the tabletop.

2 comments