Echoes of El-Alamein
Martin here and 2026 has started with a bang. EW newness aside I’ve actually managed to play some games. Today I’m reflecting on how my MW British Cruisers got on at Echoes of Alamein 2 at Table Top Republic last weekend. This was a 3 game, 100 point, MW Desert themed event. This presented me the ideal opportunity to get my New Year New Army project form 2025 on to the table top and see how it would do. I did get in a couple of practice games before the event as well but I played these with a DAK and Italian Force so my friend who I went with me could try out his British Desert Paratroops. At least it meant I wasn’t rules rusty.
So what was in the list?
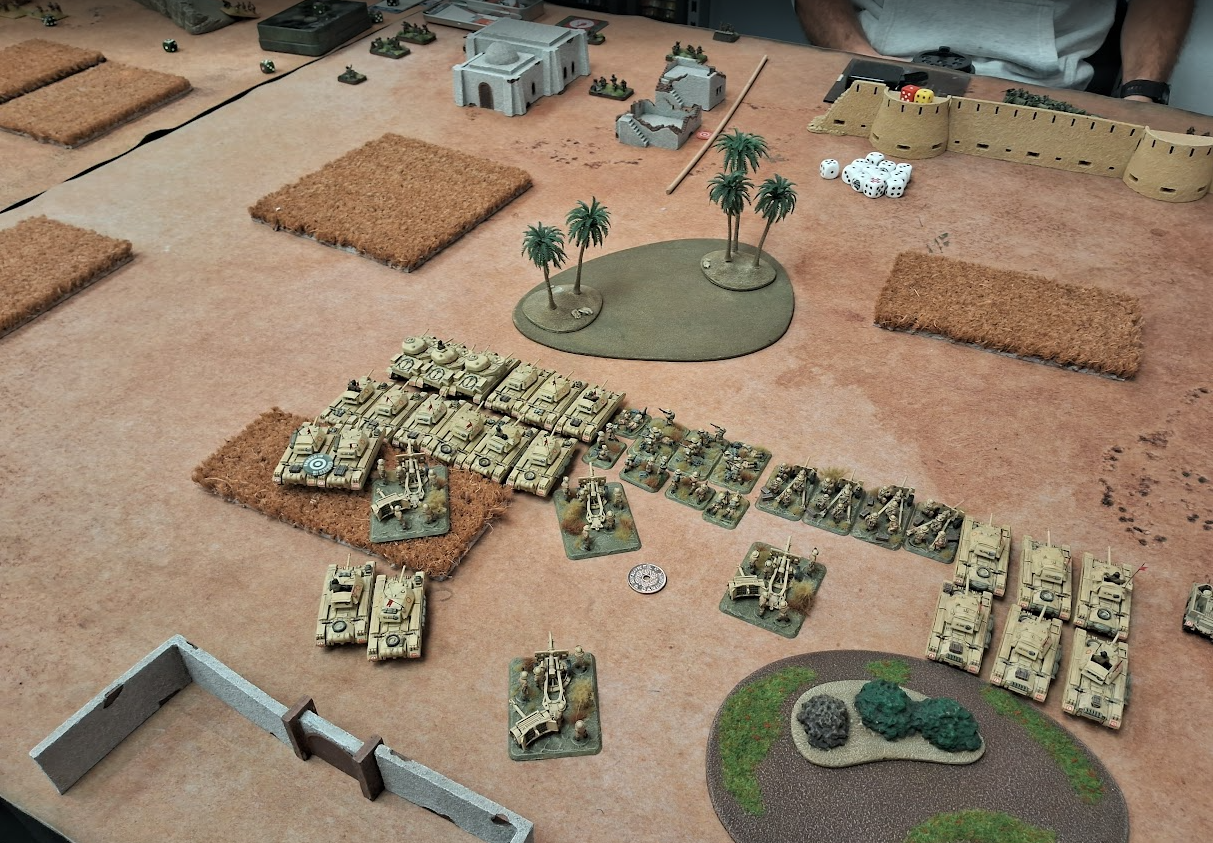
As you can see I have two formations, the first of aggressive crusader tanks with a mix of 2pdr and 6pdr guns for engaing enemy armour, with their own built in support artillery and a Smoke Bombardment from the CS tanks, this also gives me a 4 tank strong HQ which should be handy for boosting assaults. The second Formation is a small Motor Rifle Company which can hold any objectives as needed and will primarily be used to enage opposing infantry and guns. These are backed up by a general purpose platoon of Grant Tanks and it is all supported by a more than useful 25pdr Battery. With the event using Dynamic Points I have a bit less in my Motor Rifle Platoon than I would using Book points where I would be able to field an extra Universal Carrier Patrol and upgrade all my Crusaders.

What’s the game plan?
My basic plan is to be aggressive, with my Crusaders hit on a 3+ I need to maximise their speed, hence the Cavalry Commander card which enables me to fire after performing a Follow Me move, offering the opportunity to move 18″ and still fire plus I get a handy Motivation boost for doing so to 3+. Handy for flanking enemy armour or forward firing gun positions. This will be particularly useful in games where my Crusaders are coming on from reserve and may not arrive in the right part of the battlefield.
Stancewise I can play all three with this force though obviously Attack is most advantagous as it will enable me to swamp the battlefield with my 19 Crusader tanks in one go. In Defend or Manouver scenarios I will have 4 or more reserve platoons as long as I try and avoid getting into scenarios where I am facing Deep or Delayed reserves this shouldn’t be too many to cope with though it isn’t very desirable.
Set up is always a bit situational as you don’t have full control of objective placement and terrain will influence things. However, I always like to have some sort of general jumping off point in mind for my Force which I can adjust for the terrain/scenario. With this list I’m looking to employ a refused flank or set up a hammer and anvil type deployment disposition with my Force. The Infanty and guns form the refused flank/anvil whilst the Crusaders form my attacking echelons/hammer potentially boosted by spearheading with the Universal Carrier Patrol. In both set ups the Grants will be deployed between my two Formations and will be the unit my formations pivot around. Operating the Grants in this part of my battle line allows them to move across to protect the infantry/guns and they still cover the flank of my massed Crusader Formation. Well that is the theory of what I’m trying to do.
In game terms my biggest challenges will be facing a Tiger Tank with only AT9 this is a beast I simply can’t easily deal with and will have to rely on drawing/pushing the beast away from the Objectives. My other concern is facing lots of Italian 47mm guns my one game with this force I have played was against Duncan with an Italian Parachute Formation where his shear volume of infantry based AT6 anti-tank fire successfully nullified my Crusaders numbers having no HE on my tanks reduced them to using mainly MG fire so I could hit which doesn’t work so well against dug-in troops.
Game 1
Saw me matched up against my regular playing partner Bryan and his British Paratroops which I had played the couple of practice games against. These are a late MW force comprising the Paratroop Formation (HQ, 2 platoons with Piats, Mortars, 6pdr guns and 75mm pack howitzers) and a Valentine Formation (HQ and 2 platoons with 2 2pdr and 1 6pdr Valentine) from support he had a Paratroop Rrecce platoon all this is led by John Frost giving them a 2+ Motivation when near him! I had a few ideas about how to play against them but was rather concerned that I was seriously lacking AT and FP to hurt the tanks and dig out the infantry.
We both chose to attack and ended up with Dust Up with me as the Attacker, meaning we both had delayed reserves, now this really helped me as we both had 4 platoons in reserve meaning I would start the game with 3 tank platoons on the table top to his none and his wouldn’t start to arrive realistically until turn 4 and they are slow. Brian won the roll to go first as well meaning his artillery couldn’t bombard me either and he was limited to moving ROF with any shooting. For deployment I used the limited spearhead opportunity to get my mobile elements of the force across the board opposite the objectives screened by a small walled house and placed all my guns covering my objectives ready for when he decided to try and advance on my objectives. The British screened the objectives with one infantry platoon with the howitzers and AT guns behind them, the mortars were centrally placed to cover the second platoon advancing behind some rocky ground towards my objectives.
Bryan went first advancing his infantry through the centre toward my objectives screened from my position by rocky ground. Knowing I had to make my numerical advantage count and having the luck to go second enabled me to rapidly advance my armour and infantry towards the objectives and to drop a smoke bombardment to screen them, this would allow me to set up a flank assault on the 6pdr position in my turn 2.
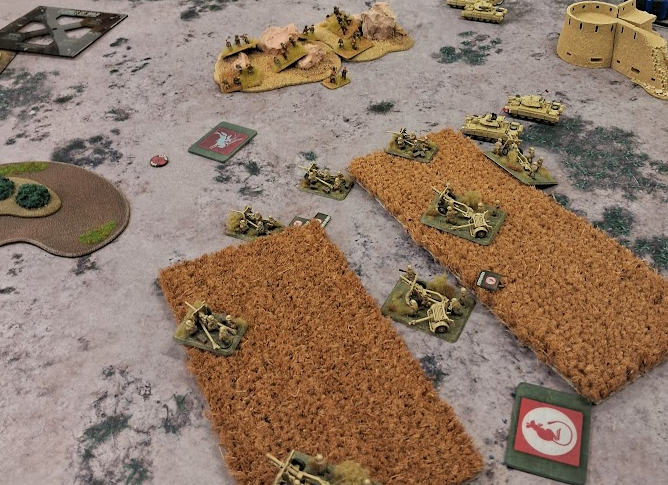
Turn 2 saw the paratroops advance across the rocky hill toward my gun line but a failed Follow Me order left them exposed so the Mortars laid smoke to prevent my guns targetting them directly in the open. Around the objective the shooting was limited with the smoke screen but the howitzers managed to pin my infantry down in the house. On my turn I manaoucvered 2 Crusader troops and my carrier patrol all to assault the 6pdr guns. My infantry HQ spotted for the 25pdr guns managing to pin all 3 British defending platoons whilst my Crusader HQ CS tanks laid more smoke for me to attack into, while my remaining HQ tanks and 6pdrs managed to pin the advancing paratroops. I launched my first assaulting platoon loosijng 1 Crusader on the way in to the Piat but managed to kill two of the guns. The British then counter attacked but managed not to do any damage and my first platoon broke off, the guns reorientated to face the second Crusader platoon but this exposed them to a rear charge from the carrier patrol which whilst not the best assault troops I sent in this time managing to kill 1 gun agin befor breaking off with the loss of 1 carrier. With the British down to just 2 AT weapons I decided to be cautious and chose not to send in my third attack wave. My reasoning here was the gun might run any way and I was not within 4″ of the objective meaning repositioning was going to be difficult for the paratroops as they would have to give up their foxholes making them much easier for me to kill.
Turn 3 was a bit of a disaster for Bryan nothing rallied meaning his attacking platoon had to fall back behind the rocky hill to protect them as my gunline was now bolsterd by 4 tanks giving me a massive amount of defensive fire, to add insult to injury his mortars were out of range to bombard me as well so would have to move forward this turn. No reserves arrived. His defensive position was looking very weak and the paratroops moved closer to the objectives usng what terrain they could to screen them for the inevitable MG fire they would face. The pack howitzers also had to move to prevent them meeting the same fate as the 6pdr platoon cutting their ROF to 1. The 6pdr platoon failed its last stand. Shooting saw me take a couple of hits but sustaining no losses. My turn 3 saw my infantry recover and move up to support my atatck fully, I repositioned my two tank platoons to again attack the forward firing guns from behind (something I had learned from the practice games to do) I shot up the paratroops killing the Piat team. My first assault failed with the guns driving me back with defensive fire but only succeeding bailing out 2 tanks, my second attack was more successful killing 2 guns which then promptly failed their Motivation and were captured. My final assault saw the Carrier patrol take on the paratroops but thiswas a bit ambitious and despite killing 1 team I was destroyed by the counter attack.
Turn 4 and Bryan was in trouble with just the paratroop HQ and 1 platoon on the objective. He got 1 platoon of Valentines on from Reserve but these couldn’t get close to the objective electing to move at tactical pace to engage my tanks. The advanced paratroop platoon recovered but where now stuck unable to advance or retreat so went to ground. The mortars pinned my artillery and AT guns but the presence of the tanks had stopped nay though of an assault by the paratroops being risked. My tuirn 4 started with me loosing a Crusader platoon to a failed last stand test but these were replaced by 2 platoon coming on from Reserve aided by the Cavalty commander card these closed to be able to join my assault next turn. I was happy to risk them getting shot as the Valentines would have to move to get near enough to the objective in turn 5 to help defend it if the infanty held. My infanty now joined the fight and through a combination of shooting and assault drove the paratroop platoon back away from the objective and consilidated to prevent them simply moving back next turn. I had a chance to win the game with my 2 remaining Crusaders assaulting John Frost after having killed the 2iC with shooting. They rolled in and struck crushing Frosts team between themselves and a tall wall!
Result win 7-2
Game 2
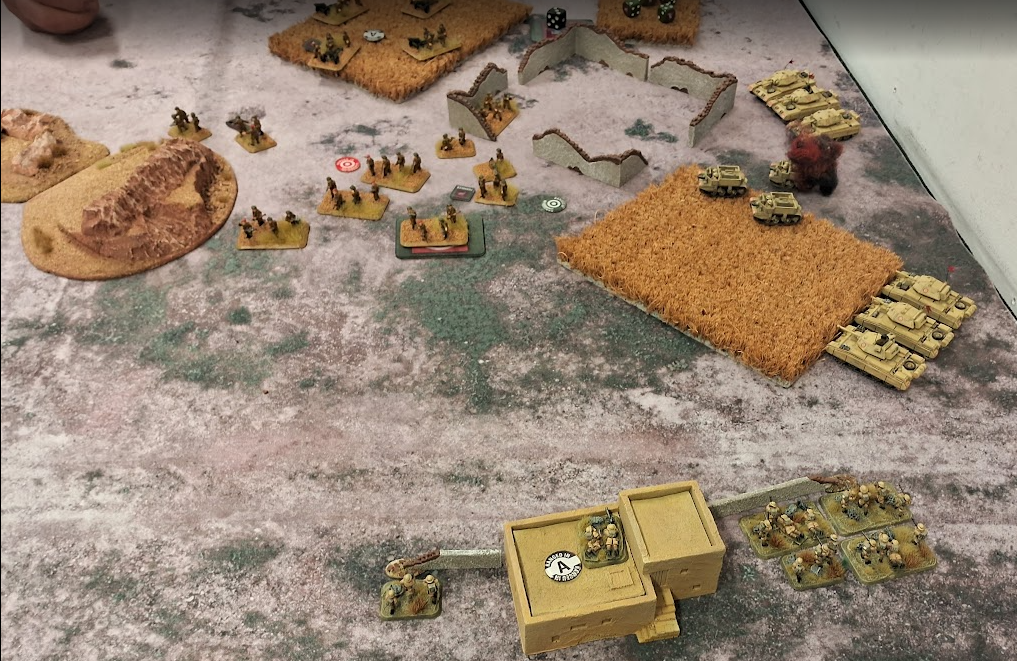
My second game was against Tom the store owner who had an Africa Rifle Company (HQ, 2 Afrika Rifle platoons, 5cm AT guns, 10/4 2cm AA platoon,) with Panzer IIIs and Mixed Panzer IIIs and Marders in Support along with an Allied Italian platoon of Semovente 75s. Again we both chose to Attack with the result we ended up playing Breakthrough with me as the Defender. Again I wasn’t too upset at this outcome as I would be able to use the speed of my Reserves to flank the inevitable German advance. I set up with just one platoon of Crusaders opposite the German deployment box and the remainder of my forces positioned as near the centre of the table as possible to move them onto the objective planning to use my 25pdr troop and infantry as a speed bump to the German advance. I placed my 6pdr platoon in Ambush. Here Toms lack of playing experienced tolled as he only had an infantry platoon as his reserves meaning they would have to come on and face my Crusader HQ and a Crusader troop which was likely to be a one sided encounter meaning he would be dependant on getting his remaining troops across the table to capture an objective.
Going first Tom advance his panzer IIIs down his left flank looking to move around a palm copse in the middle of the table whilst he advanced his Marders and AA into my deployement zone to be able to see my units. He opened fire with the Semoventes managing to kill 1 25 pdr and pin the planoon whilst his Schutzen 81mm mortar pinned my infantry down. My turn started with my guns and infantry failing to unpin. My infantry re-arranged themselves to reduce the number under the template using the tall walls around the building to screen them from enemy observation. I moved my Crusader HQ and a Crusader troop to cover the objectives and pushed my Scout Carriers forward to engage the Marders and AA half tracks managing to kill 1 AA half track with MG fire and pinning them. My 25 pdrs fired flat and only succeeded in bailing out two of the Marders in a fit of poor dice rolls, either missing or failing their FP rolls. My Crusader CS tanks laid a smoke bombardment screening my entire force from the remaining German positions due to the relative positions and the tall terrain in the middle of the table.

Turn 2 saw Tom start with the Marders failing to remount, after unpinning he chose to move the AA trucks to get a better firing position on the Carriers to avoid the terrain and continued to advance the Panzer III’s moving a platoon either side of the central palm grove. Shooting was pretty uneventful with the half tracks failing to kill any of the Scout Carriers due to a lack of AT and FP. My turn 2 and I decided to wait to pop my Ambush my first Reserves arrived and I chose the Grant platoon and moved these up the table edge to flank the advancing Panzers. The 25pdr platoon and infantry recovered and repositioned out of the ranged in markers as much as possible, this did leave me with very little dug in. Shooting the Scout carriers continued their duel with the AA picking off 2 more leaving them with a last stand test next turn. The Grants failed to harm the Panzers.
Turn 3 and Tom recovers his Marders which reposition to fire on the scout carriers and his reserves arrive moving up to the objective but fully in view of my 2 tank platoons and infantry – they simply had nowhere else to go. The AA failed its last stand test. He advanced his panzers between the palm grove and house and moved his second infantry platoon forward towards the walled house. His shooting started with the Semoventes killing 2 more of my 25pdr guns leaving me just 1. The Marders killed a CS tank but the Panzer IIIs spliting their fire at my concealed Crusader platoon and the Grants failed to harm the Grants with me making the saves for the hits he did land but a Crusader 2pdr was knocked out. His infantry opened fire on mine and destroyed my Motor Rifle platoon entirely! My turn and I now elected to Ambush flanking the Mixed Panzer III platoon whilst another Crusader troop with two 6pdr guns arrived from Reserve, I moved the Grants to be able to fire on both the flank of the pesky Semoventes (hull down behind a ridge) and the Panzer IIIs, Both my Crusader troops also targetted this platoon. My carrier platoon manouvered to get behind the Marders not that I expected to harm them but it would just keep them tied down as leaving this pesky unit unthreatened risked exposing his advancing infantry to thier fire and may halt his advance. My 25 pdr unpinned and passed its last stand test. Shooting was pretty effective with the panzer platoons both reduced to 1 tank whilst his infantry were mauled by the Crusaders loosing a couple of stands and importantly for me the 2.8cm AT gun team. I sent in my 3 tank troop to finish them off destroying the platoon without any losses.
Turn 4 and Tom was now in a lot of trouble but so was my entire Motor Rifle Formation which if he was smart could be lost this turn. His Mixed Panzer III platoon bailed tank remounted but failed its last stand test whilst the remaining Panzer III remounted and held its nerve. Toms infantry made it into the walled house and he advanced his 5cm guns. The Semoventes moved to support the advance easing the pressure on my remianing 25pdr. Shooting saw my Scout carriers go down to a hail of 5cm and 7.5cm fire from the AT guns and Marders, the infantry in the walled house opened fire on my infantry HQ but only killed one team meanaing the Formation was still in good spirits. The sole Panzer III picked off a Grant reasoning they were more of a threat overall than my Crusaders with their superiour FP rating (not a good option I felt at the time as killing a Crusader from the weakened platoon may have worked better overall for the VP score, I was pretty confident by this stage I would eventually win the game). My turn saw my gun again hold and more Crusaders arrive from Reserve. I manouvered the Grants and Crusaders to enable them to fire onto the AT guns from behind and the Marders and my remainign CS tank rejoined the remainder of the HQ to fire directly at the infantry. My Motor Rifle HQ team moved behind a ridge to prevent their easy loss. I left two Crusader troops to deal with the remaining Panzer III whilst the fresh unit moved onto the objective to support my HQ and existing troop to prevent Tom moving his infantry close enough to contest. Shooting saw the Marders all killed or bailed and 5cm guns destroyed. The Infantry lost their 2.8cm AT gun and HMG team to my massed Crusader fire from 9 tanks and the 25pdr. I killed the last panzer III.
Turn 5 and with Toms realization he was going to loose, he decided to go down in a blaze of glory advancing his infantry onto the objective, in the crop field hoping his mortar might get lucky he remained in place to try and hit my remaining Motor Rifle HQ team. The Marder platoon failed to remount but held firm. The Semoventes manouvered to engage the Grants closing on them. Shooting was ineffective with no hits scored. My turn and on came my last troop of Crusaders into the fray, my 25pdr finally failed its last stand test. I opened fire on the infantry killing all bar one team, the Grants fired on the Semoventes bailing them. I now only needed to kill the HQ platoon or the sole infantry team either with it routing or dieing and the game was over as I would either break the germans or drive them off the objective.
Toms turn and he unpinned and remounted everything, but failed the sole survivour role fro the Afrika Rifle platoon leaving his Formation with just the HQ and ending the game as his remaining forces withdrew.
Result win 6-3
Game 3
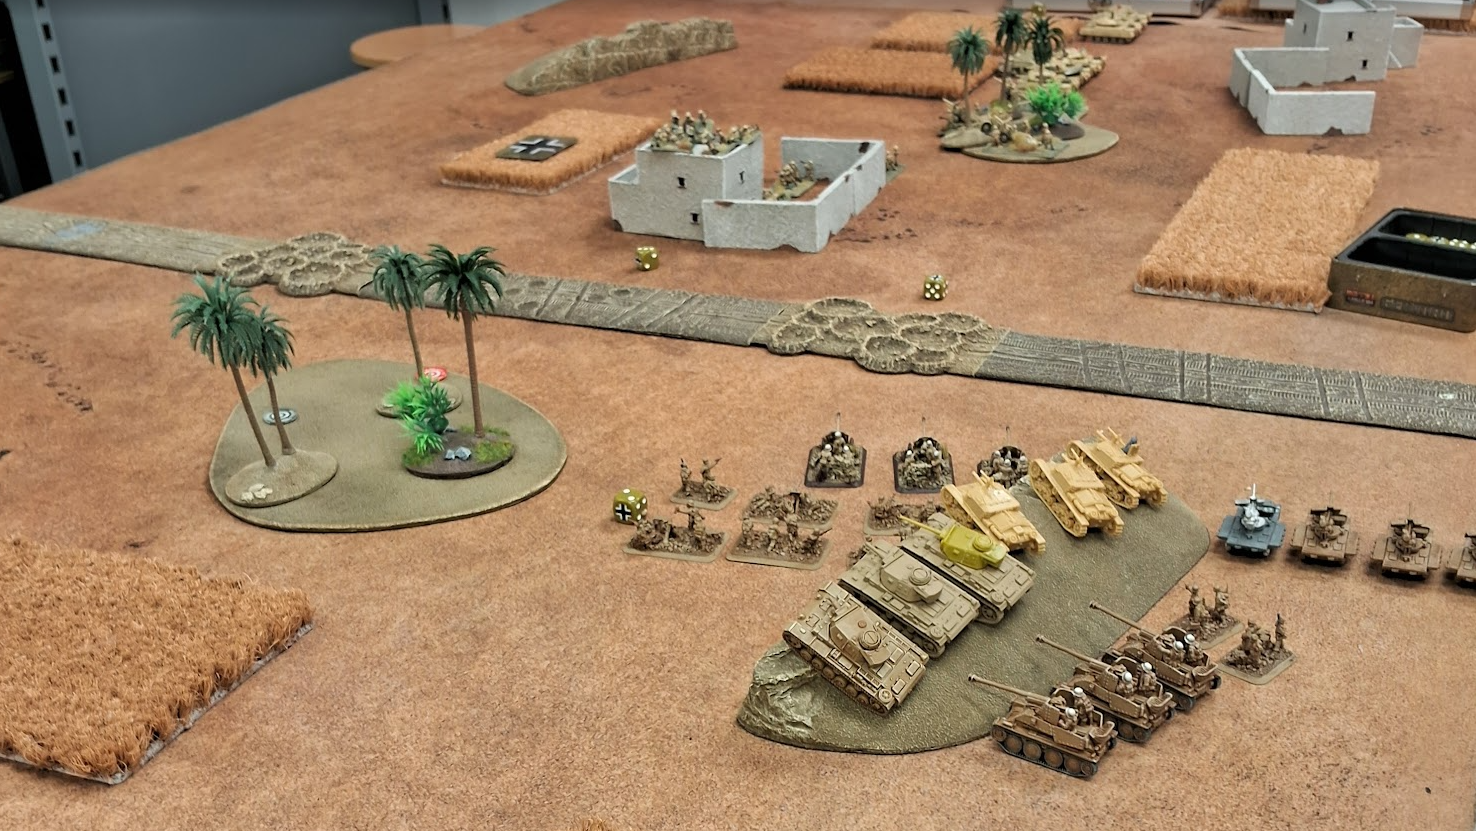
My final game of the day was vs Jacapo, he was someone I have not played before which is part of the reason going to events. Jacopo also had 2 wins at this stage with a very unusal MW choice of a British Comando Force (HQ, 2 Comando platoons, Mortars, HMGs, 6pdr AT guns, Priests and 2x Daimler Scout Troops) supported by Allied American M10 Tank hunters. A very potent force of quality troops. I again chose to Attack for some reason Jacapo chose to Defend leaving him with 5 platoons in Reserve (HMG, Mortars, both Daimler troops and M10s) as we rolled Killing Ground. For the first time I would start with the full might of my 6 Troop Crusader Squadron on the table, my only real worry was where would he place his ambushing 6pdrs – I needed to commit him to them early or make him unsure of where to place them and thus force them into an unfavourable position. This was a scenario where the exceptional speed of my Crusaders coupled with plenty of room to manouver in could prove absolutely decisive as long as I placed the objectives carefully.
The terrain for this game was also interesting Jacapo chose the side with a large desert fort wall in the centre making it hard for the troops on either flank to support each other. My strategy was to try and exploit this with the objectives placed as far apart as I could towards the corners of the table, when you have 14″ (35cm) Tactical movement you can afford to have to move a little further. This resulted in the two Commando units being placed in opposite corners unable to support each other whilst the Priest battery were behind the fort in the centre but with no line of sight for direct fire. I started by advancing my Grants and 2 troops towards one objective and two more troops and my Carrier patrol towards the other using my Cavalry Commander ability to move 18″ and still be able to fire – not that I expected to hit anything much, it was more to pressure Jacapo to reveal his Ambush position. This would allow me to either withdraw and focus all my efforts on the other objective and simply overwealm it with tanks or if they stayed hidden I could potential work myself into a position to outmanouver the defence by surrounding the objectives.
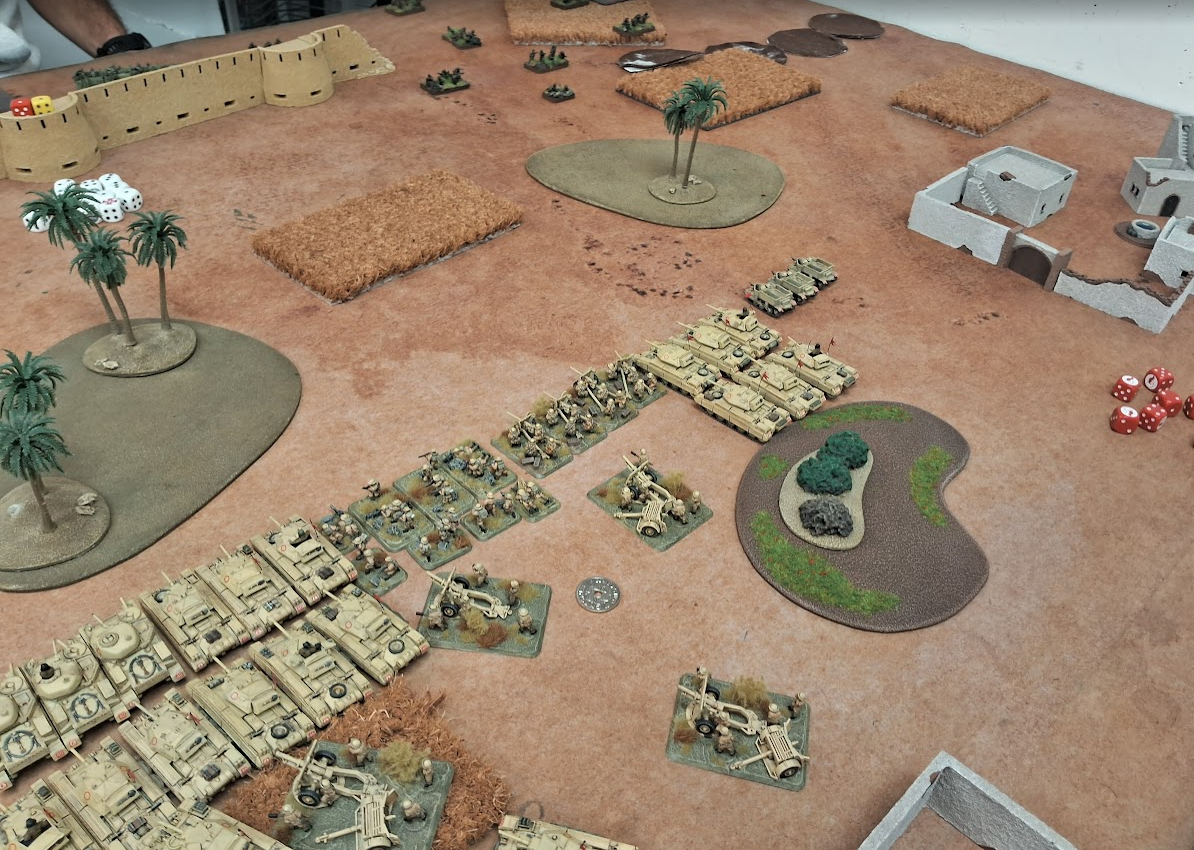
My remaining units occupied any terrain in the Defenders deployment I could on my left flank to prevent this being used for a close range Ambush. I used my CS tank Smoke Bombardment to screen my advance on the left flank from any potential ambush from in front whilst leaving my other flank uncovered to encourage the Ambush here – I was prepared to sacrifice one of my Crusader troops to pin this down. Jacapo held his nerve recognising the trap I had set him, he rolled for reserves and oddly brought on his HMG platoon, entering behind his right hand side objective. Shooting was limited to the Priests carrying out counter battery fire but failing to hit my 25pdr guns.
My turn 2 and I set up my platoons to assault the objective on my right whilst my AT guns kept moving forward to occupy the middle of the table. I stupidly forgot to move my infantry as I was concentrating so hard on manouvering my tanks to get them into a position where they could survive both an Ambush and the appearance of the M10’s if needed at the same time. Shooting saw me pin the Commandos down and kill 1 team which was moving up on to the fort wall. I pinned down the rest of the forces but couldn’t get any shots at the Priests. My initial assault went in uncontested the Piat being just out of defensive fire range. I killed a team but then the Commandos counter assaulted bailing a tank and the remainder broke off. They then consolidated so as I could not assault them with further platoons.
Jacapo seeing the risk on his left Ambushed with his 6pdr troop covering the objective I had attacked. Reserves were again successful and this time Jacapo elected to bring on his mortar platoon. The ambush shooting was truly terrible with just a single bailed out Crusader! The Priests pinned the 25pdr batter as I lost 1 gun to their repeated bombardment.
Turn 3 and I realised there was a big enough gap to get my Scout patrol round behind the far 6pdr gun so halting my Crusaders in a crop field I moved them round the side ready to assault whatever happened here this would leave them within 4″ (10cm) of the objective for next turn. I also pushed a couple of Crusader platoons back into the centre of the table moving at Cross Country dash speed and using Follow Me orders to completely re-orientate my tank strength from left to right – this looked spectacular on the table seeing these tanks in full flight cross half the table in one bound. My infantry advanced into a building near the left flank objective. My Grants and remaining two troops kept up the pressure on the left objective with one troop now in a position to fire on the Priests. Shooting and I killed 1 priest and bailed a second. I pinned down the infantry on both flanks with concentrated MG fire, my 25pdr troop ranged in on the Commando HMG and Mortar platoons but scored no kills. I fired at the 6pdr guns killing 1. I assulted a single gun with the carrier troop but the Commando Piat proved too close to me and shot one as they went in. I killed the gun but failed to win the assault as the counter attacking Commandos drove the two remaining carriers back. This left me sitting within 4″ of the objective facing off against a weakend Commando pltoon.
Jacapo started his turn with just getting the one reserve platoon this time he went with the M10’s realizing he had possibly left it a bit late before getting on the table. The came on on the back edge and he elected to bring them on the right hand corner facing my Grant troop to stop me repeating the same manouver against his other infantry position with just a lone Piat defending it from 4 tank platoons. The Prioest failed to remount and the Priests had to manouver to enage my Scout carriers. Shooting started off with the Priests missing the carriers followed by the M10’s failing to hit the Grants. The mortars and HMG’s opened fire on the Motor Rifles killing half of them and a HQ team, this reduced the platoon to a medium base, a Boys AT rifle and the light mortar (I would need to appoint a new platoon leader with my Force leader next turn). The Commando Piat picked off a Scout Carrier which could help.
Turn 4 and the Carrier held but with only 1 I couldn’t try an assault unless I managed to kill the Piat. With the repositioned Priests I now couldn’t risk an assault with my Crusader troops as the Priests would be close enough to participate in defensive fire. On my other flank I manouvered my 6pdr Crusaders to support the grants in engaging the M10’s. I opened fire through a combination of Grants, Crusaders, Crusader CS tanks and 25pdr artillery I managed to kill one and bail one as well as pinning all the infantry platoons. On the other flank I managed to pick off the Piat so deciuded to try and end the game by pushing the Commandos back with the remaining Carrier. I charged in but missed the Commandos motivated but failed to kill me pushing me back, here I had miss calculated and now was more than 4″ (10cm) from the objective for next turn. Jacopo got the remaining resurves of two Daimler troops onto the table, the M10 failed to remount, the bailed Priest remounted and the pinned infantry recovered. On the contestd objective the Commandos dug in whilst the Priests and Daimler patrols moved to be able to contest next turn. Shooting saw a lone Grant brew up to the M10’s and I lost a single Crusader from the 3 strong unit on my right but more importantly my remaining HQ team was killed bringing my platoon losses to two both from the Motor Rifles.
Turn 5 saw me move my Crusdarer troops to swamp the right objective if I could deal with the Daimlers and Priests. My remaining tank troops concentrated on killing thre M10’s the only other AT threat to my Force. I bailed out both remaining active M10s and destroyed the bailed out tank. On the other flank I knocked out the lead Daimler troop and picked off another Priest. Jacapo in his turn failed to remount the M10’s and they fled the table, the lone Dingo also withdrew. The second Daimler troop moved forward to be able to fire at my Crusaders on the objective. Shooting saw one of the two tank troops destroyed but this wasn’t going to be enough. With all his real AT defence gone I was in a position to win the game by assaulting either objective with little to stop me moving in – I still had the ability to launch a 7 tank assault with my HQ platoon joining a Crusader Troop which would be very hard to stop.
Turn 6 and I set up for a final assault on both objectives my losses were now 3 platoons the Commandos were still a challenge to shift so I opened fire killing off the Daimler and Priest platoons but I again failed to drive home an assault against the highly motivated Commandos on either flankl who again won the assault as I failed to counter attack. Jacapo repositioned attempting to dig-in on the objective after using his consolidation move to bring more teams close but failed the role. His shooting saw my Motor rifles loose another team to mortar fire.
Turn 7 and this was the end of the game. The Motor rifles held their groundand with a hail of tank MG fire, 6pdr shots and a 25pdr artillery bombardments the Commandos on the right objective finally succomed and I was left in possession of the objective with no enemy on that side of the table it was game over. My losses had been high again mainly in the Motor Rifle Company but a third victory was achieved.
Win 6-3
Overall this left me with 19 vps from my 3 victories and in first place. I was also surprised to pick up the best painted award which was a bonus as there were some great looking armies on the table top. Overall it was agreat day out with some interesting armies and some new faces. The shop is great with plenty of useful items in it (not to mention some 60 odd gamers playing a mix of systems) and is well worth a visit if you can get there. If you live fairly local and fancy a bit of gaming they have a well attended FoW night on Thursdays and run small events like this most months. I’m off to bask in a bit of glory before setting off into the North African night. Martin
