Bulge British – Baltic or Bust, an overview.
Finally Bulge British is here and what a bulge it is! Packed with six armoured formations and four infantry formations, plus a heap of support, all to get the British to the German Baltic coast.

Let’s look at the new formations. The book is largely split into the armoured divisions and the infantry divisions so let’s look at the armoured first.
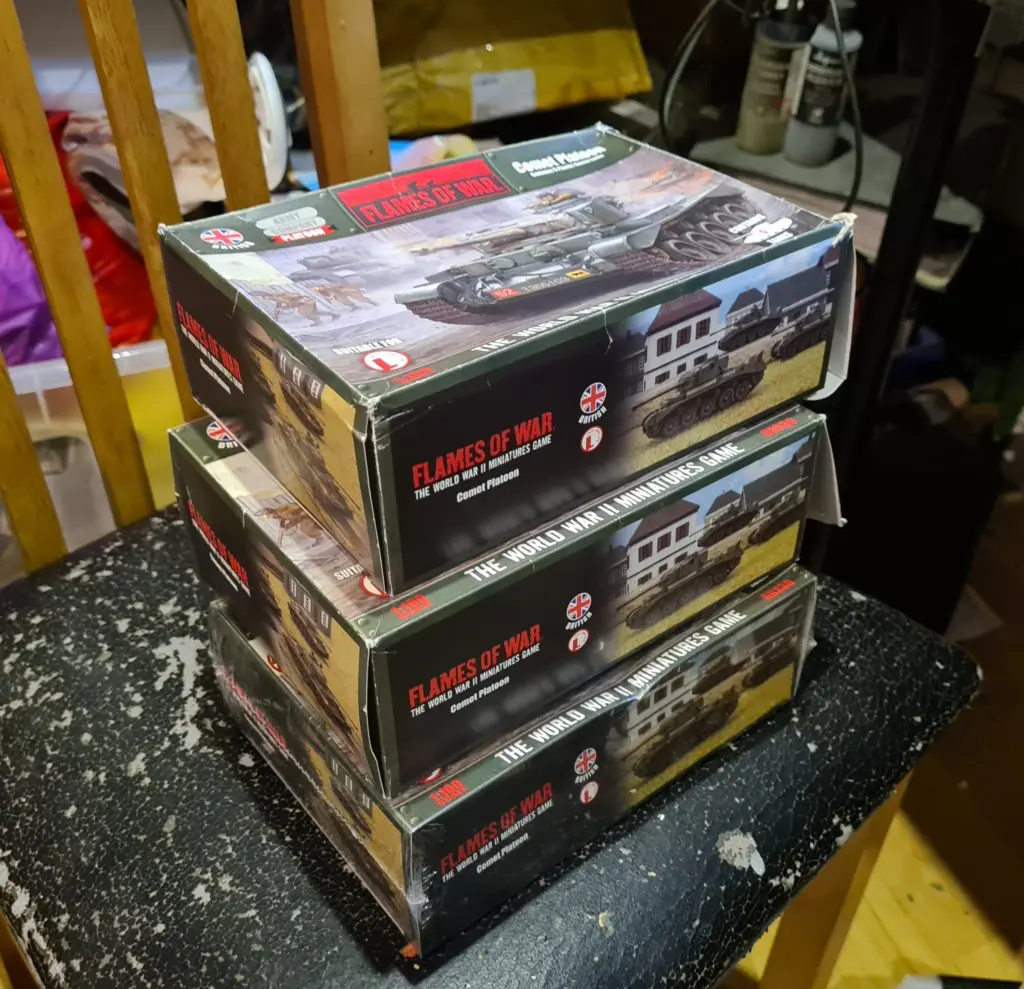
Ccccooommmeeetttsss!
Now, those who listen to the podcast know I’ve been waiting for the last cruiser’s triumphant return to FoW. The Comet is the pinnacle of the cruiser line which, whilst a flawed doctrine, did eventually produce some excellent designs, if generally lagging the Germans due to the material losses of Dunkirk.

The Comet takes the Cromwell as a starting point, adds a new, larger, turret and mounts a 77mm main gun. The 77mm uses the same projectiles as the 17pdr but combined with a shorter, handier propellant case; trading raw velocity for crew handiness and allow a more traditional tank turret with no extra loaders or side mounted breeches! The other benefit was that it gave the tank a HE and smoke round giving the Comet a true multi-purpose gun, all on a chassis with a good turn of speed and a bit extra armour to boot!
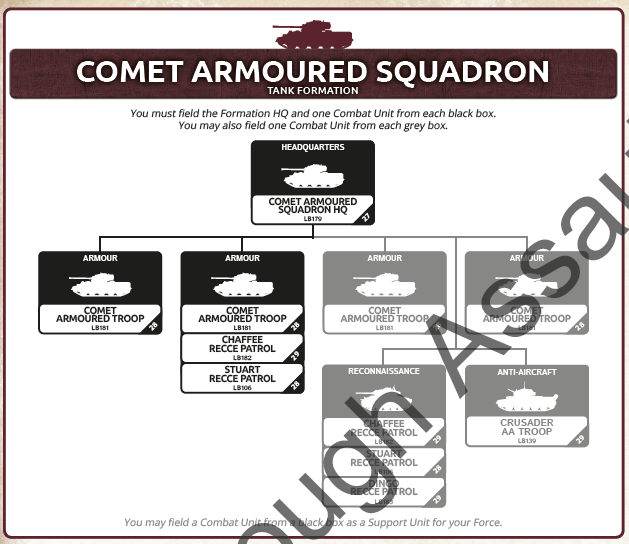
The formation mirrors what has become standard for British armour; HQ, two to four tank platoons, recce and AA. The second compulsory box can be recce (Stuarts or Chaffee – despite 11th armoured never using them and Desert rats not getting Comets till post war; suck it rat fans!) to help form a cheap formation. The HQ can be a mix of Comets and Cromwell CS tanks (the Comet being dedicated to the 77mm) whilst the troops can have three to four Comets. Of note is the Dingo unit. This gives a cheap recce option of three Dingos, helping to bolster the formation.

Hurrah for the Hussars!
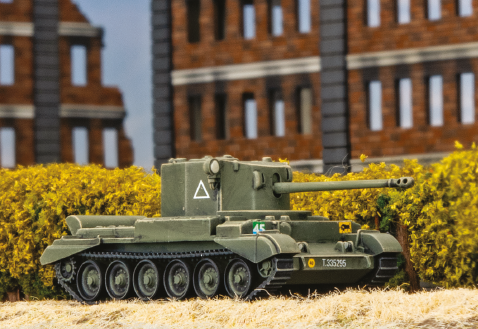
Whilst 11th armoured division was lucky enough to get the Comet before the end of the war, it didn’t quite get enough. The three regiments of the 29th armoured brigade fully fitted out whilst the division’s armoured recce regiment, the 15/19th Hussar, was able to equip most squadrons. B Sqdn, presumably on the naughty step for some transgression, did not, but did get its pick of the other squadron’s now discarded Cromwells and Challengers.
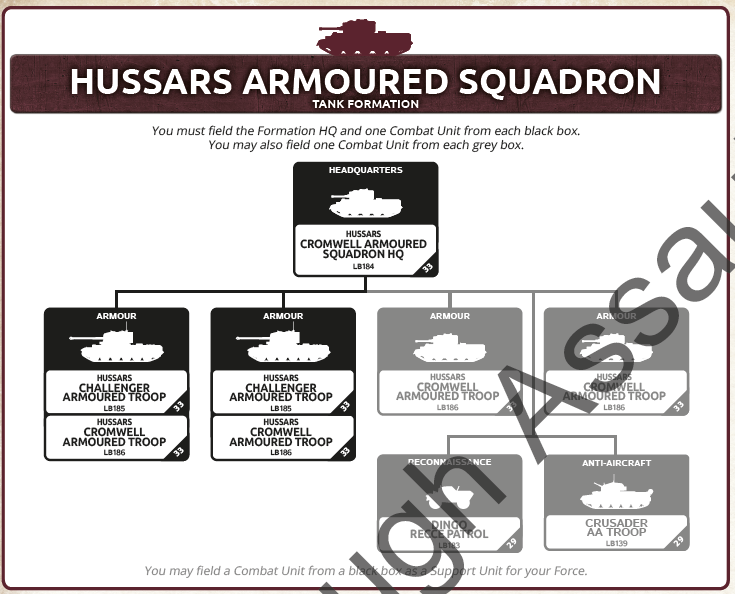
The upshot of this is that we get a formation that can have two Challenger platoons (of three to four Challengers) and two Cromwell platoons (also three to four tanks), both options being in the compulsory boxes. Dingos and Crusader AA round out the formation.
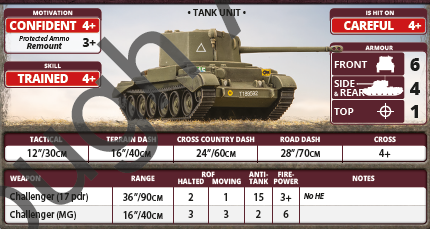
The Challenger is pointed similarly to the Comet, the tank that ultimately replaced it as the answer of upgunning the Cromwell. The Challenger retains the Cromwell’s speed and, somewhat generously, armour but the longer chassis drops its cross value. To make up for it, it gains a turret that estate agents would no doubt charge considerably for in Greater London as a single room studio flat, sporting a full size 17pdr (late) gun. The “late” denotes that we have gone from APCBC ammo to high velocity sabot ammo and, as such, got AT15. Eat it Panther Gs! Sadly the HE round is still lacklustre so we keep “no HE” but, hey, that what the Cromwells are for. BF have also toned down the excess of v3 by making the 17pdr rate of fire 2. Having two loaders in a turret because your round is stupidly oversized preserves your rate of fire, not increases it!
I’ll take a deeper dive on these two formations and their place in 11th armoured in more detail over the next few weeks and Mark will be looking at “a better list” for Comets.
Cromwell’s till the end
The Cromwell, or its derivatives, seems to be a recurring theme as we next encounter the Cromwell Armoured Squadron. This formation can be used to represent the Desert Rats post-D-Day as well as the armoured recce regiments like the Welsh Guards or 15/19th pre-Comet. The formation has the typical structure of two-four tank troops (one compulsory box allowing recce Stuarts or Chaffee), a recce box and a Crusader AA box.
The HQ is the normal mix of 75mm and 95mm Cromwells whilst the troops themselves can be one of two types – one to three Cromwell with one to two Challengers or Cromwell with one to two Firefly.

This, along with the recce options allows the players to tailor the formation to match their division; Challengers and Dingos for 15/19th, Challengers and Stuarts for the Welsh Guard and Chaffee and Fireflies for the Desert Rats. You can’t mix fireflies and Challengers in the same troop but you can mix them in the formation to reflect the Desert Rats having a mix of the two 17pdr gun tanks.
Guards! Guards! …
The Welsh Guards are not the only Guards in the book as we turn our attention to the Guards Sherman Armoured Squadron. These exchange the Cromwell for the ubiquitous Sherman, backed up by the 17pdr armed Firefly variant. The Sherman troops can be equipped with up to four tanks, two of them always 75mm but with up to two Fireflies. The Guards also have another trick up their sleeve… rockets!

Yep, for 1pt you can equip all the unit with Tulip launchers – the RP3 rocket from the Typhoon – giving you a one shot FP2+ bombardment that counts as two guns firing for each tank! AT1 won’t trouble tanks but dug-in panzerfaust infantry will be somewhat worried when these roll up! The HQ troop can also sport Tulips, making that four-string HQ option more attractive than normal.

…Guards!
The Guards Tank Brigade with its Churchills also get a showing. They are not too different to their D-Day version but now receive an extra formation unit; Panther Cuckoo! A single Panther to give an extra boost of AT to the formation. Just don’t get bailed…
Ramming Speed

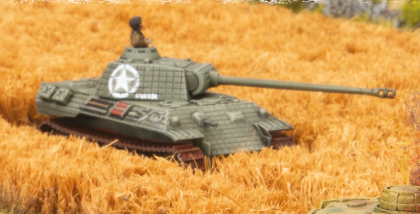
So, one of the big announcements was that the Sexton plastic kit would build Ram Kangaroo APC but also Ram gun tanks. I presumed that was just for fielding Ram OP tanks but, no, there’s an actual Ram formation. BF give the background that US tank losses forced the British to relinquish some of their reserves by reequipping the South Alberta Regiment, the Canadian Armoured Division’s armoured recce regiment, back to Rams. In reality the US just dropped the fifth tank in its platoons but, here, we have a ‘what if’ unit with two to four Ram troops, a Firefly troop, plus recce Stuarts and AA Crusaders.
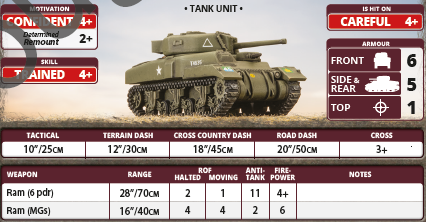
The Ram is basically a Sherman with a MG turret and a 6pdr main armament as well as a side armour of five! It’s a relatively cheap troop too so I’ll be curious to see if these end up being a sleeper hit, even if they aren’t to my taste.
Motorised Bulls
We finish the armour section with the Black Bull Motor Company. These are pretty similar to previous Motor company save that the M5 transports are not a card and can have .50 gun (29th armoured brigade stripped the .50 from their Sherman and reallocated them to 8th Rifle Brigade so the transports could be armed); a very welcome option.
Non-Australian Kangaroos

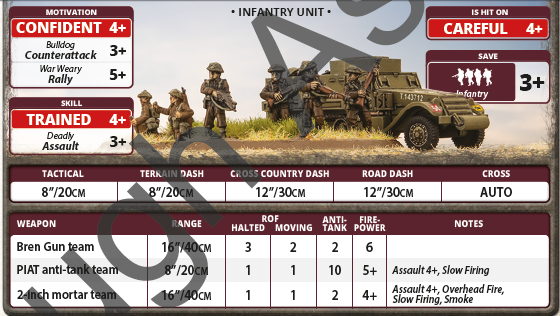
The Kangaroo Rifle Company are effectively the British late late war infantry. The differ from D-Day British infantry only in gaining the ability to take Ram Kangaroo APC as an option, bolstering the platoon cost by a couple points. The Ram Kangaroo improved on earlier efforts with defrocked Priests by taking surplus Ram tanks, removing the turret and ammo racks and fitting benches inside for infantry to ride on. This gave an APC with the protection and mobility of a tank whilst allowing a squad of infantry or two to close right up on the objective.

This is represented by allowing the “Close Assault” rule, allowing infantry to disembark as part of the charge into combat. The Rams themselves sit back and provide MG fire as they are reluctant and have a 6+ counter attack. The Close Assault rule gives a relatively handy way of mitigating the reduced rally of British infantry by saving them from being pinned until the defensive fire, at least.
Theirs is the glory
The final two formations deal with the valiant failure that was Operation Market, the airborne assault on Arnhem.
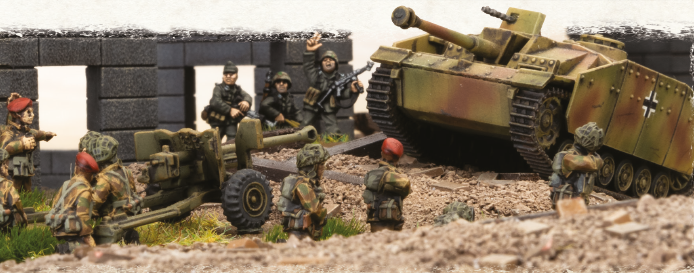
Frost’s Paratroop Company represents the 2PARA units that made it to Arnhem proper, including the accompanying Engineers and Recce Jeeps. As such, compared to D-Day paras, the formation has a few extra options including a Recce Jeep slot which can also be an extra unit of Paras, as well as allowing two of the three Para platoons to be Glider Pilots or Royal Engineers. The Para platoon and Royal Engineer platoon both receive a bolstered last stand of 2+ ensuring these guys will hold a bridge to the last team. The Mortar and 6pdr platoons are smaller than their D-Day equivalents; you can have two-three tubes in the mortars or one or two 6pdr in the gun troop, reflecting the dispersed nature of the single battery of four guns that made it to Arnhem. It’s a neat historical reflection though it may limit the formation’s attractiveness outside of historical scenarios.
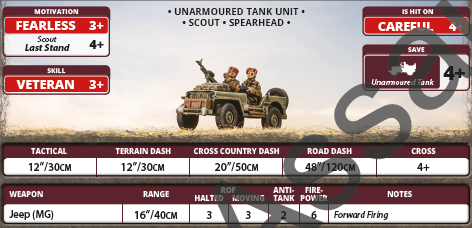
The Glider Pilot formation is two to five units of glider pilots, reorganised into fighting platoons after landing. The Glider Pilots were expected to fight with the units they landed with and were trained to use the guns and equipment their gliders carried to help make up for landing casualties. The platoons differ from the Para platoons by being true veteran units and having body armour that grants an additional 5+ save versus artillery hits, making them great for holding ground under fire.
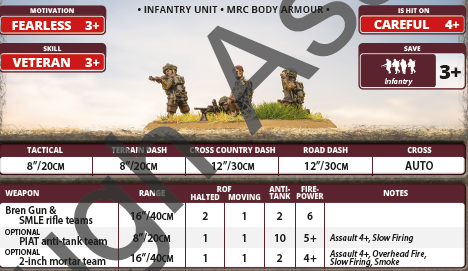
I’ll look at these uinits in the Market Garden context in more detail over the next month or so.
Support
The book provides a whole host of support options. Old favourites like 25pdr, Typhoons, M10C (bolstered to AT15) and Hobart’s Funnies return, but we also get some new goodies too.
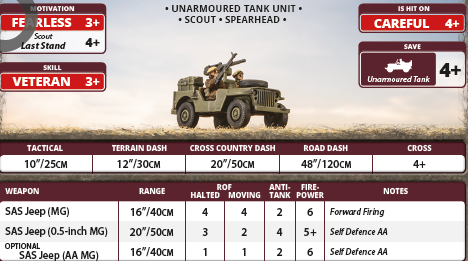
For recce, the Daimlers for the Armoured Car squadrons are joi8ned by SAS Jeeps. These guys were racing ahead of 11th armoured division in the advance on the Baltics. They provide a relatively cheap Fearless Veteran scout/spearhead unit though they get pricey once you start mounting more and more MG and armour on them! Sadly there seems to be no command card for using a formation of them.
Along with the general improvement of 17pdr (German players will question if it was needed) on the towed and M10 platforms, we also get the Archer self-propelled gun. Mounting a 17pdr backwards on the Valentine chassis and priced somewhere between the M10C and the towed gun, the Archer gives a gun that can’t be pinned or bullied by artillery but can’t move and shoot like an M10C can.

The 25pdr is joined by the Sexton which mounts the same gun on a Ram derived chassis. Its cheaper than the towed gun, perhaps a quiet admission that the 25pdr was too expensive, but which may consign the towed gun to the display case. Oddly the Priest is still an option even though it was dropped soon after the D-Day landings.
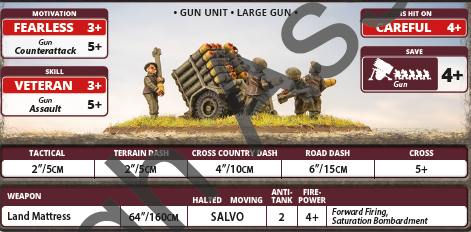
We also receive the Land Mattress rocket. Mounting Navy anti-submarine rockets an a wheeled chassis and used to brutal effect by the Canadians, the land mattress counts as two guns when firing and provides a FP4+ salvo.
Finally the static bofors is backed up by the self-propelled variant, mounting the gun on a cut-down truck chassis. The self-propelled version costs the same as the static one so I expect we’ll see the wheeled version become more prevalent.
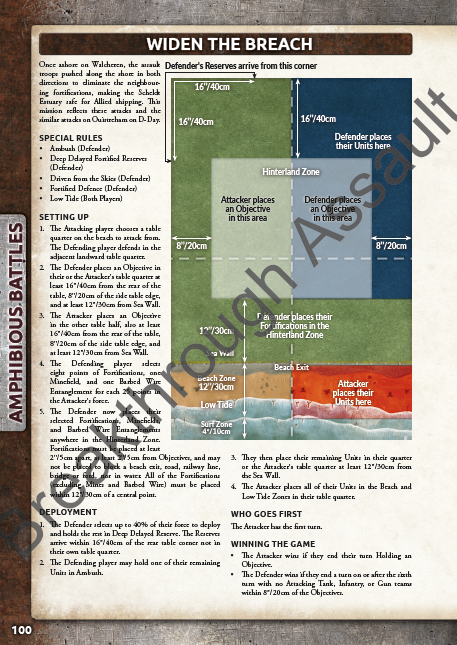
The book rounds out with the normal catalogue and painting sections but we also get a variety of amphibious landing missions to reflect the clearing of the Schelte and the Rhine River Crossings.
All in all, the books rounds out the British late war experience. Now, to get a Comet squadron painted!



12 comments