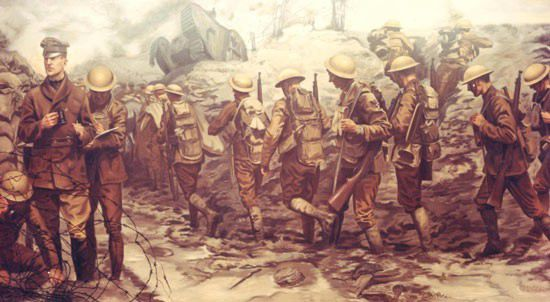
Great War AAR – Sunshine, Maxim Guns Unt Rainbows Everywhere
Today, Duncan looks back at a recent Flames of War Great War game where his US forces took the fight to the German forces in 1918.
Introduction
So it’s been a while since I managed to play a game and even longer since I wrote one up – so with the smell of freshly painted troops still clinging to my nostrils I decided that now was the time; and that time in history was 1918.
I’m going to start by caveating that neither myself nor Luke had intimately studied the Great War rules or scenarios and going back to V3 was actually quite tricky – other than that read on and enjoy the chaos!
Pre-game
Not really understanding what each army did we rolled a dice to see who would be US (odds) and who would be German (evens) – I rolled and came up with the Germans. Now I love playing the Germans usually but not when there are new toys to be had and especially when 4 of those new toys are the cutting edge of 1918 tank development but thems are the breaks sometimes. Again not having played before we agreed a point(ish) total of around 1650pts as that put the majority of all the toys on the table – which is always a nice feeling.
Lists
Luke picked first, and controversially, went for a CT force from the 42nd “Rainbow” Infantry Division rather than the CV force available from the 1st “Big Red One” Infantry Division.


The reason for this was pretty apparent once we started totting up points – the Great War point’s values for things are incredibly high! Going CT meant he got a lot more toys than I would and as it turned out the downside of being easier to high was not that critical. I chose a much more grizzled force of CV from the Infantrie Kompany – I wanted to go full Stoss Kompanie but my goodness they are costly!


Set Up
The way that you decided the attacker and defender is also very different. The most important of which seems to be if you included an artillery battery within your force. Neither of us had, and we both had chosen some armoured assets so ultimately it came down to a die roll which resulted in the brave boys of the 42nd on the attack.

There are 4 very different scenarios in the Great War book and for simplicities sake we opted to play number 1 The Big Push. Again this scenario has some cool, WW1 specific rules that a) we had to get our heads round and b) gave it tonnes of flavour and variety from a regular Flames of War game. Special mentions, with my abridged explanation, go to:
Cratered Ground
If stationary infantry and man packed guns in the open count as in bullet proof cover
Preliminary Bombardment
All defending platoons start the game pinned.
Overwhelming Force
Recycle attacking infantry platoons but take them into account when calculating force morale.

As the defender the first thing I did was to set up a trench line across the 4ft table and then I got to deploy 6 barbed wire entanglements across No Man’s Land. The trench line was easy but there was some head scratching from me as to how best to deploy the wire. I chose to create natural gaps in the wire and hopefully channel Luke’s forces through these breaks or force him to risk the 50/50 roll of getting across the wire where he wanted. I’m still not sure that I made the correct call but only experience would be able to shine a light on a better alternative I think.
Finally I split my force into the half starting on the table and the half that would appear from strategic reserve. I opted for one platoon of infantry, both infantry guns and the machine gun platoon which I converted into 3 machine gun nests with the last machine gun dropping back into reserve. I strung the infantry out as far as I could along the trench line with one 7.62cm Krupp gun at each end of the Reserve trenches – the machinegun nests I deployed equally along the line so that they could, if required, support each other with machine gun fire.
Luke started with everything on the table and the first turn… Squeak! The win conditions were from turn 6 Luke starting his turn in possession of one of the two access trenches or if I could deny the trenches from him.
He set up a full strength infantry platoon either side of the central wood, which was itself occupied by his machine gun platoon. His 3” trench mortars went on his left and his borrowed French tanks and attached French flamethrowers on his right supported by his short platoon.
Turn 1
US
Luke decided that you can’t make an omelette without breaking eggs and to get stuck straight in. Flowing largely through the gaps in the wire the US troops stormed forward straight into the teeth of the German guns. The two 37mm guns of the French made FT-17s shot at my left-hand most machinegun nest and pinned it again. The trench mortars targeted the right-hand most machine gun nest again hitting once but not destroying it. The rest of his rifle and machine gun fire did nothing against the heavily entrenched Germans which meant it was over to me.

German
The first thing I had to do was check for reserves… yep none of those. Then on to try and rally everything on the table – which as a predominantly WW2 player I found most unsettling and just as unsuccessful! One machine gun nest decided that ceasing to hide and firing against the on rushing wave of US troops was a good idea.

I focused my pinned and unpinned machine gun nests on the left hand infantry unit and managed score a couple of hits but not enough to pin them. The single shot from my left hand infantry gun missed the FT-17s and on the right hand side, where everything was pinned, I manged to pin Luke’s left hand infantry platoon but they stubbornly refused to die!
This next turn was likely to be critical already.
Turn 2
US
First Luke rolled to rally his pinned down troops which of course they did and then it was a human tidal wave of US troops assault the Germans all along the lines. On his left the FT-17s moved up to target the right most machine gun nest again – again pinning but not destroying and there supporting infantry moved up to assault next turn pinning the German defenders with accurate rifle and machine gun fire. The 3” trench mortars took aim at the nest on their left and missed completely this time.
Meanwhile the French flame throwers moved up right of their centre and unleashed a torrent of fire upon the poor German defenders but their shooting was wayward with only one stand of infantry succumbing.

The assualt phase proved very swingy the left hand platoon swamped the defenders killing 3 in total and caused the Germans to fall back.
German
Yikes! Things were looking extremely shaky already and it was only turn 2 – it’ll be ok because my reserves will turn up… never mind, carry on with what I have on the table shall I?
The (continuing) bad news was that the US were in the trenches but it was not all doom and gloom. I started by rallying everything apart from my infantry that had just fallen back and started to pour on the fire across the front hoping to stall the Americans.
On my the left hand side the machine gun nests managed to bail out a FT-17 and the infantry killed a couple of stands of US troops eyeballing them across No Man’s Land.
On my right the infantry platoon shot largely ineffectively against the new occupiers of their trench line but the machinegun nest managed to snipe one stand of infantry off.

There was no close combat so I had to weather the US storm for another turn before reserves could arrive and begin to assist my beleaguered troops.
Turn 3
US
Luke began by again rallying his troops on his right and jumping back into the FT-17 (a little red faced I imagine) but importantly the infantry on his left that were occupying the trench line remained pinned.

Luke’s second wave of infantry would be able to start pressuring the already stretched Germans this turn and his firing began to start taking its toll. My left most machine gun nest was destroyed but highly accurate FT-17 fire from the very lip of the trench works, the machine gun fire and rifle fire reduced the trench defenders to a couple of rifle stands and a command stand as well as ensuring that they were well and truly pinned. In the centre my company command was pinned and the machine gun nest on my right was pinned again by the trench mortars – hanging on by its very fingernails! My right hand infantry took another casualty and that was enough to break these beleaguered troops.
In the assault phase the Americans stormed the left hand trench and finally broken in – killing a stand of troops. The Germans motivated and swung back and killed a stand of the assaulting Rainbow Division troops and stalled the attack.
German
Good grief I was in trouble! Thank goodness that I was guaranteed something turning up from reserve this turn that’s all I can say as the front line was buckling, broken and battered. I only got the single reinforcement this turn but it was one of the fearsome looking A7Vtanks which rolled on from my right hand communication trench to shore up that side of the battlefield.

On my left what was left of the trench defenders rallied, as did the company command in the centre. The machine gun nest in the centre stubbornly refused to rally but it’s counterpart on the right pulled itself together and upper its rate of fire again and in the firing phase, with the assistance of the machine gun festooned A7V torn into the US platoon on the right. Fortunately for them being stationary in the opened was not the death sentence it usually is and the bullet proof cover stopped all but one shot.
On my left the shooting was minimal but I was stubbornly still clinging on. Finally in the centre a single round from my machine gun nest took an American machine gun in the wood out – we realised that the wood was not in fact bullet proof cover as it was not open ground!
Turn 4
US
Luke started by rallying his platoon on the right but his platoon on the left that had worked so hard to get into the German trenches stubbornly refused to budge. The arrival of the A7V led to his left hand platoon jumping into the freshly vacated trenches in front of them and consolidating.
The tanks and infantry hammered away on my left hand platoon and scored another kill – it was getting extremely dicey over there very quickly.

The trench mortars finally zeroed in accurately on the machine gun nest on my right and blew it to smithereens, it had done its job amazingly though but it was a blow to see it destroyed.
There was no assaulting this turn so the Germans had a brief reprieve but needed to regroup quickly this turn.
German
Right! The US troops had stalled like a wave on the beach but now I had to try my best to turn them back. I managed to roll for 2 platoons to turn up this turn and rolling the next A7V came on my left hand side and an infantry platoon on the right – I couldn’t really have asked for anything better than that.

I was quickly on to the firing phase and my right hand machine gun laden A7V sprayed the occupied trenches in front of it pinning down the US troops squatting in them. On the left hand side the A7V killed an infantry stand and bailed out an FT-17. The sole surviving machine gun nest ploughed its fire into the shaky US troops on my left killing another.
No assaults again and turn 5 beckoned.
Turn 5
US
Luke failed to rally either of his assaulting infantry groups but the FT-17 crew did at least jump back into their tank; no assaults for him this turn then! His firing was largely ineffective with the trench mortars missing one A7V and FT-17s shooting the other and watching their shot bounce harmlessly off it.

German
What was left of my left hand platoon rallied in their trenches- gritting their teeth one final time – supported now by the single machine gun left from the machine gun nests at the start of the game who turned up on my left most communications trench. On the right the reserve infantry stormed forward and got in a position to reclaim the lost trenches in a ferocious counter attack.
The weight of fire told on the US infantry on my left whose moral was shattered by a hail of machine gun fire. On my right the A7V ploughed more machine gun fire into the defending US troops in preparation for the impending assault but did nothing more than keep their heads down.
In the assault phase the Germans piled on the pressure by assaulting the US troops on the right hand side of the battlefield. The US defensive fire made no impact on the rampant Germans and the assault killed 2 stands of US troops and force all but one stand to vacate the objective.
Turn 6
US
The worm had definitely turned and the US were on the back foot now but it was still on a knife edge. The scenario allowed for Luke’s infantry platoon to be recycled and so that came double timing on from his table edge but importantly the platoon on his left failed to rally remaining just inside the trenches.
The trench mortars honed in on the last remaining machine gun nest but only managed to pin it whilst the FT-17s ineffectively continued to fire at the AV7 and German trench works.
German
The final remaining machine gun nest rallied, as did the German infantry. The left hand AV7 remained stationary with the right hand one moved up to plough machine gun fire into the hapless US troops struggling to get into the trenches. The firing phase bought more misery to the Rainbow Division with the double timing reinforcements being racked by two machine guns and the AV7 resulting in 5 losses and a morale check. On the right more AV7 machine gun fire cheekily killed a US trooper.

The assault from the Germans killed the last remaining stand in the trenches and broke the US troops on my right ending the game.
Wash-Up
And with that it’s all over, it felt a lot longer than just 6 turns – but it was a tonne of fun! The initial feely of helplessness in the face of the overwhelming US forces swung completely in the later turns and I was exceptionally lucking with my reserves.
The trench mortars were very unlucky over the course of the game with a 3+/3+ to destroy valuable machine gun nests which were the lynch pin of the German defence. In retrospect I think two AV7s was too much of a point sink – yes they were neigh on un-killable but they were a lot of points that were going to struggle to earn their cost back or efficiently hold or retake trench lines.
Luke’s FT-17s were very underwhelming with their low velocity guns struggling against the AV7s and their machine guns not really pushing through hits vs. the entrenched Germans. I think both sides could use some more options in terms of units – field artillery and more infantry I think.
For a first game it was a refreshing change from the usual games of Team Yankee or Flames of War and I’m looking forward to the next game.


4 comments