Survival of the Fitter-est. Painting the SU-17/22

Battlefront were kind enough to send me a couple boxes of the new SU-17/22 Fitter kit for WWIII: Warsaw Pact. Let’s take a look at painting them up in East German colours!
Research
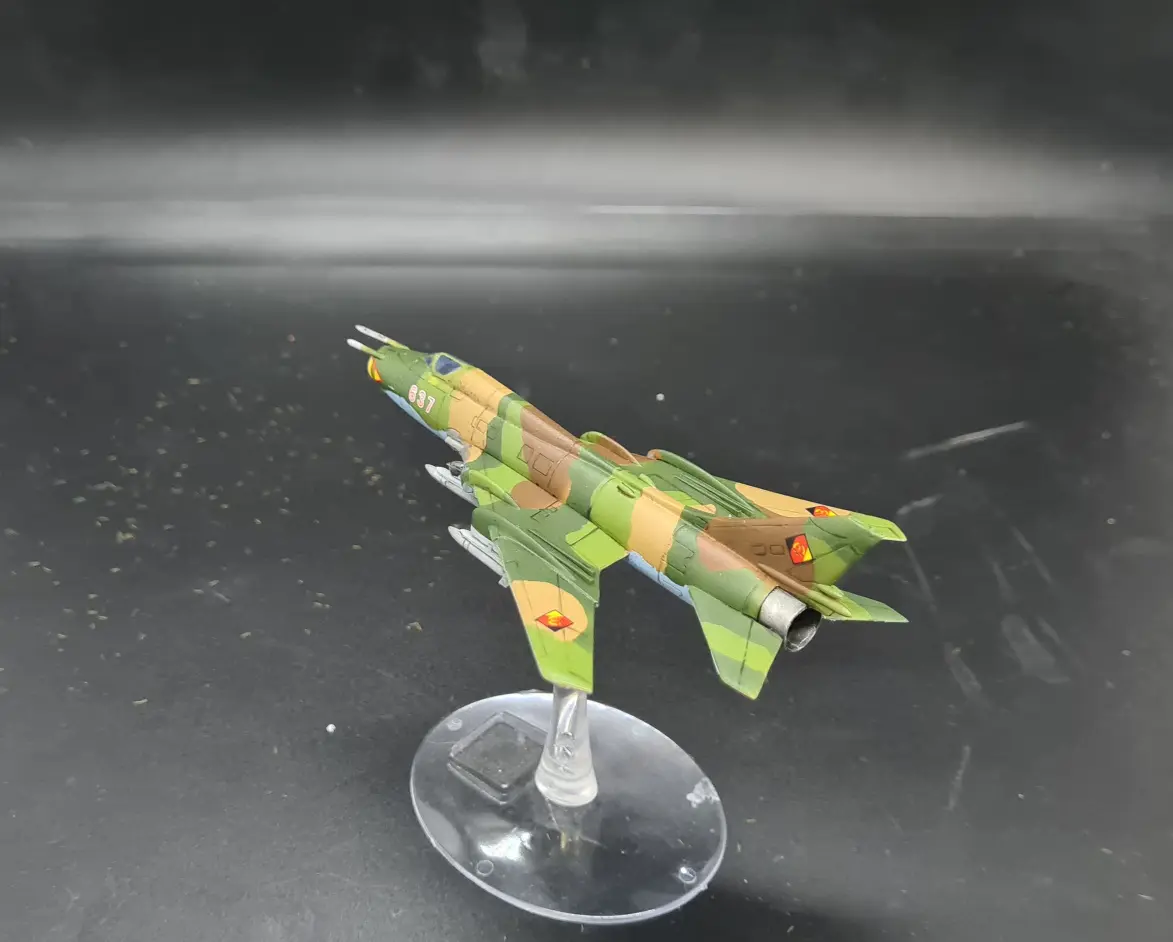
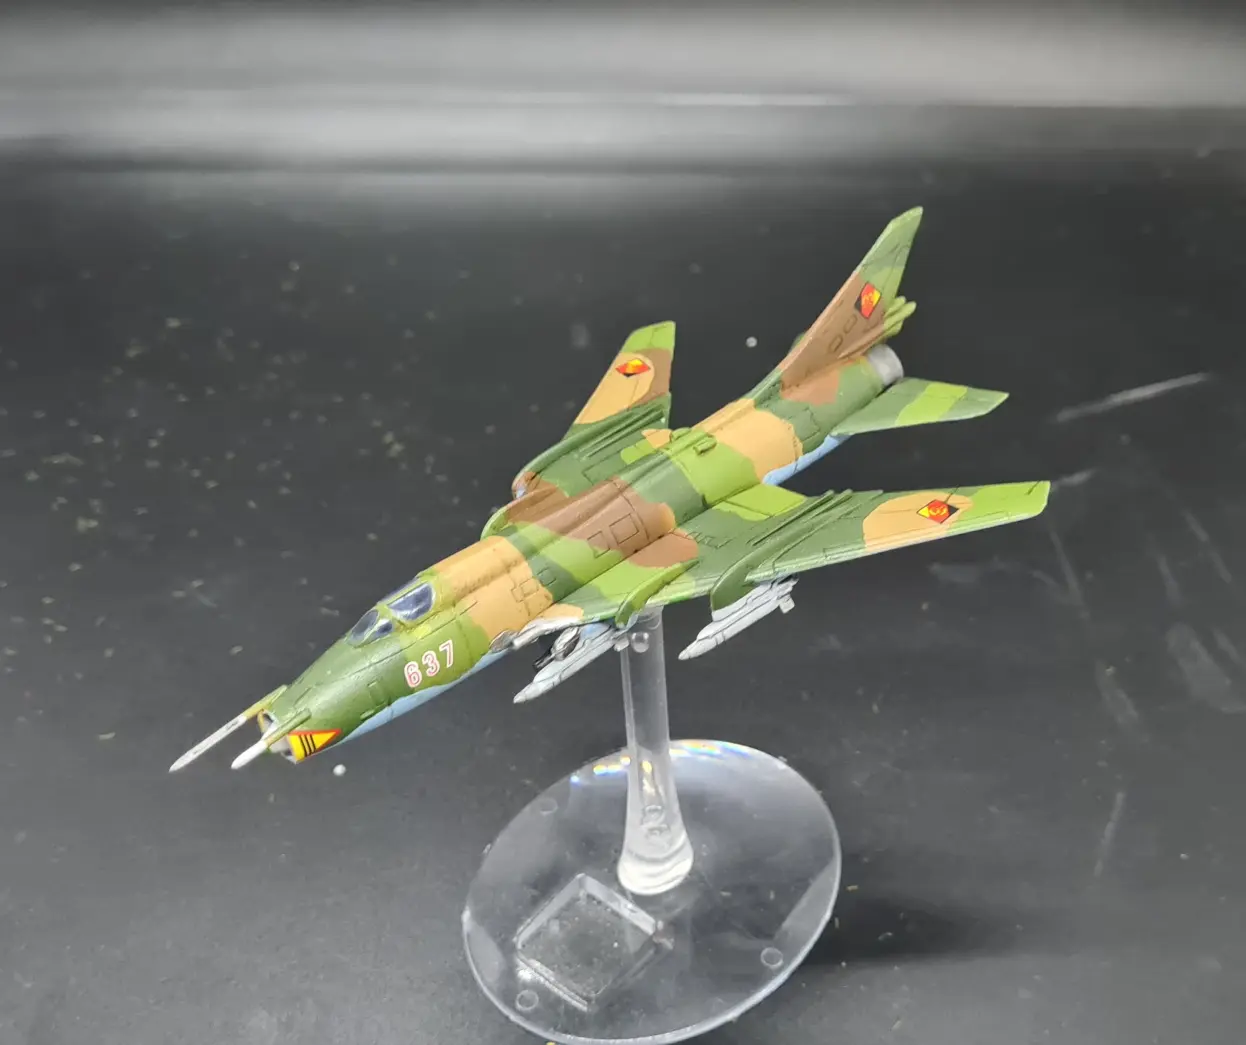
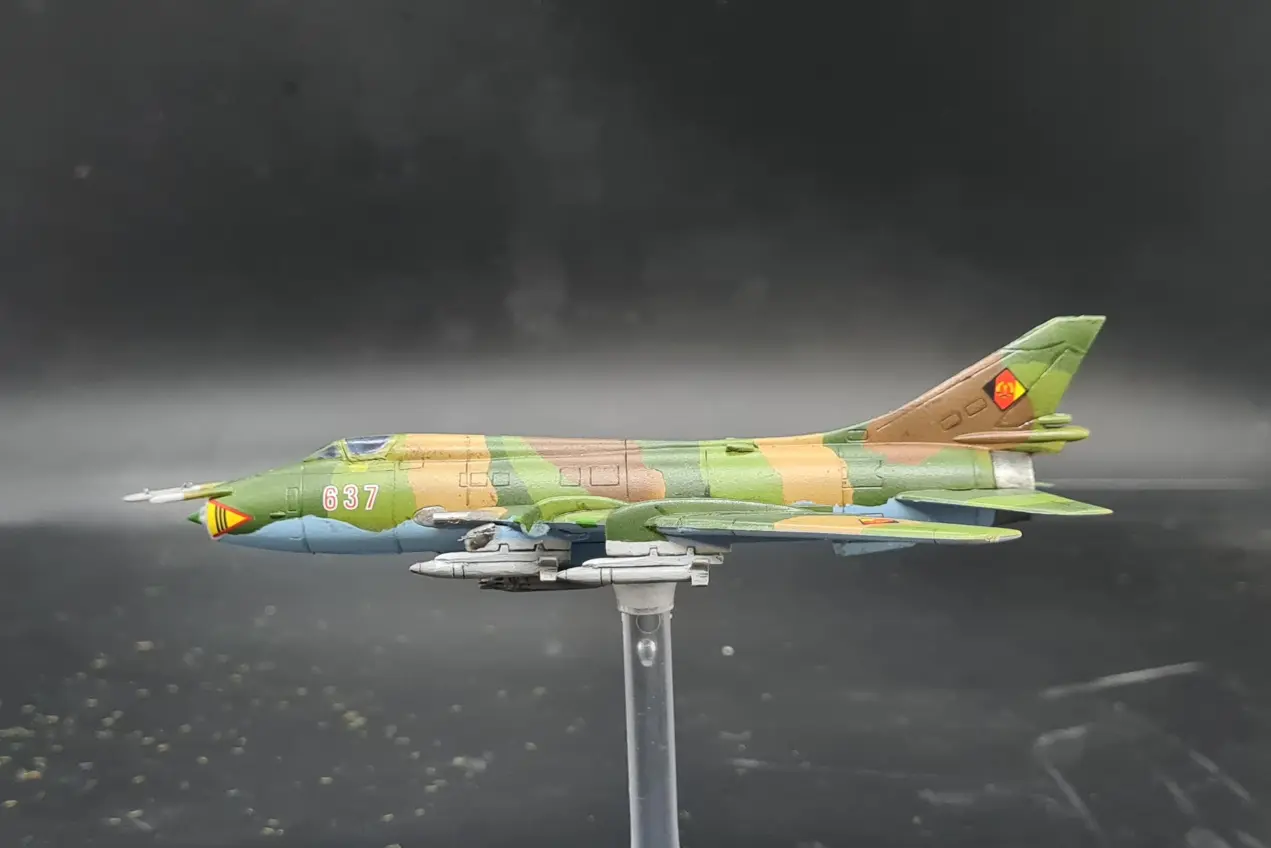
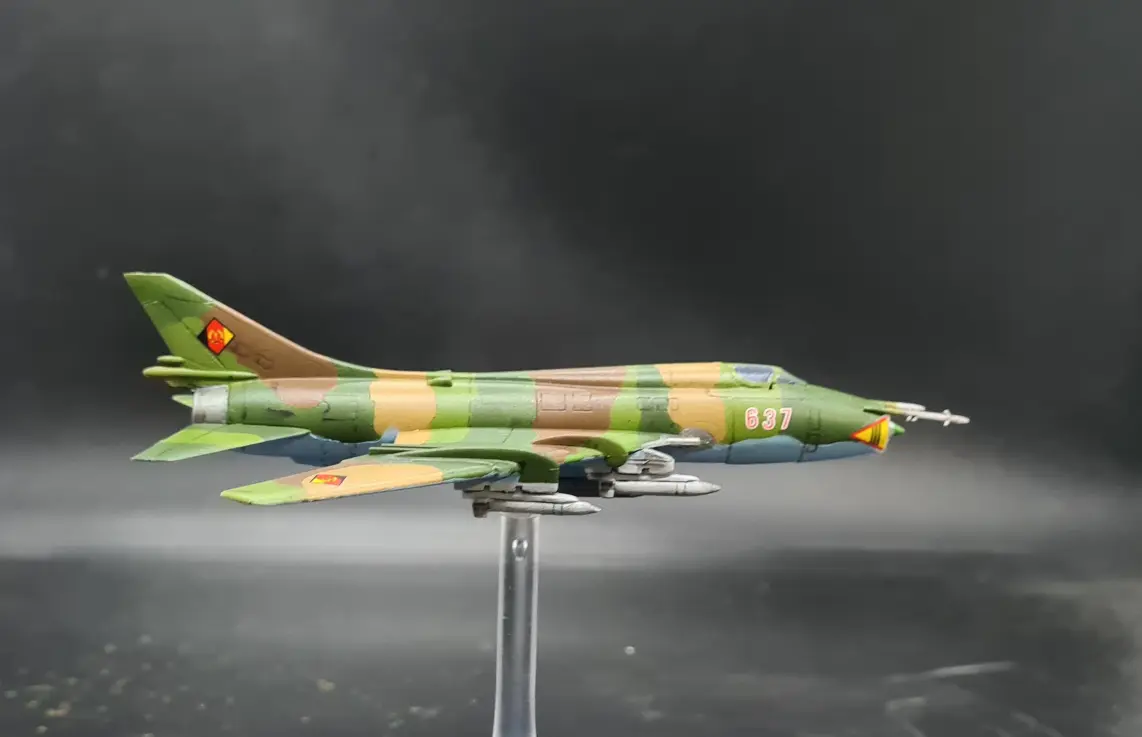
The SU-22 was used by the Luftstreitkräfte der Nationalen Volksarmee (Air Forces of the National Peoples’ Army) in the cold war period, with 54 SU-22M4 and two seater UM3K models being used.
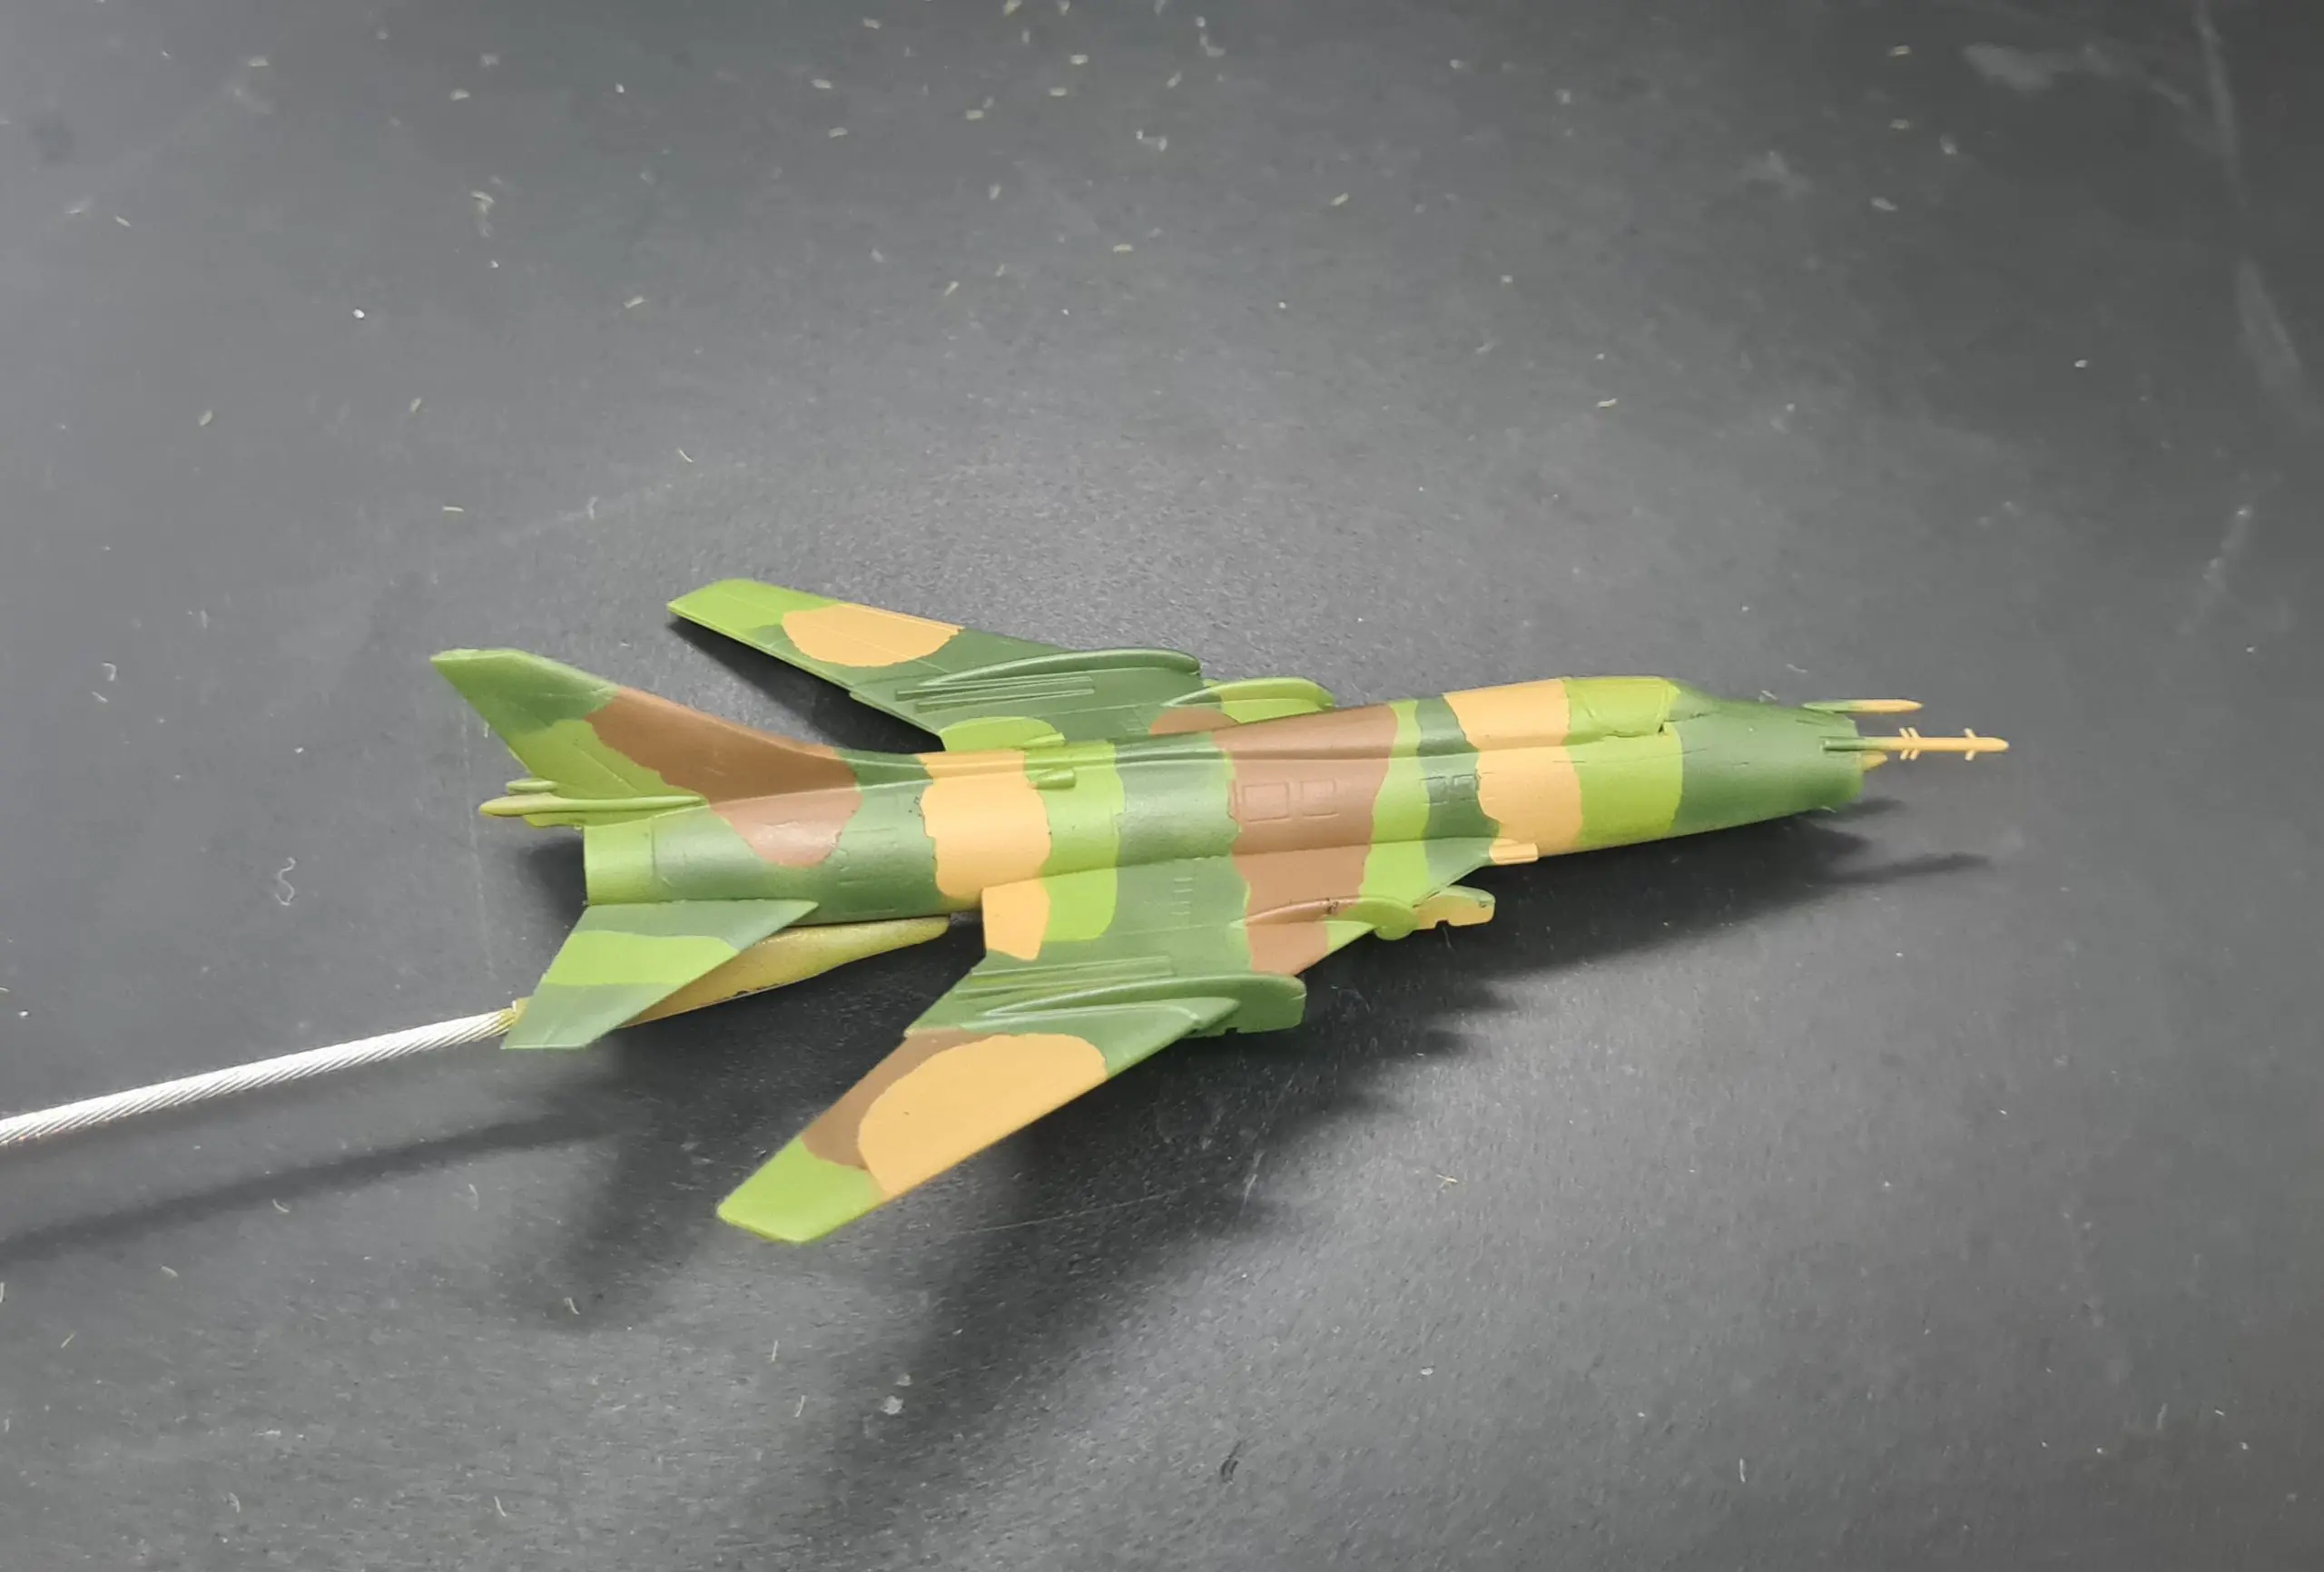
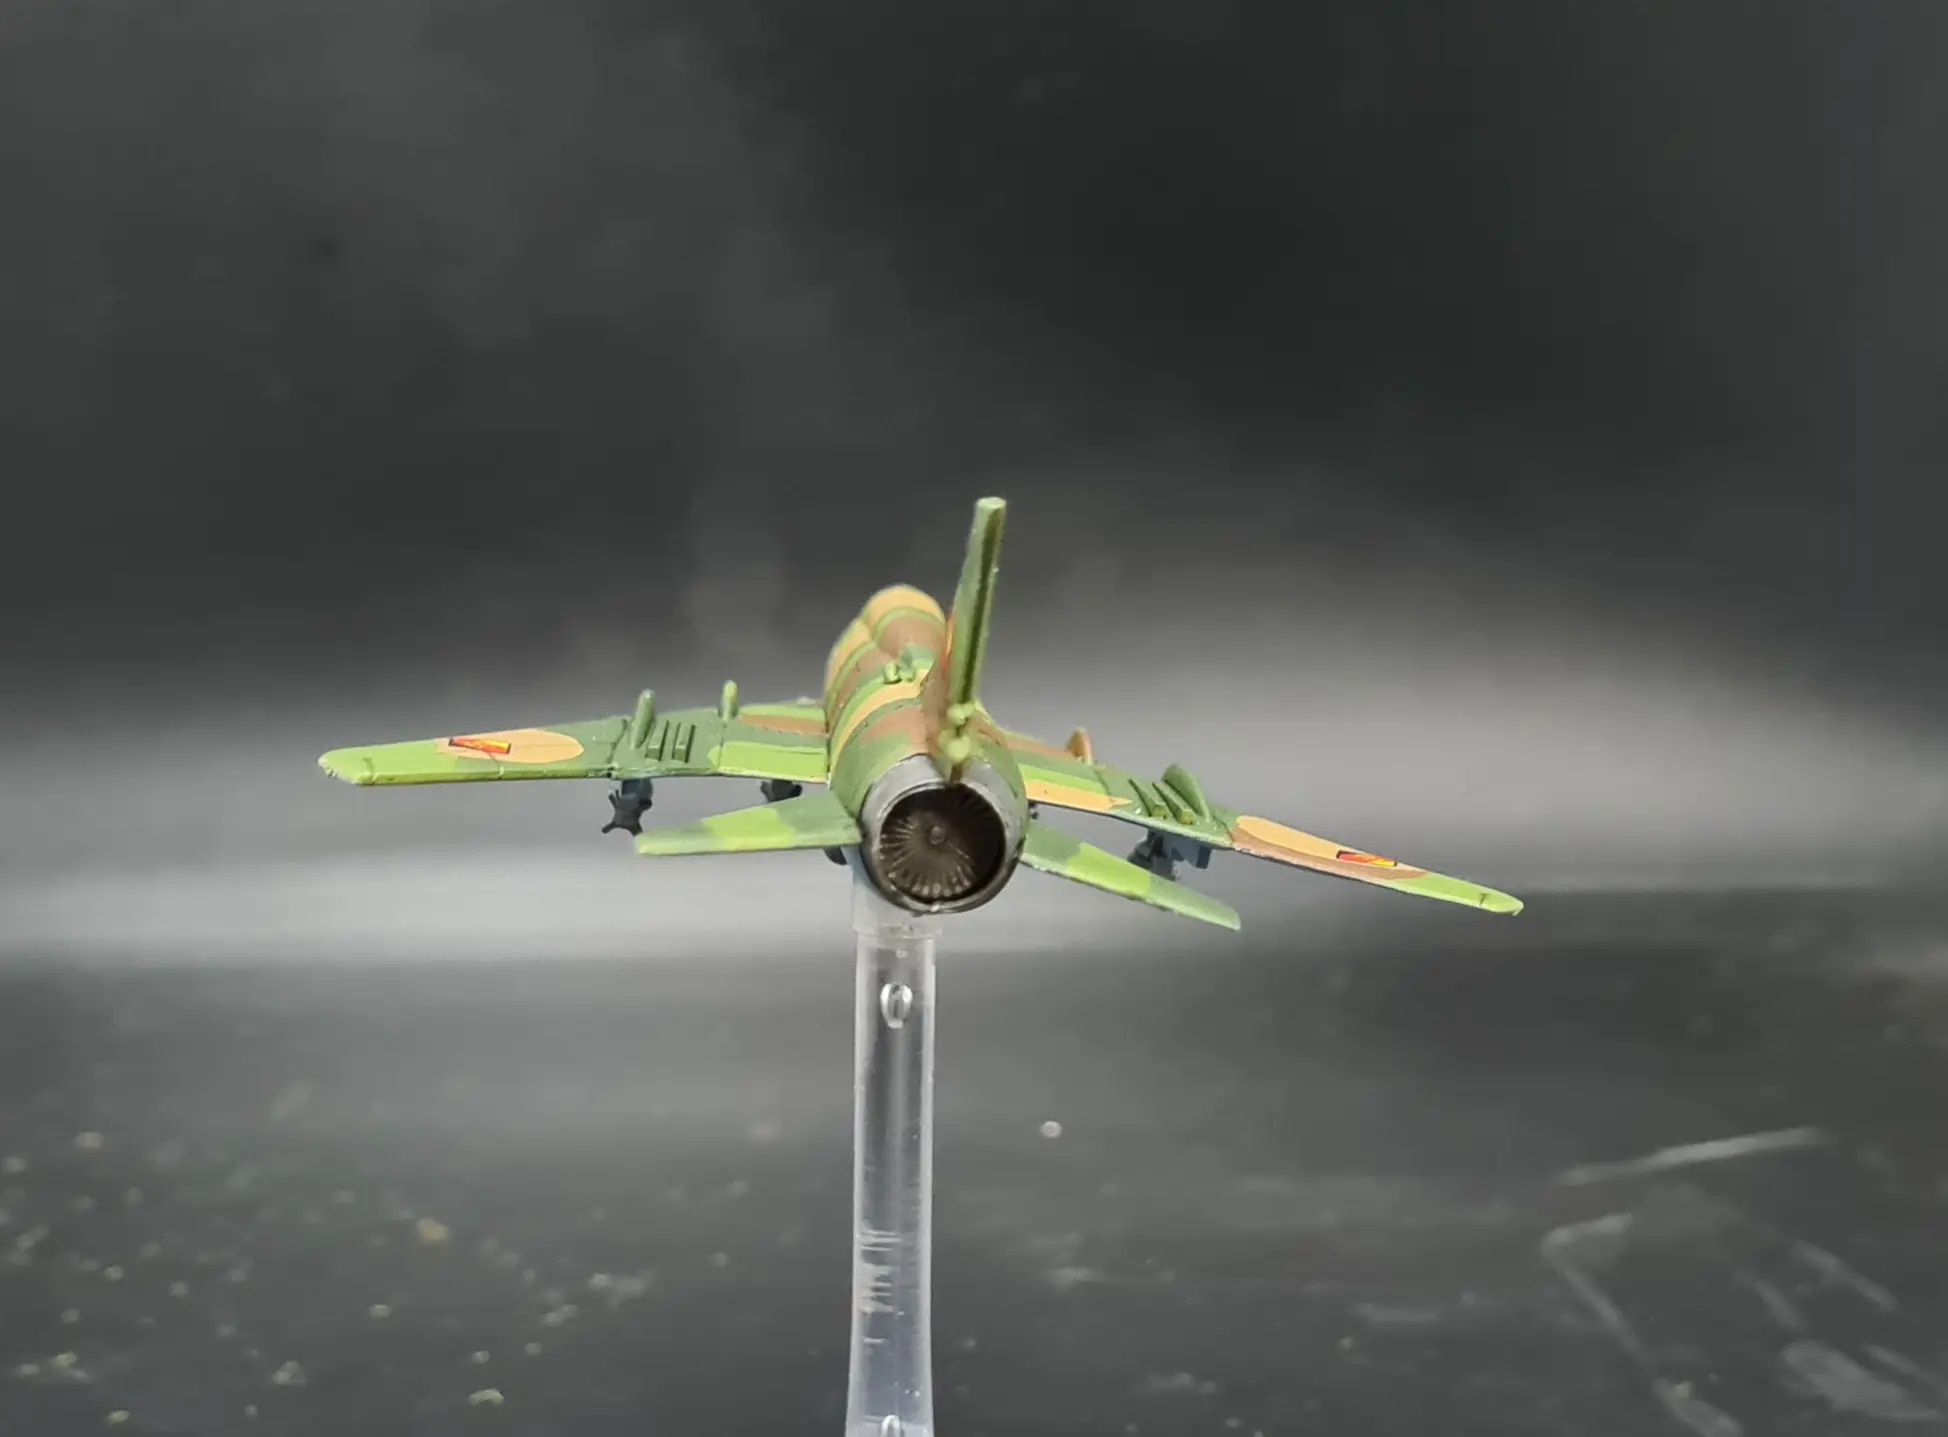
As a fighter bomber, the colour scheme reflected the typical European air arm practice (on both sides) of using a blue-grey underside and a camouflaged upper surface. This scheme utilised light green, dark green, a golden brown and a dark brown, applied in hard edged irregular stripes over the body. The exact pattern seems to have been changed a few times as I could find very little agreement between the various painting instructions and large scale models so I decided not to get two hung up on it but just ensure the four planes matched each other.
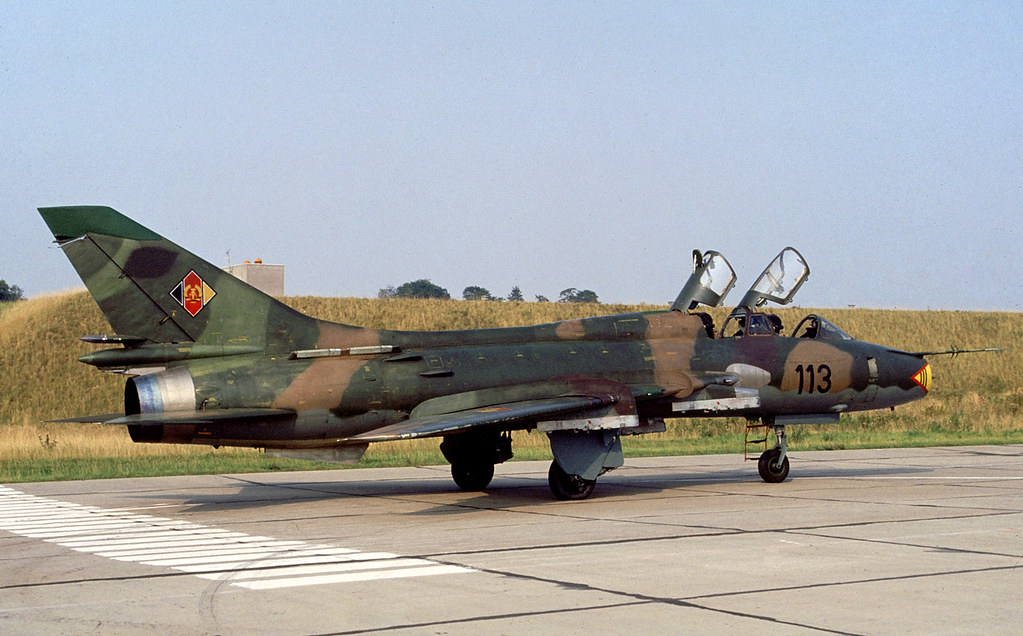
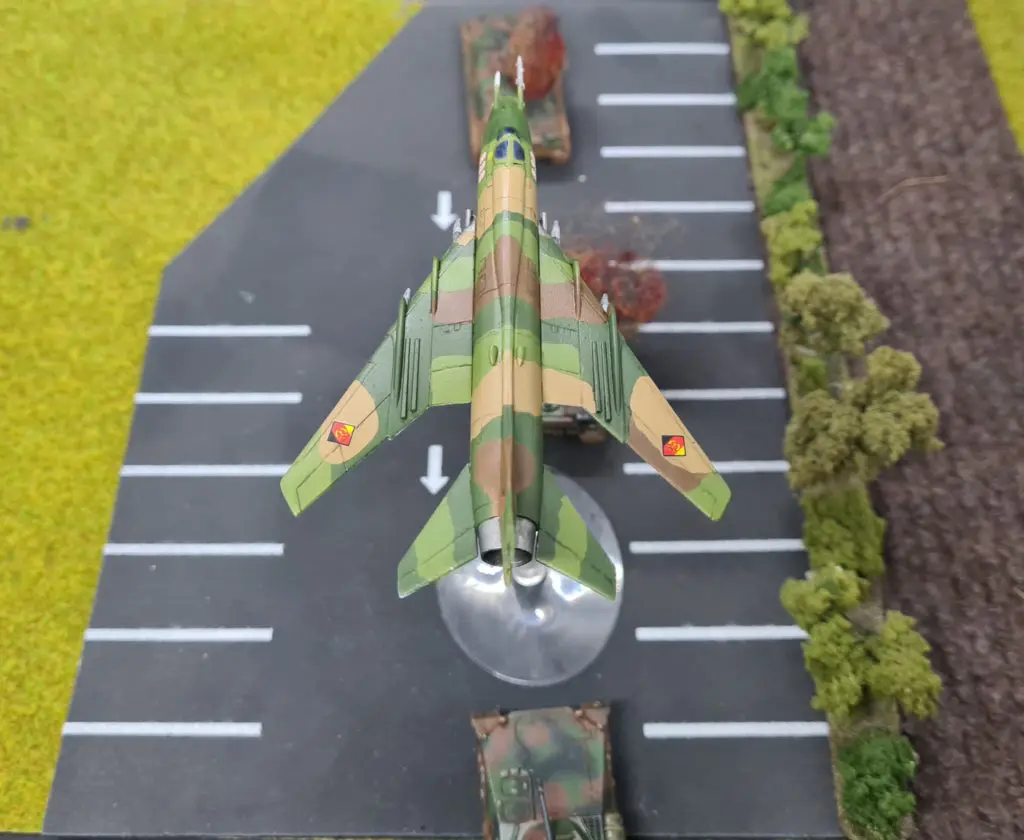
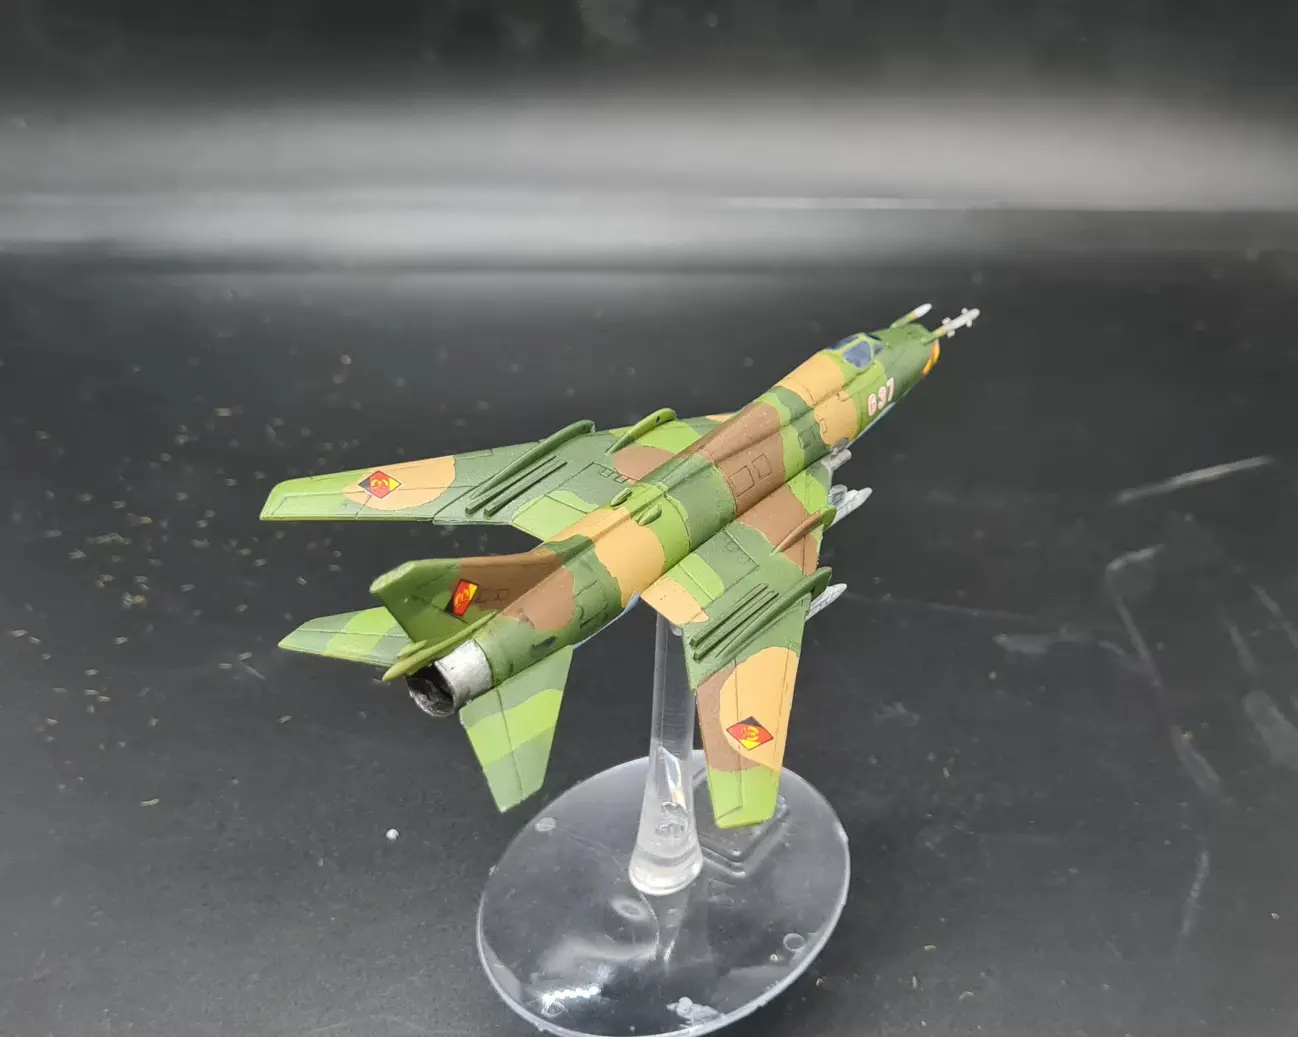
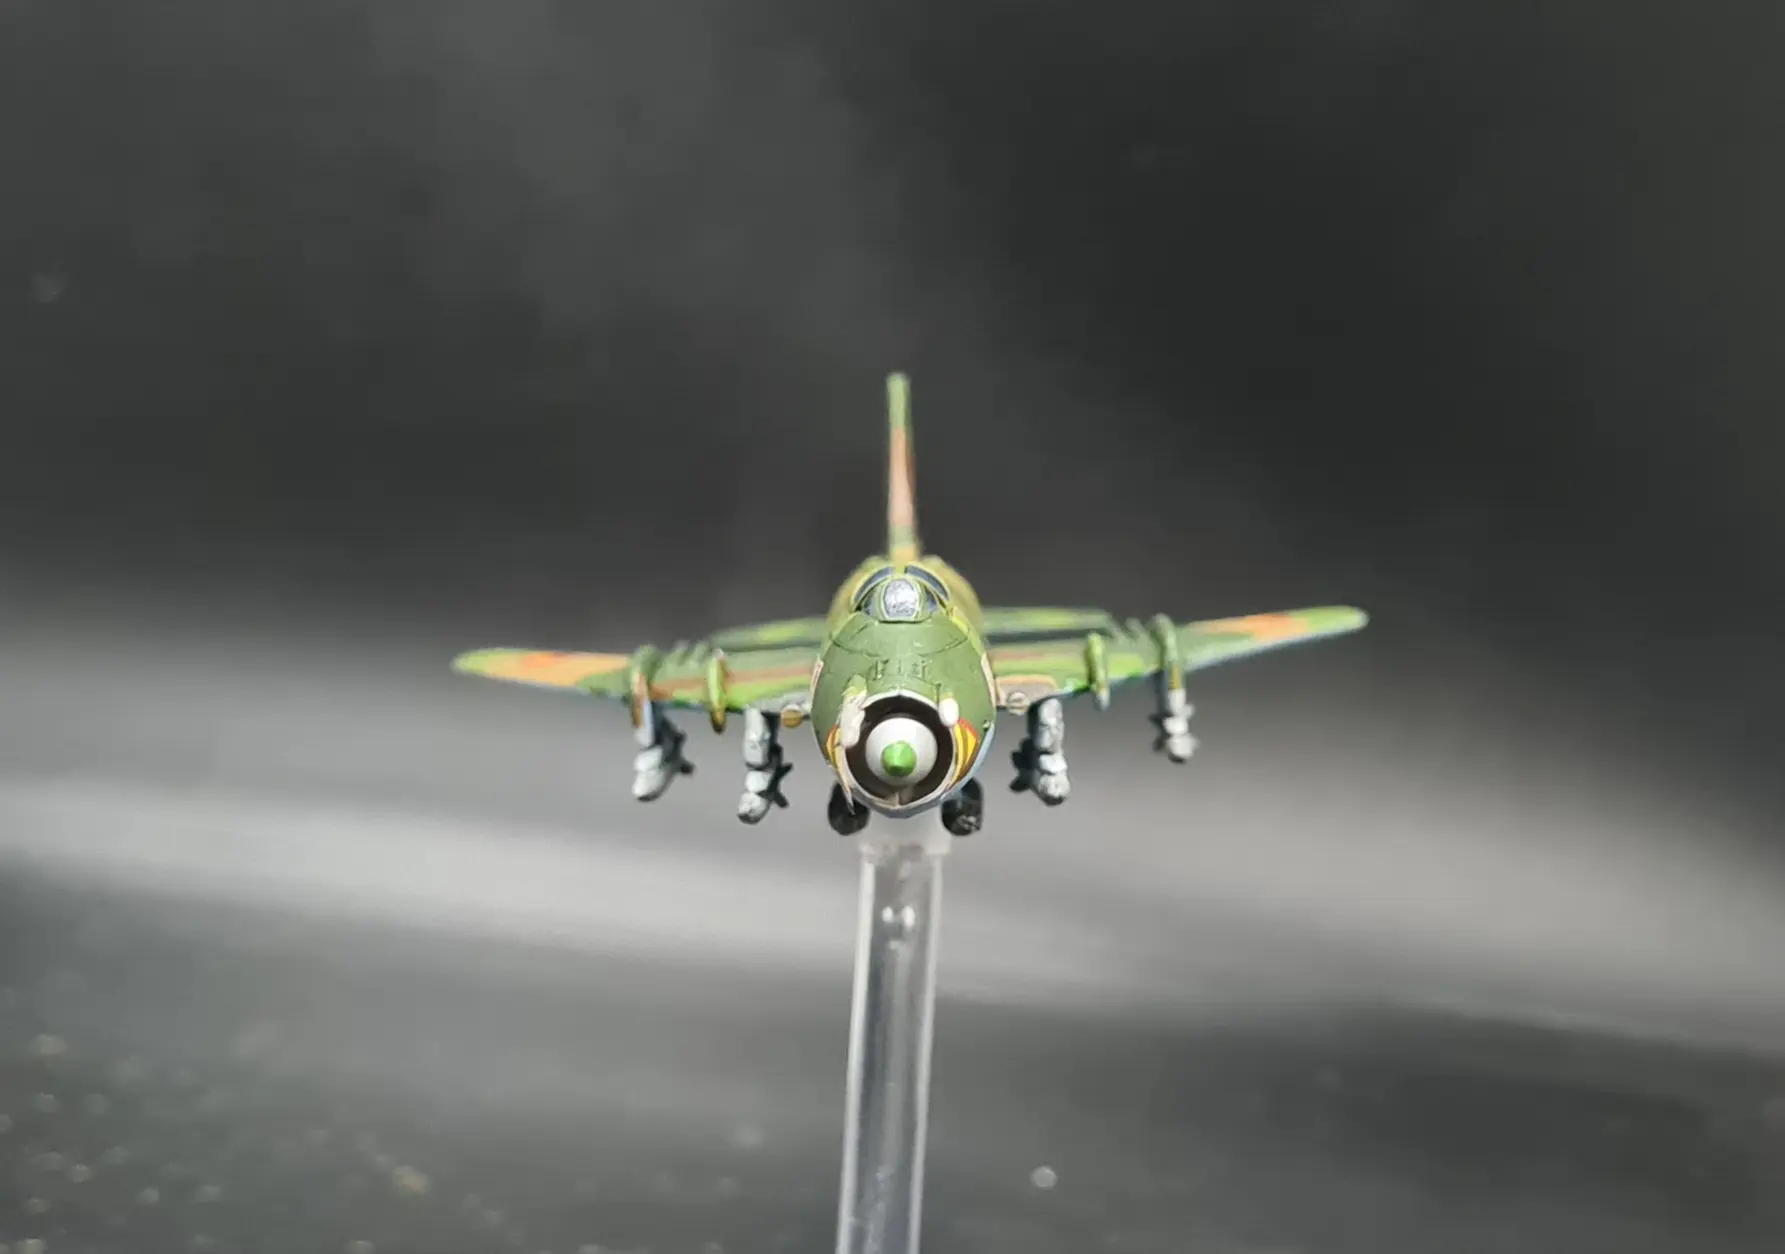
The East German examples have national markings (that look suspiciously like the McDonald’s symbol) on the vertical stabiliser and both wings, top and bottom. The nose has a prominent yellow triangle either side of the intake (presumably a warning symbol like the red chevrons on US Navy intakes. A three digit number in black or red is also prominent under the cockpit.
Assembly
For the most part the assembly of the model was straightforward enough. I encountered two issues:
The hard plastic cockpit, which had a terrible fit, looked wonky and seemed to sit two low. I used some green stuff to try and get it to sit higher and fill the gap but nothing really worked.
The soft plastic main gear doors and integral hardpoint either fit really well or required significant carving to fit. There was no middle ground! The majority fit fine but a couple were somewhat misshaped and needed shaving back to fit.
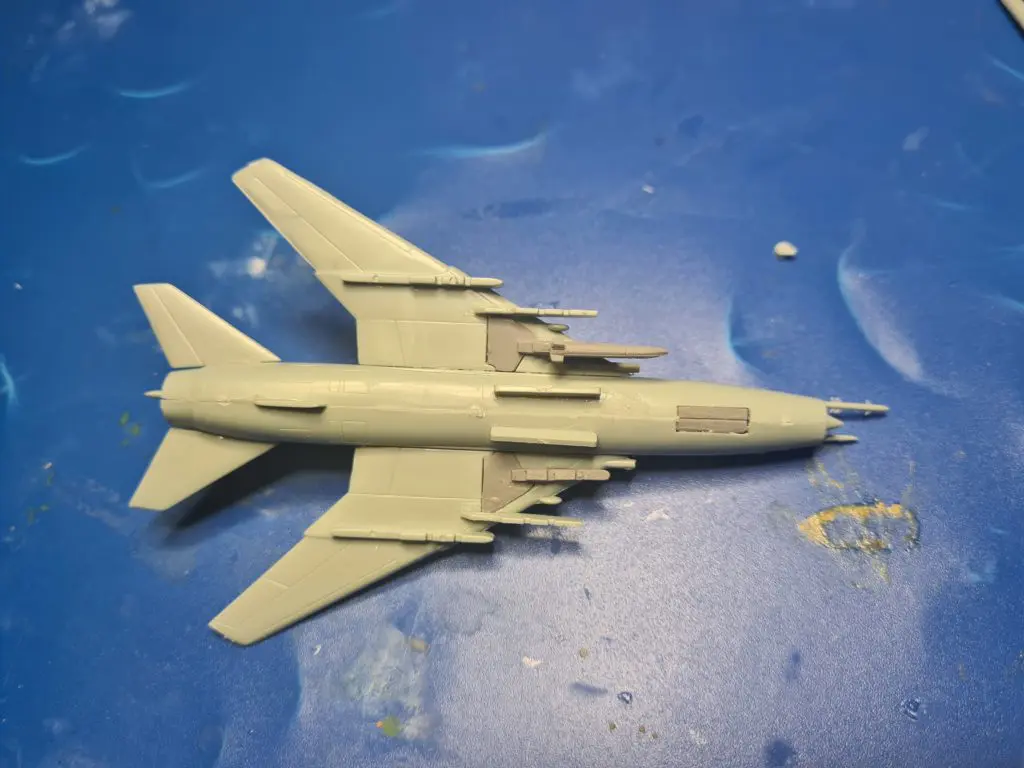
I had some 57mm rocket pods left over from the SU-25 Frogfoot build so I stuck these to the under fuselage positions. The kits come with sufficient 240mm demolition rockets to populate all four wing hardpoints and I elected to paint these separate to the rest of the aircraft.
Finally, I stuck a 4×0.5mm magnet to the underside, just behind the fuselage hardpoints, to mate with a similar one on the flight stands.
Painting
Camoflauge
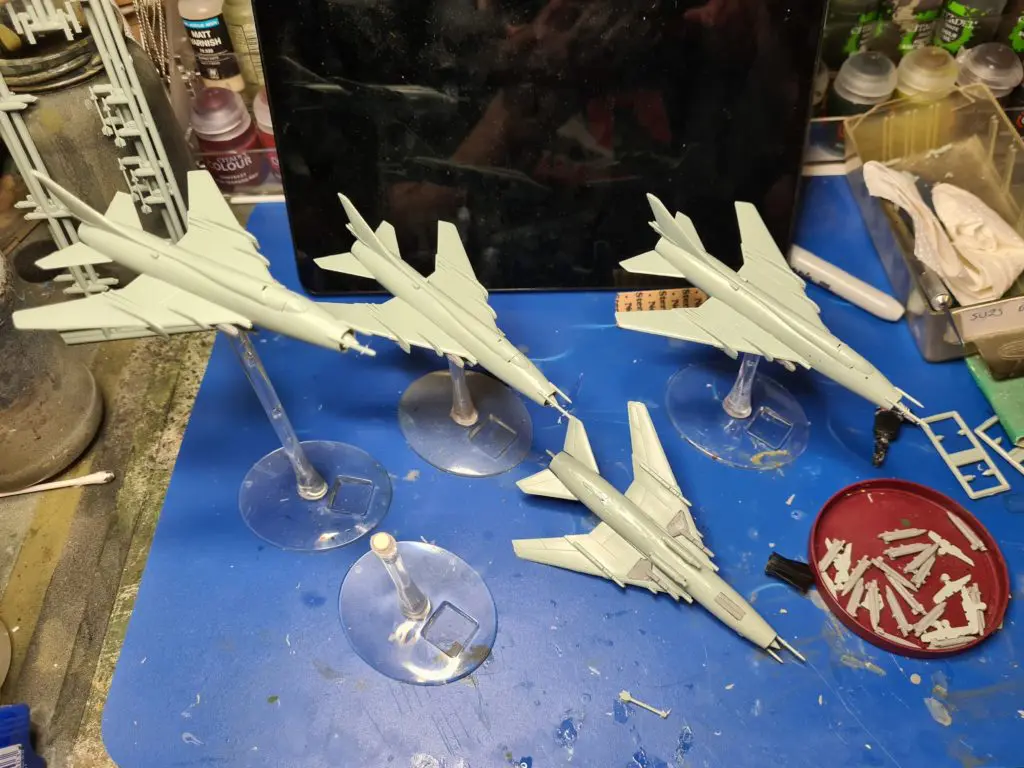
I had recently acquired some crucible clips mounted on rigid steel wire rods and I used these to hold onto the dorsal stabiliser when painting, as well as nails that picked up on the magnets on the hull.
I started by priming the model in Vallejo Surface Primer Green Brown. There isn’t much of the lighter brown colour left by the end but its always best to start with the lighter colour.
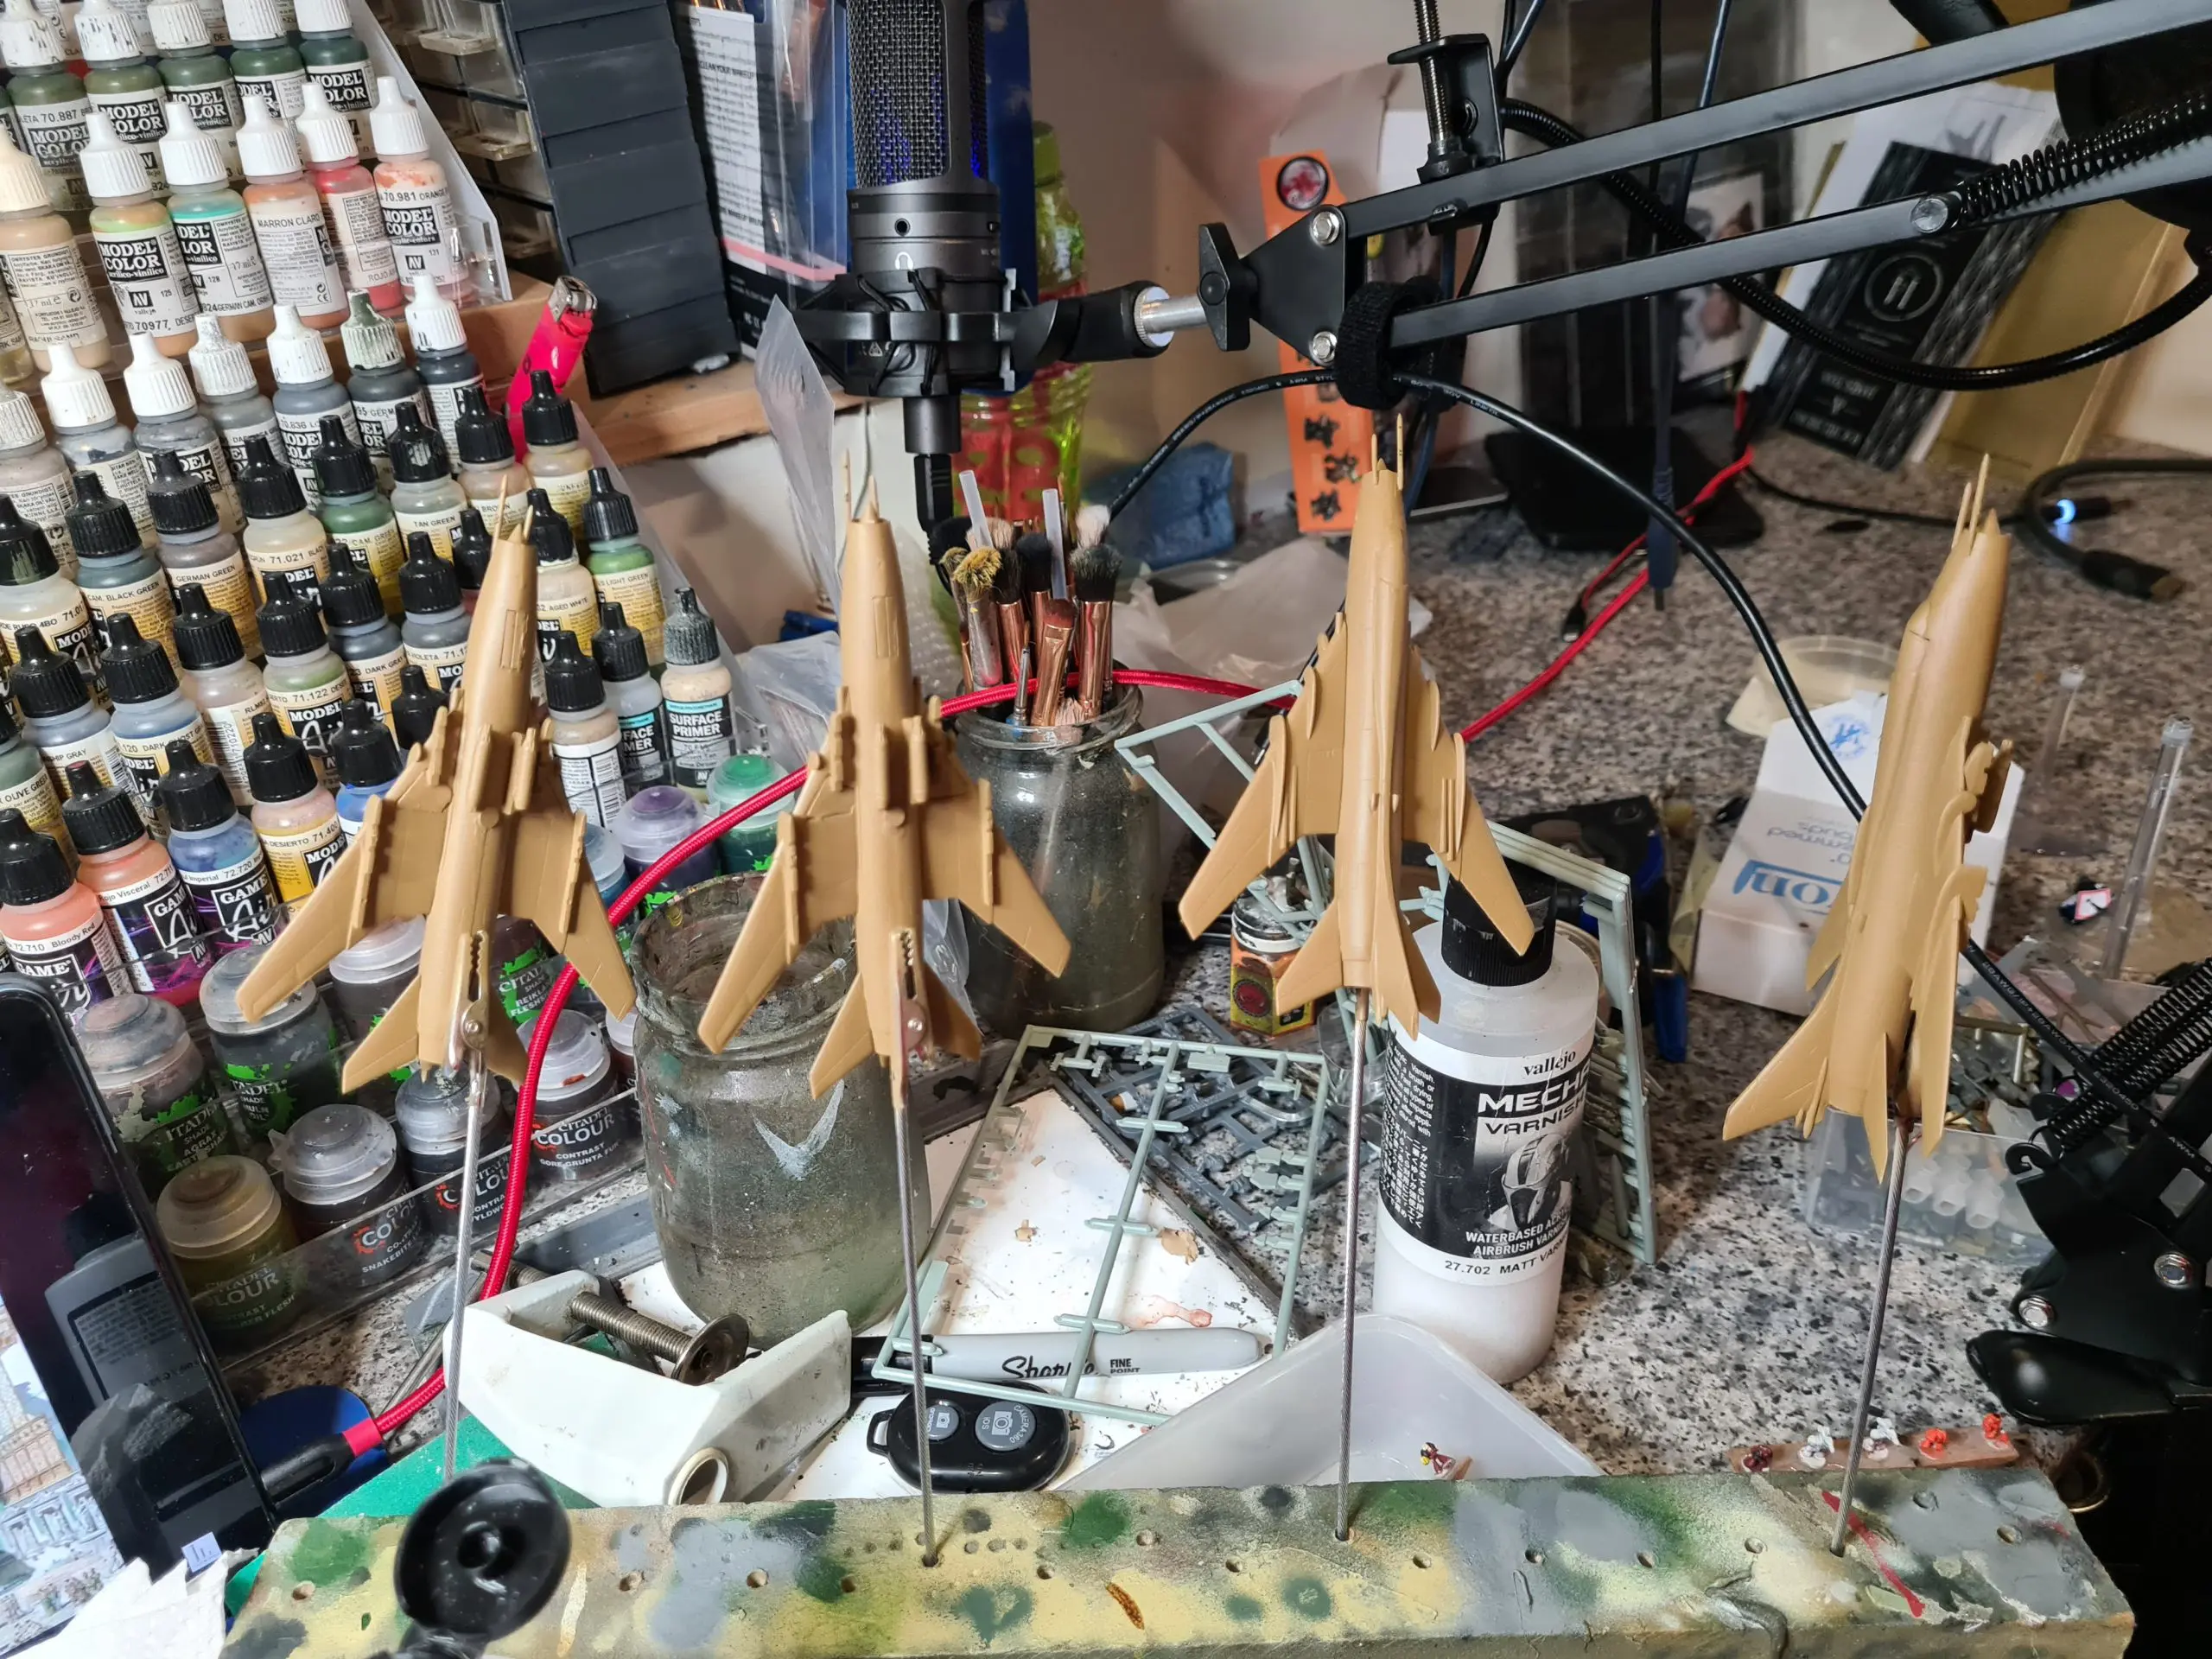
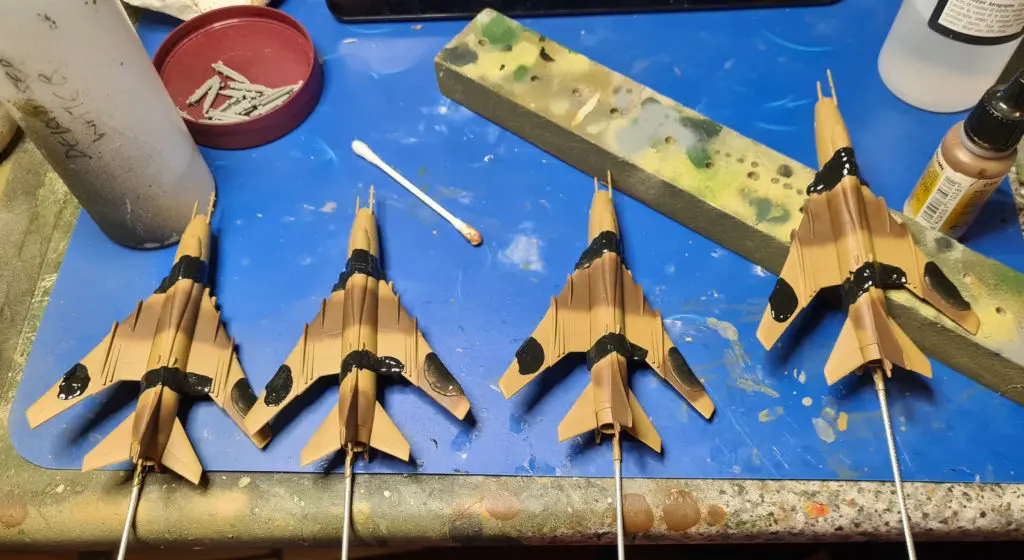
I then broke out the masking putty and masked off the areas I wanted to keep “golden brown”. I did all four at the same time to try and keep the models looking similar.
I next used Vallejo Model Air German Camo Medium Brown and sprayed a larger area than I planned to retain.
More masking putty followed to cover the dark brown areas and then I applied VMA Camo Light Green. This was a little more garish than I was expecting but I anticipated that the colour would darken up by the time the wash and varnish had been applied.
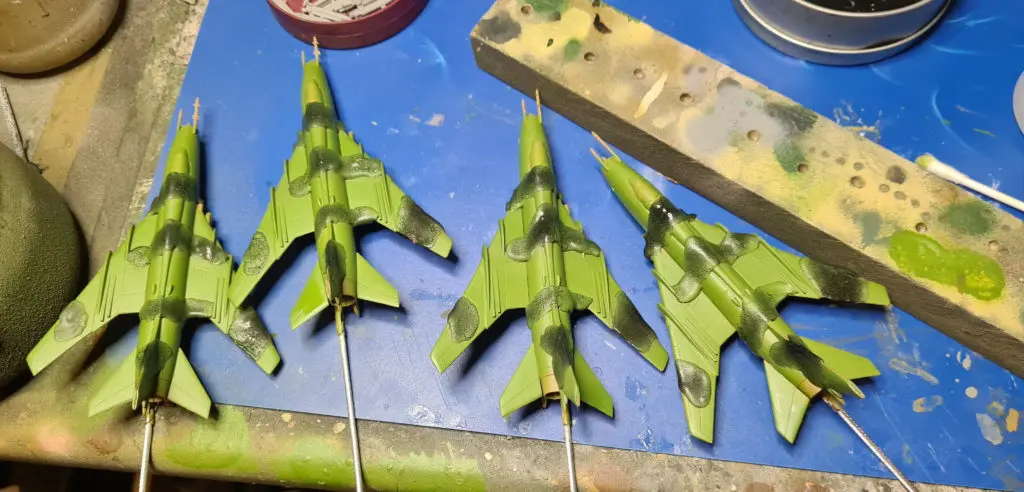
More putty then VMA Camo Green followed, completing the top surface camo.
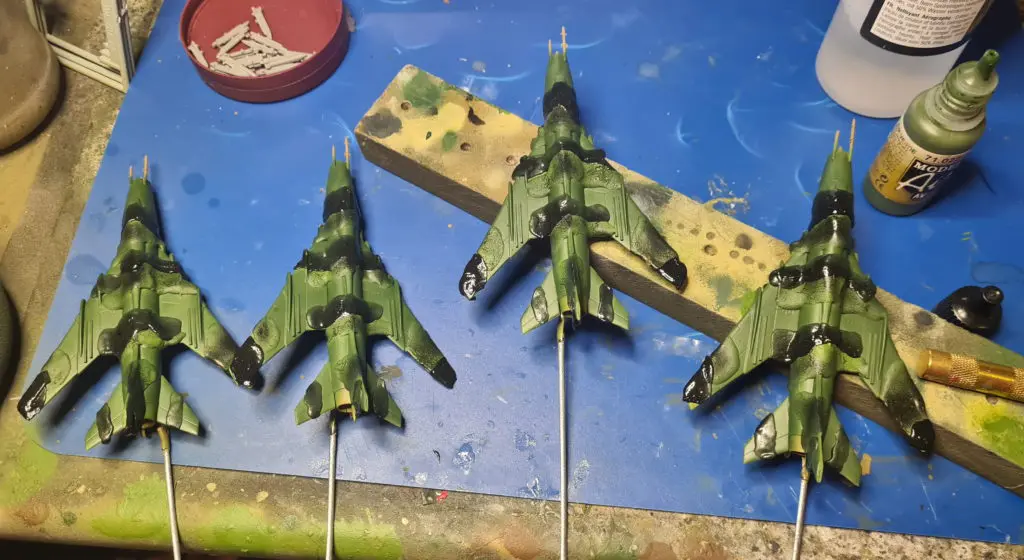
Next we mask off the sides and top surface leading and trailing edges and we apply VMA Underside Blue “Faded”.

Details
With the main blocks of colour applied I applied Vallejo Model Colour (VMC) Sky Grey to the lower halves of the hard points and the nose intake, including the nose cone. I also applied VMC Oily Steel to the gun barrel and the area around it, the top of the inboard hardpoint, rocket pods and the exhaust.
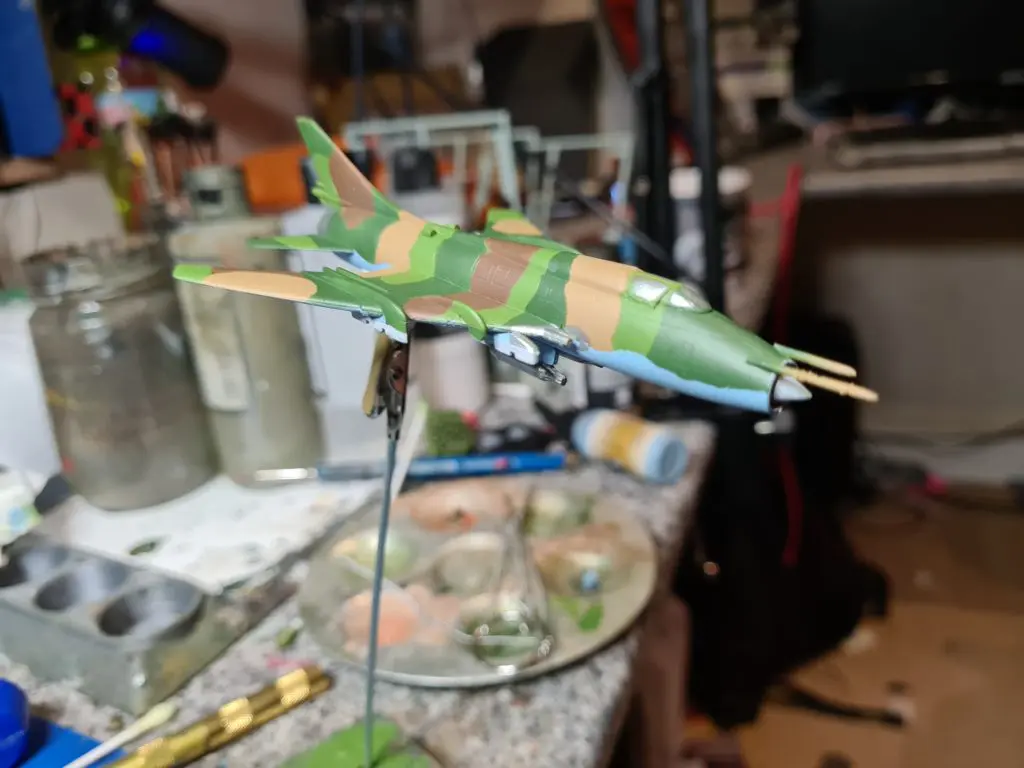
The canopy glazing was picked out in Luftwaffe Uniform and then had Citadel Drakenhof Nightshade, a dark blue wash, applied over it.
Finally I painted the last third of the nose cone VMC German Camo Bright Green.
Switching to the Demolition Rockets, I primed them Vallejo Surface Primer USN Light Ghost Grey, gave them a VMC Sky Grey drybrush then a coat of Citadel Nuln Oil.
Finishing
The planes received a coat of gloss varnish via the airbrush. I then applied the transfers that come in the box to the nose, wings and tails and used Sktrex Red Numbers to add a nose number to each aircraft. The nose warning transfers required some decal softener to follow the contours of the intake.
Once the transfers had dried, I used Citadel Nuln Oil Gloss to pin wash the panel lines and applied the normal Nuln Oil to the Demolition Rockets and metallic areas.
I glued the rockets onto the hardpoints and gave the whole aircraft a coat of Vallejo Mecha Matt varnish to kill the shine.
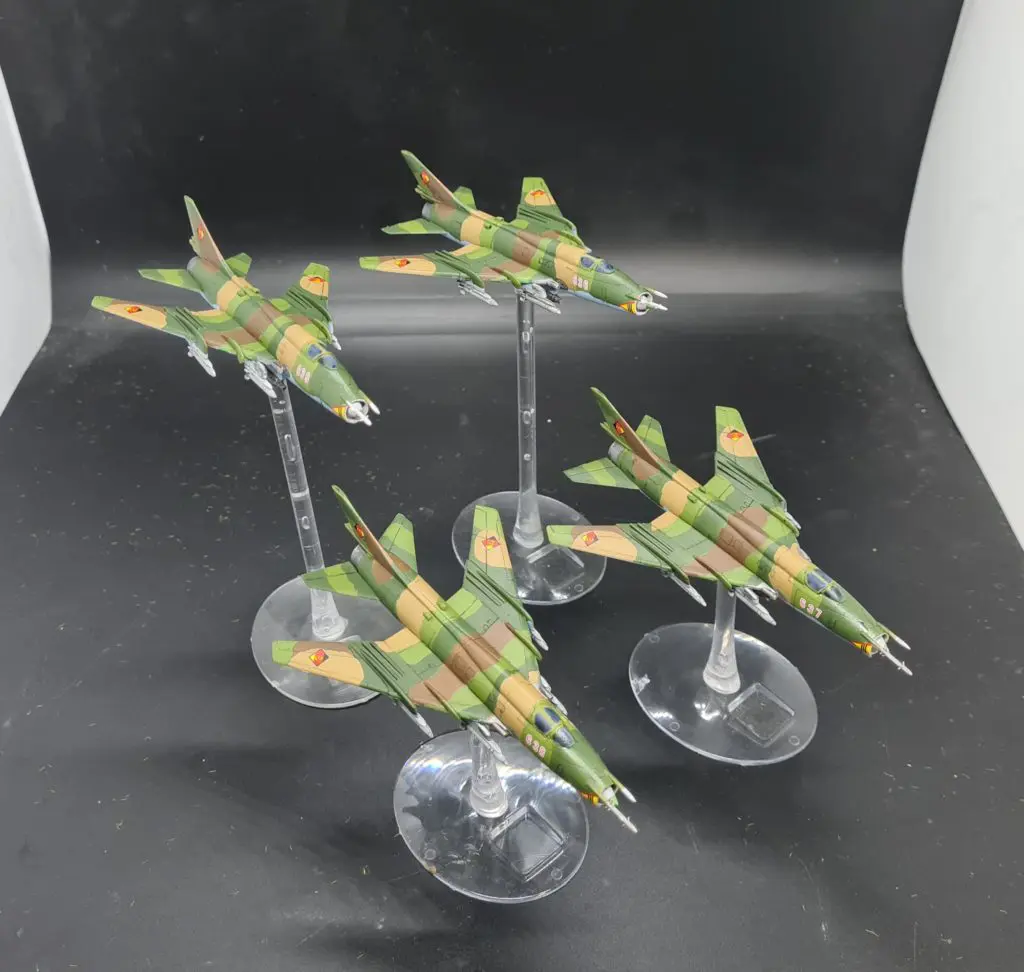
Painted Miniatures
East German SU-22M4 Fitter-K

Conclusion
Whilst this article looks at East German fitters, the other Warsaw Pact nations are much the muchness, with some small variations.
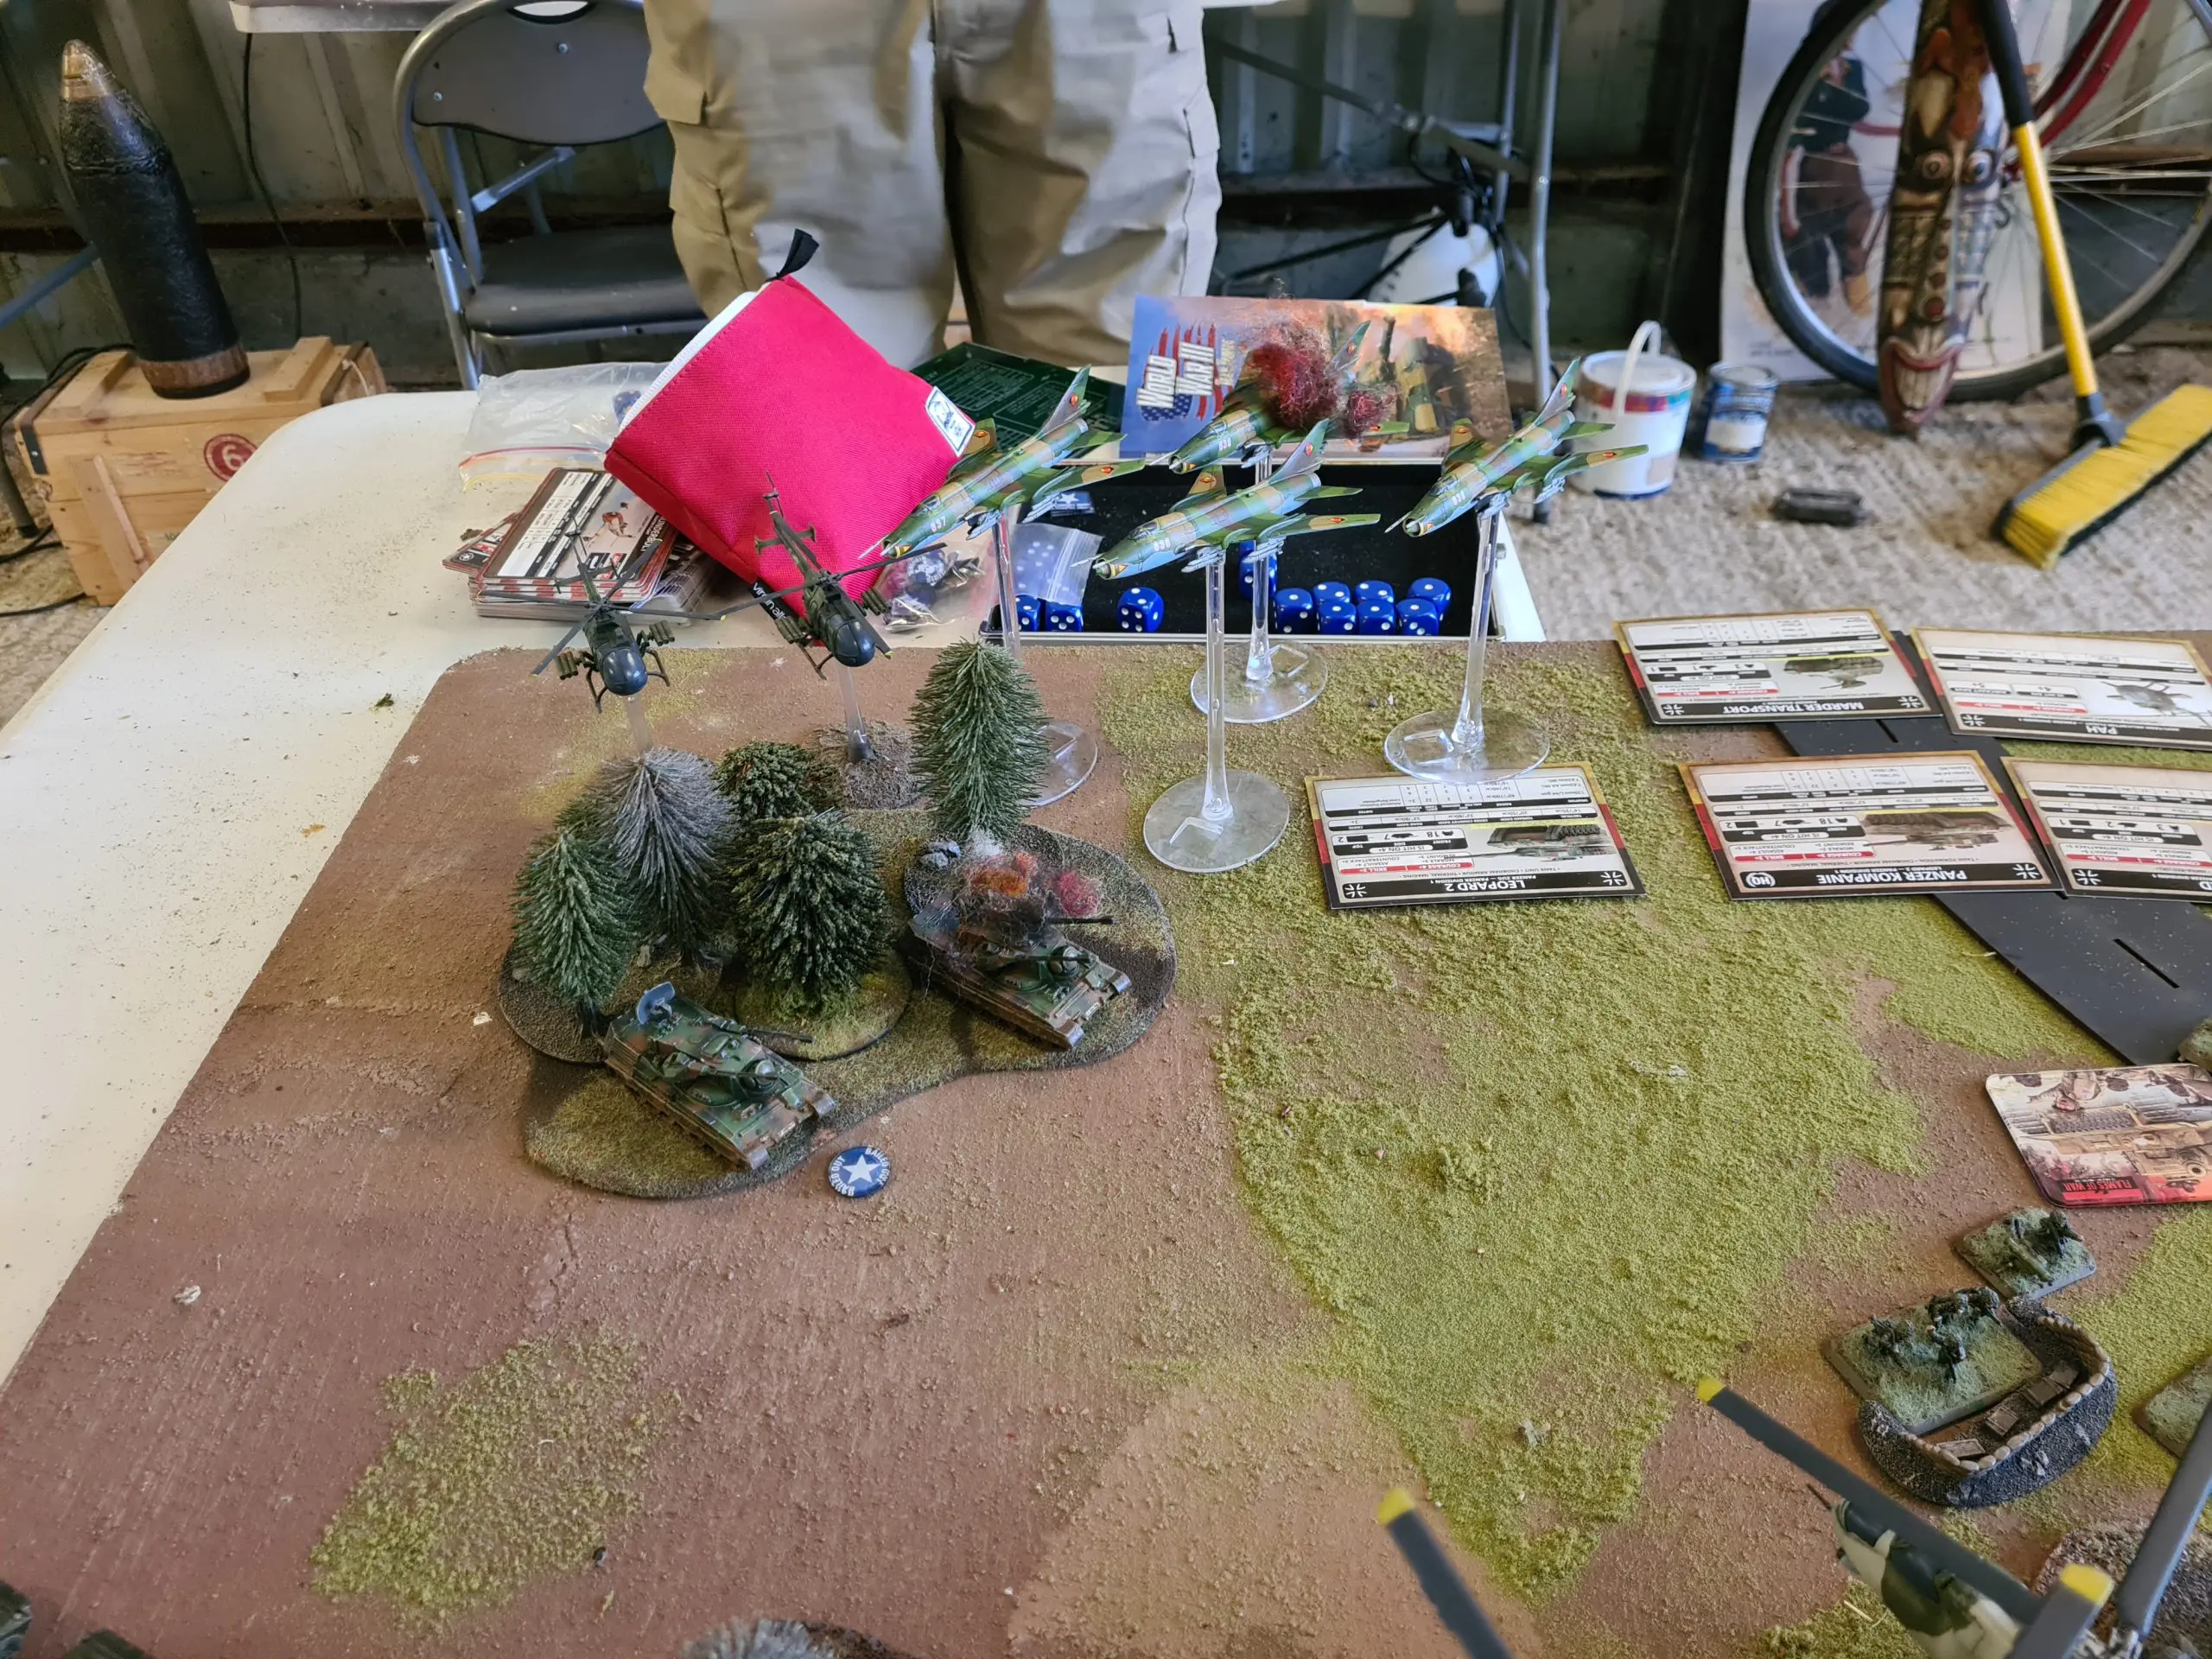
The Fitters made their game debut versus Eddie’s West Germans, suffering one aircraft lost but destroying one Gepard and bailing the other with 30mm fire to clear the way for the Hinds then, later, using the Demolition rockets to kill a couple infantry stands Not a bad start!
Don’t forget, I did a video unboxing of the SU-22 which can be found on our YouTube channel.

1 comment