Contrast and Compare: Romanian Infantry

This is our 1500th article! Woot! – Lee
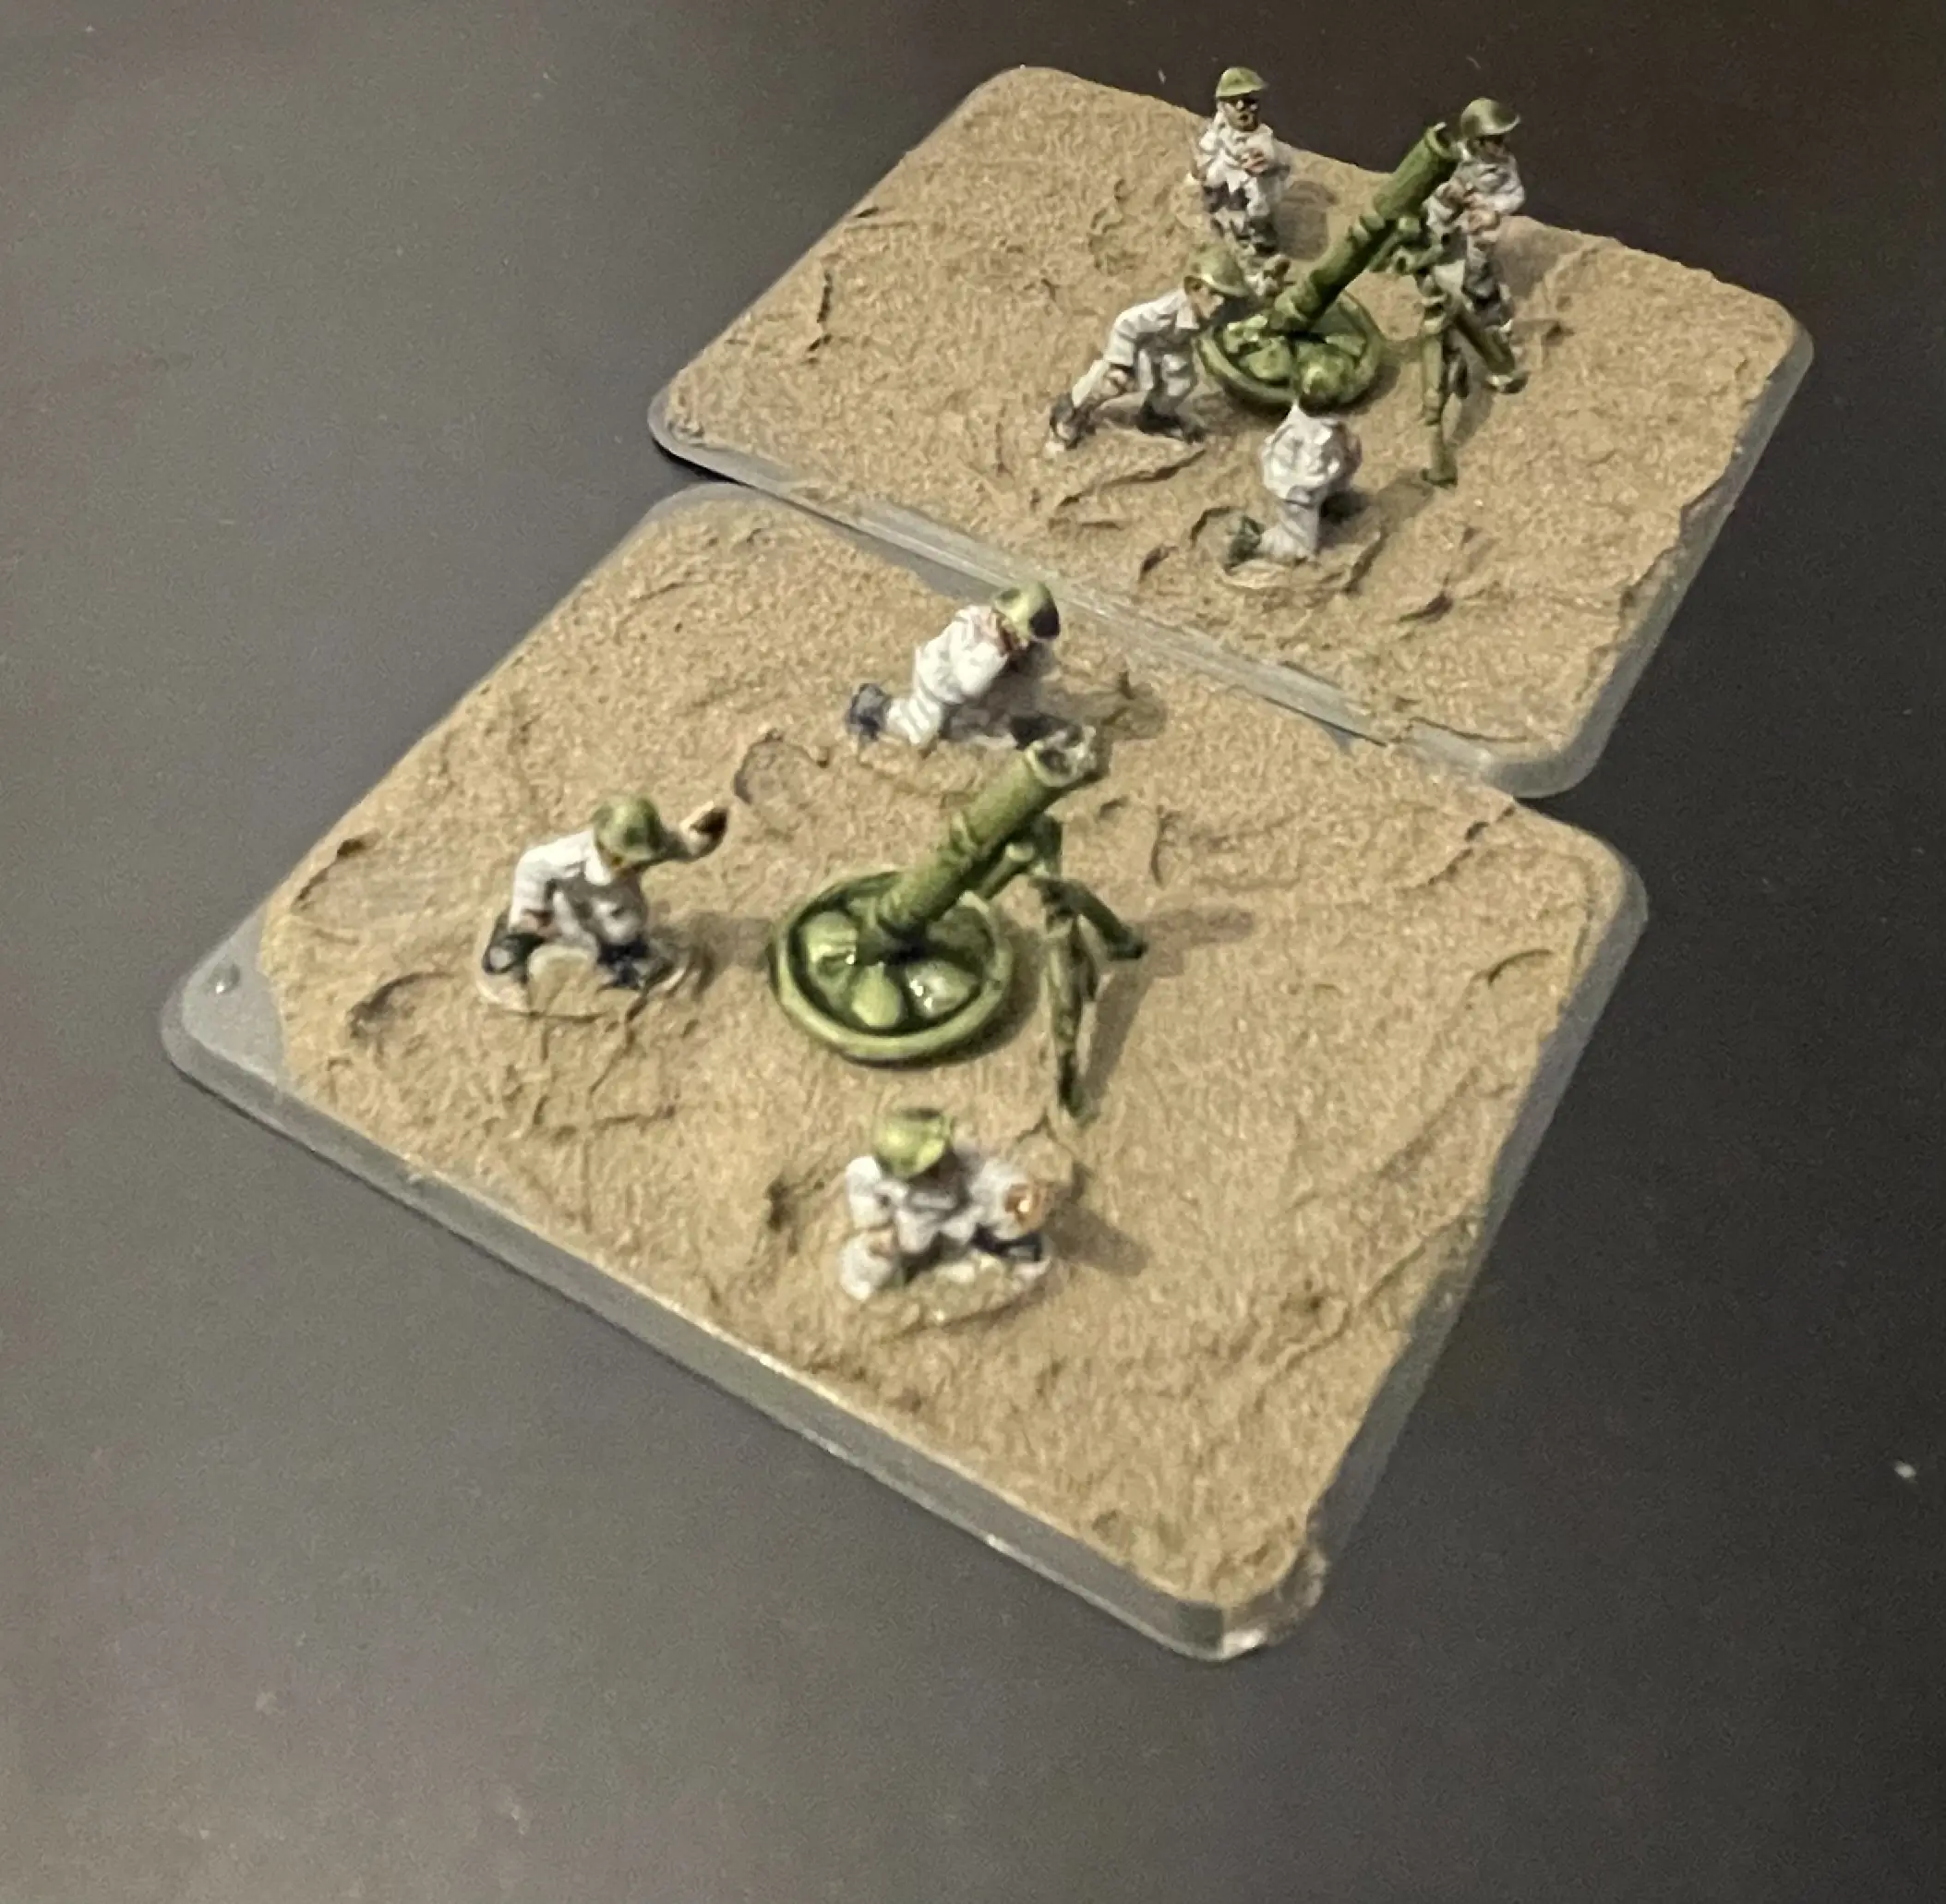
Greetings all, Mark G here with another installment of my continuing adventures with Citadel Contrast paints. Today I am going to explain my technique for painting Romanian Infantry super quickly and as an added bonus, a step by step guide to a muddy snow base (Full credit to Duncan Gosling for this).
Painting the figures
Step 0: Preparation
To start with the figures, including the assembled mortars, were cleaned and stuck to the bases. This was accomplished by applying a thick layer of Vallejo Earth texture all over the base then sticking the figures into it. As the texture dries, it sticks the figures to the base almost as well as glue does.
Next all the figures are primed grey using a cheap matt grey primer from Wilkinsons as it works a treat.
Next up I dry brushing the models white. This really helps the highlights on the contrast shine through and I find is needed at this small 1:100 scale.
Step 1: Helmets and Guns

Step 2: Boots and Faces
the hands and face. Here the white dry brush really helps the contrast bring out the detail.
Step 3: Uniforms

Step 4: Webbing and Haversacks

Step 5: Final Touches

That is it for the infantry! Five easy steps and all super quick.
Now lets make them standout with a great base.
(Its all about) The Base
In Duncan’s article here he showed us how to do a great mud effect on our tanks. He also showed a picture of his Soviet gun teams with snow effect and a muddy area where people were walking. This is how he did it, replicated on my mortars teams:
Step 1: Mud
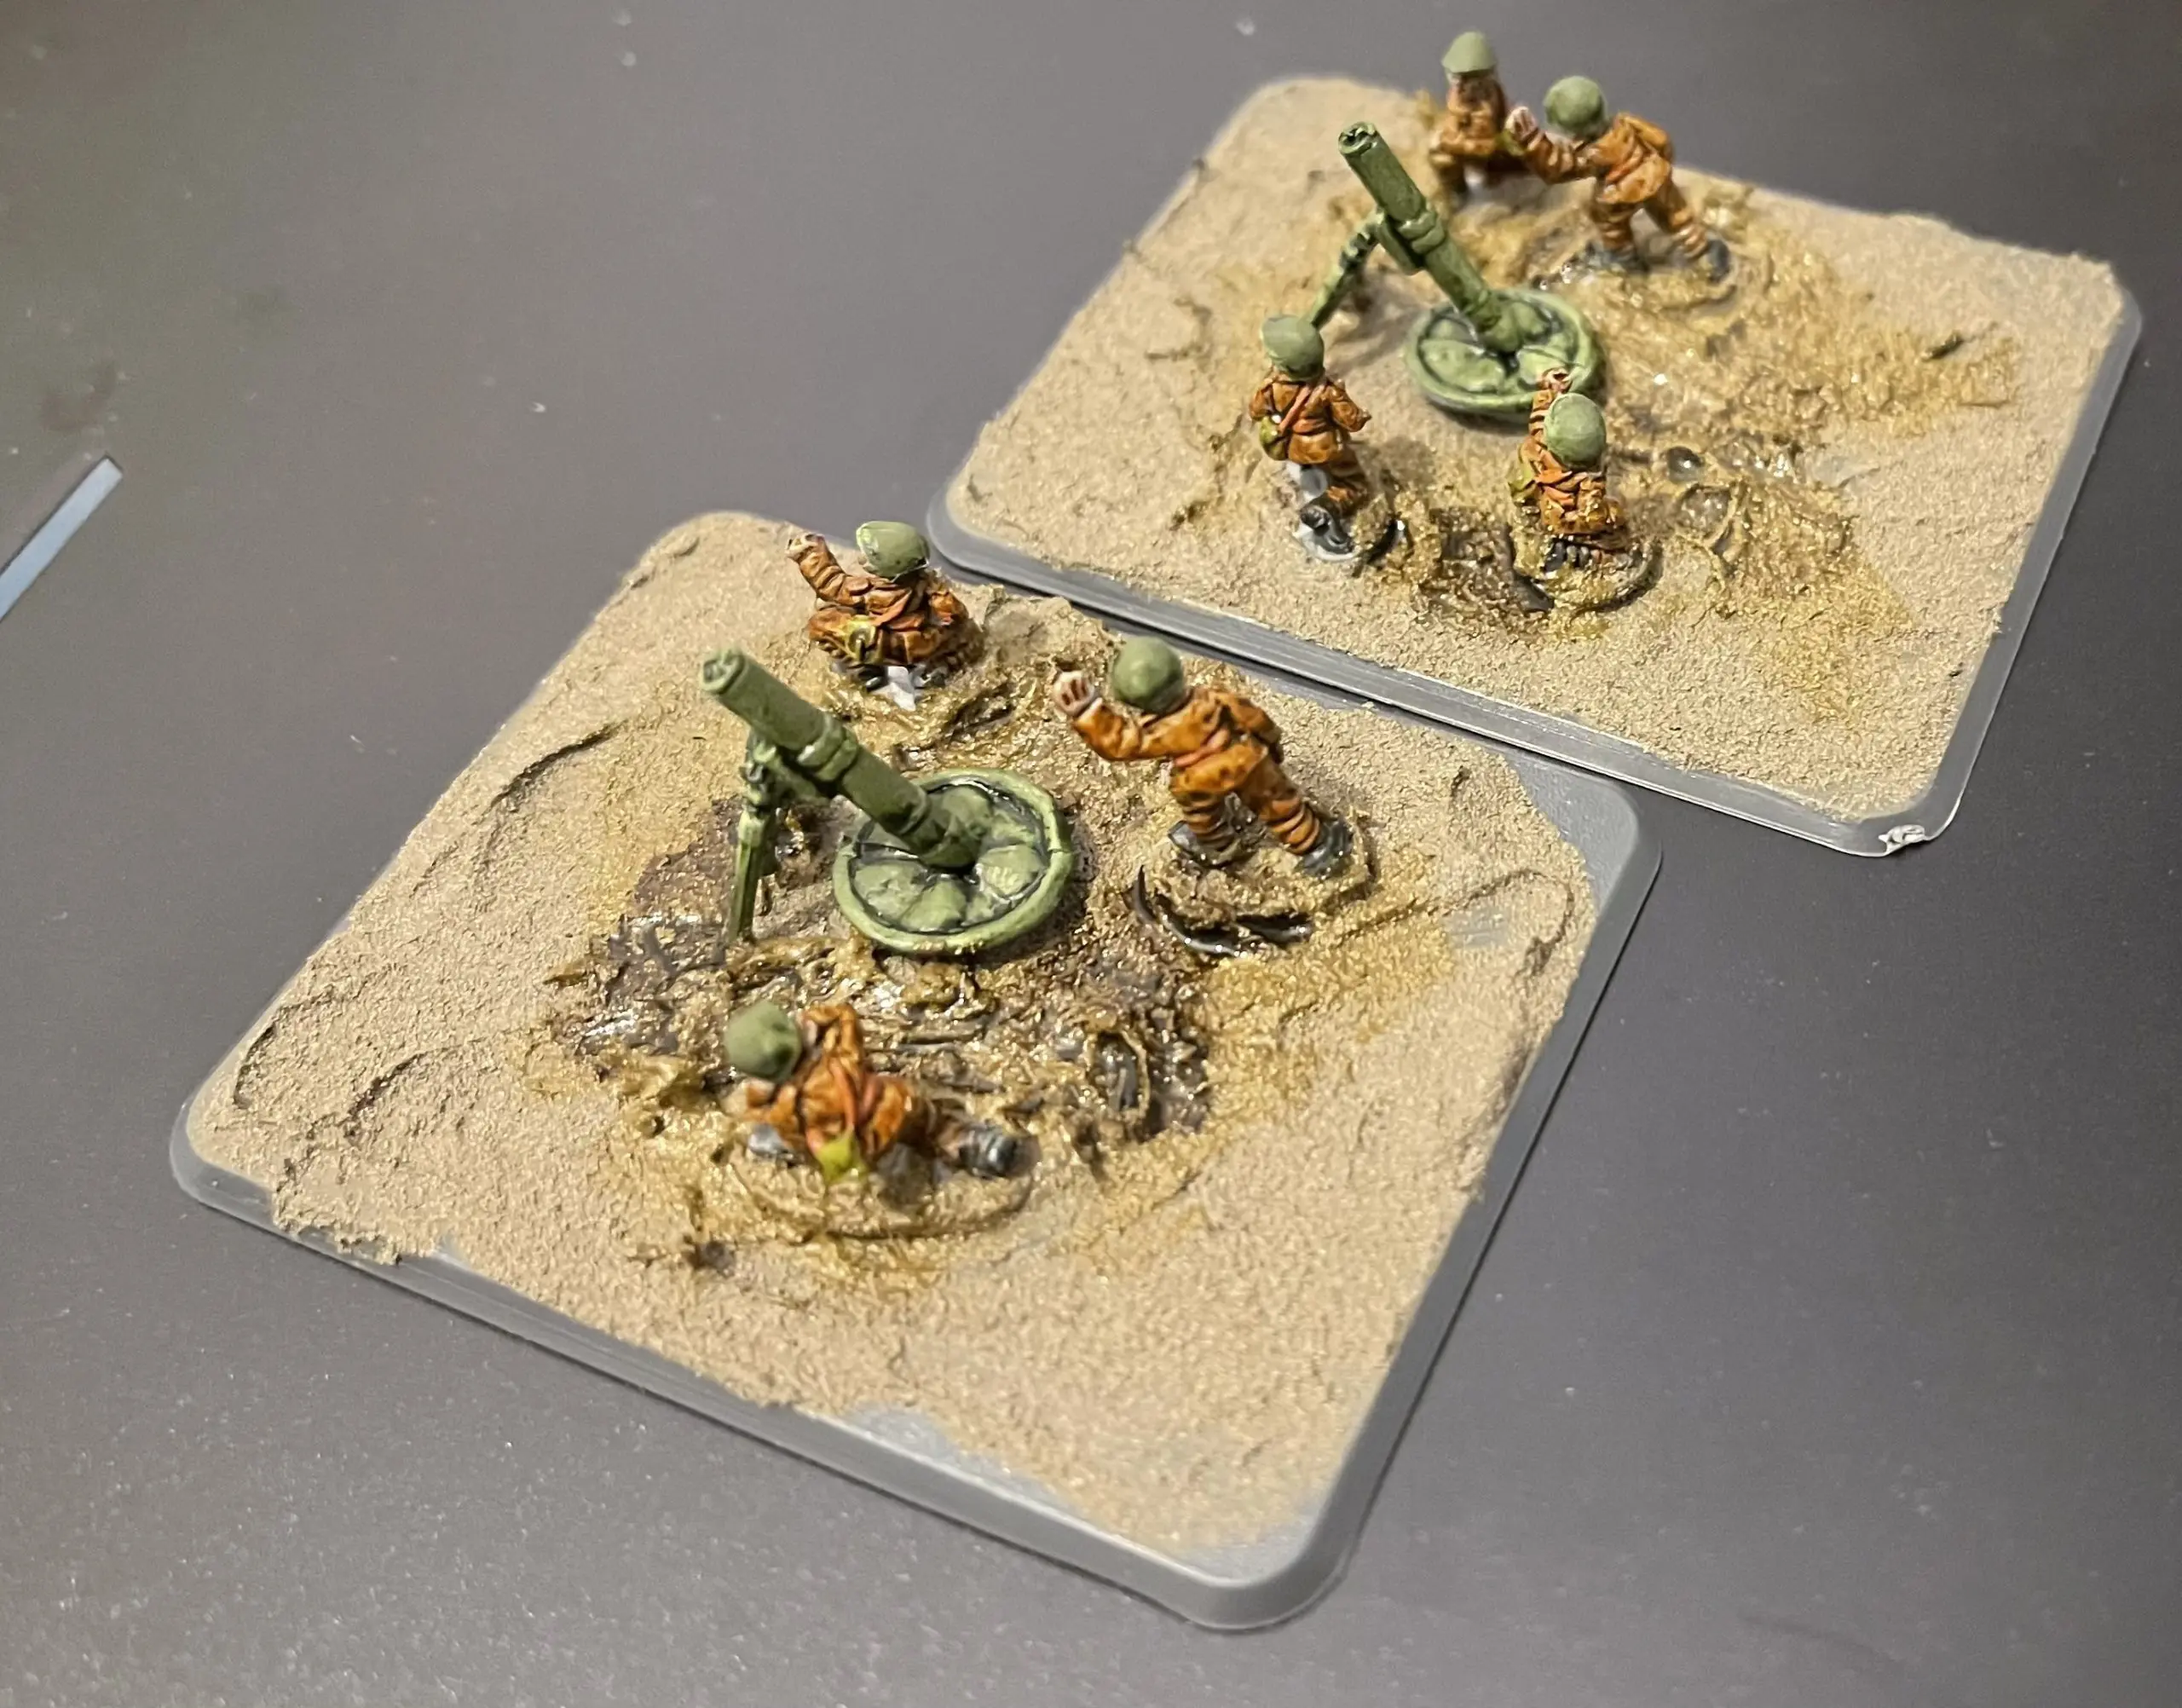
Step 2: Snow

Step 3: Finish Touches
Well there we have it, quick easy Romanians already for the snow to melt and the Spring offensive to begin.

1 comment