Painting Panzers in a pinch
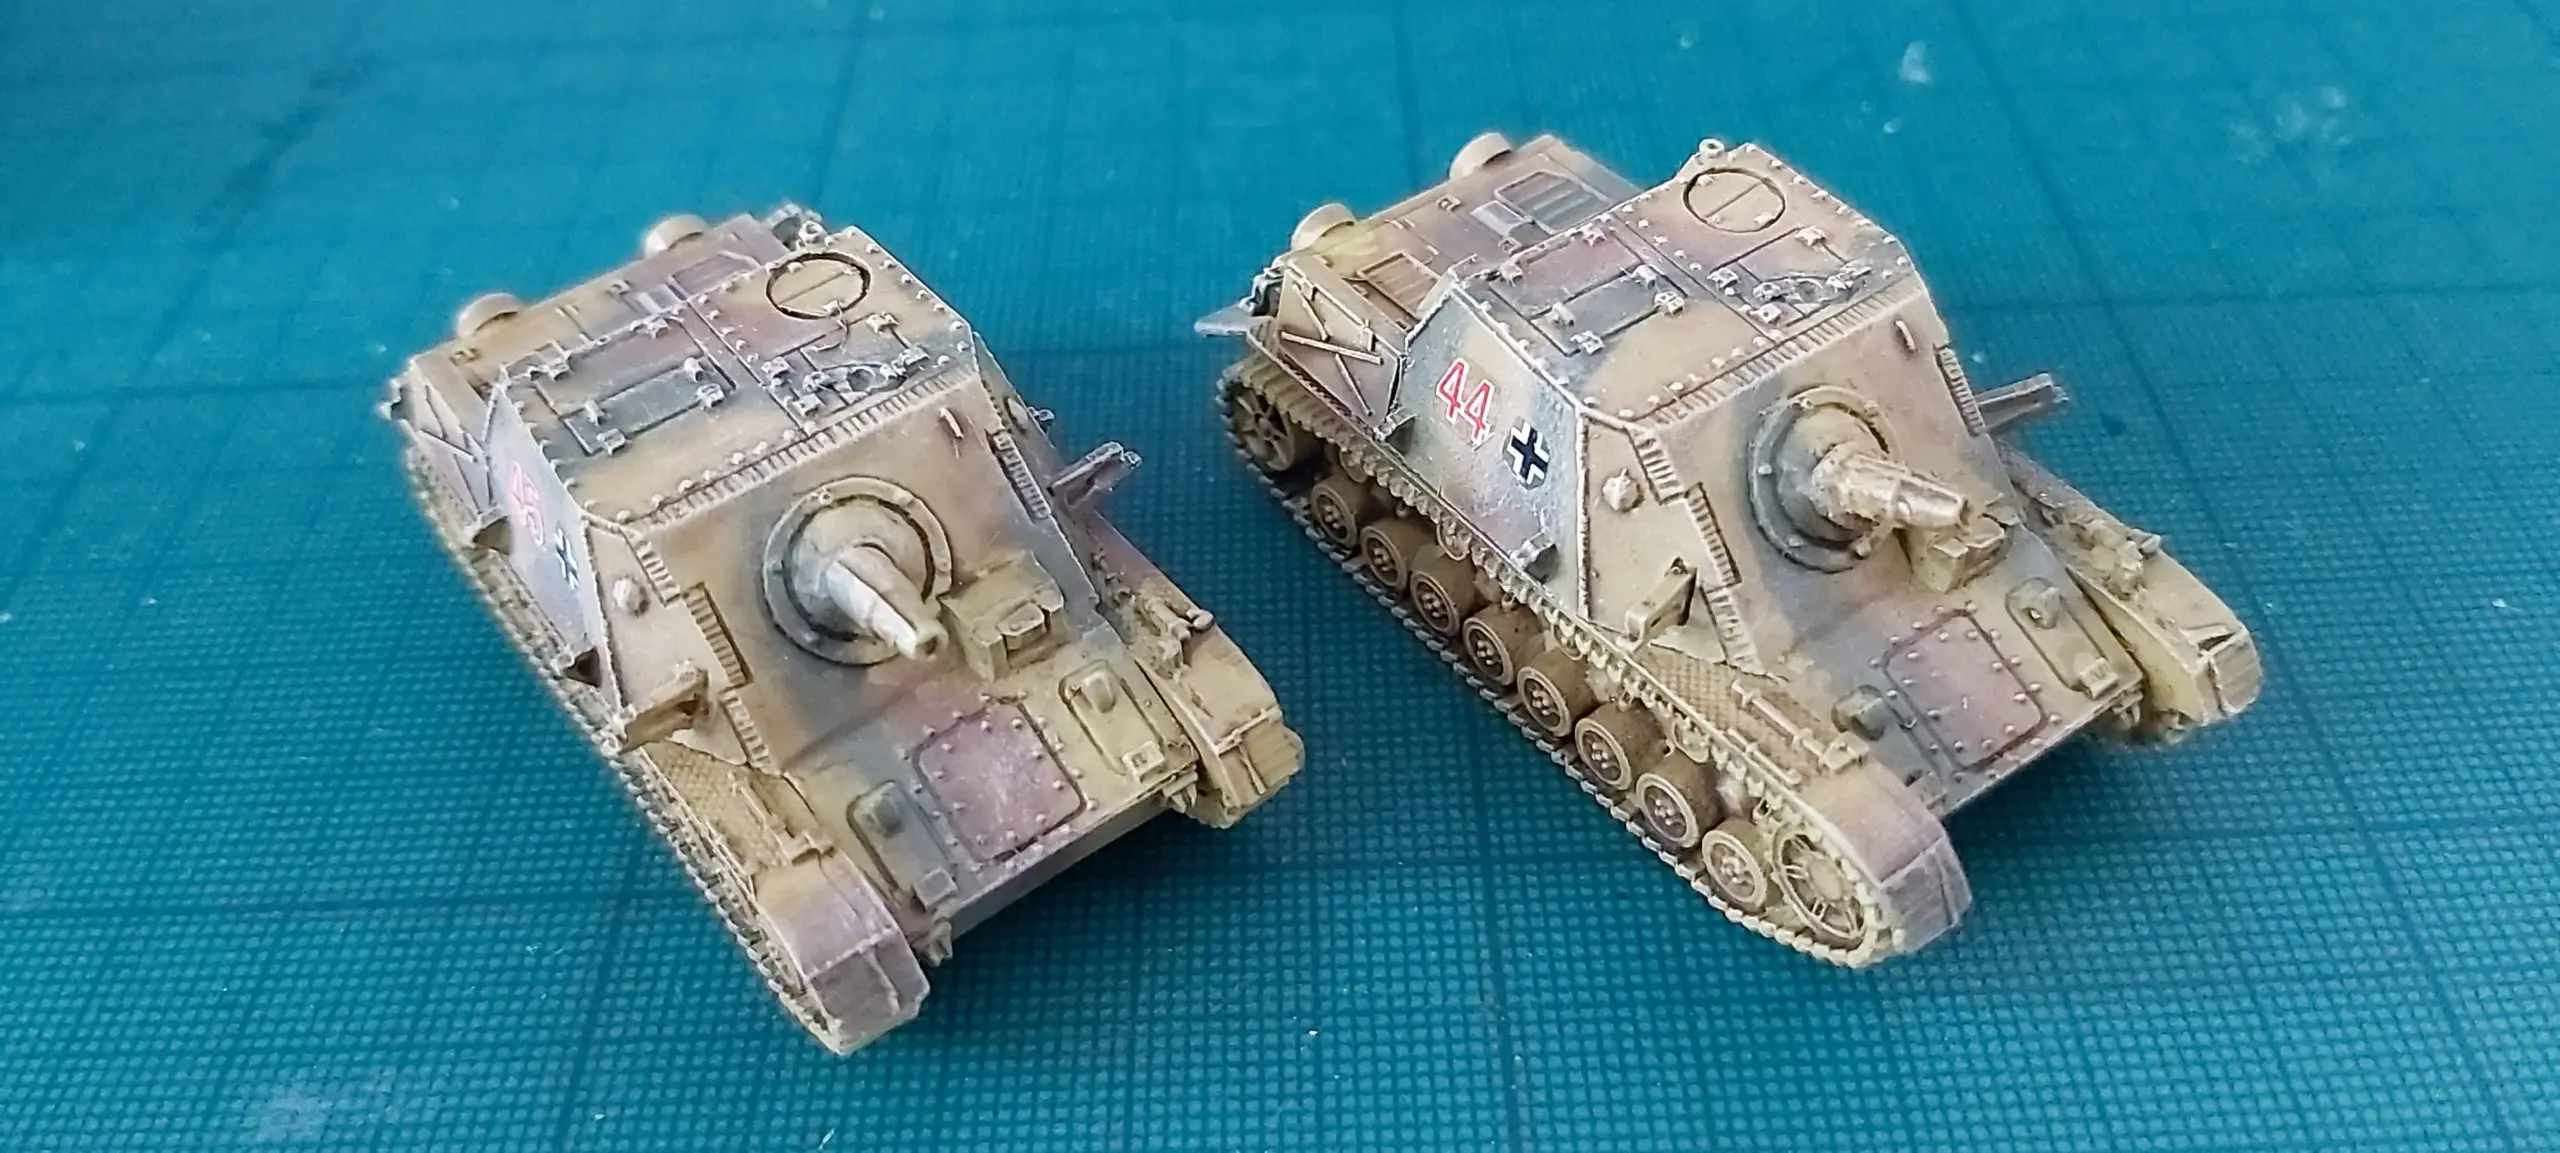
The German D-Day launch, at the time of writing, is in full swing, with Battlefront showing really pretty colourful models, presented in beautiful three-tone, soft-edged camouflage.
You get excited, you rush off and buy some of these models, sit down, start painting, and get put off as towards the end of your painting slog. Your tank begins to look absolutely nothing like the professionally painted models on the website (results may vary depending on your current skill).
So, how do you get a good finish on your models, something to be at least proud of when you see it sitting on the table? Well, worry not, for I believe I have a super quick, and easy way of getting your models painted up in German soft-edge camouflage.
Here’s what you will need;

For this little tutorial, you’ll need the following paints, sprays and brushes in addition to your freshly built model.
- Plastic Soldier Company German Dunkelgelb (Dark Yellow) Spray
- Citadel Agrax Earthshade Ink
- Vallejo 890 (Reflective Green)
- Vallejo 826 (German Camo Medium Brown)
- Vallejo 819 (Iraqi Sand) [n.b. or 847 Dark Sand]
- Citadel Dry Brush Large, Medium, and Small
- Additional paint for super quick and easy German tracks: Citadel Contrast Gore-grunta Fur

Preparing the model
Basecoat sprays are a fantastic invention, and save a ton of time.
I have basecoat sprays for the majority of my forces, including a brown to quickly and easily do basing.
Give your entire model a few thin coats of colour, starting with the side you won’t see often, be it back or underside.
Once the spray has dried, give the model (The schurzen in this case), a light inking of Agrax Earthshade, making sure it pools properly into the recesses. Some modellers spray their model with gloss varnish to ensure the ink doesn’t pool on larger flatter parts.

Scrub on the Camouflage
Now, most tutorials will at this point recommend going back over the raised areas of the model with the base colour again to bring it up, but by cutting this step out, you save a bit of time, and the end result is (in my own opinion) good enough.
Take one of your drybrushes, and beginning with the green in this instance, brush most of it off, but leave it at the stage where you’re still leaving a coloured streak if you brush it on a scrap of toilet paper. Then, I brush it heavily to form the camouflage on the tank, as the brush gets less paint on it, push it out to the edges of the camouflage, and it should leave slightly paler colours, giving a slightly ‘soft edged’ look. It’s not perfect, but the motto of this tutorial is ‘Good Enough’.
Note if doing schürzen; be sure to match up the camo from the tank onto the schürzen to ensure a nice uniform appearance. The schürzen below will match the Brummbär in the first image when done.

Soften everything up
Once you’re happy with the end result, take the larger drybrush and grab some Iraqui Sand Paint (That spelling spelling still irks me) and using proper light drybrushing technique, go over the entire model until you get highlighting on the raised areas. I would recommend doing this after any decals have been applied, as this will lessen the shine from the film and tie them into the model more.

Quick and easy tracks
As an additional little tip; Citadel’s Contrast Range has been getting a bit of an exciting following, and I have been utilising various paints from the range such as the Black Templar for road wheels and tyres.
Recently though, I found that Gore-Grunta Fur does German Red-Oxide treated tracks really well.
The other advantage to using this paint for this purpose is that it goes on like an ink, so doesn’t need much effort to work it into the details on the track, and controls well when going round the wheels against the track. The end result speaks for itself;


1 comment